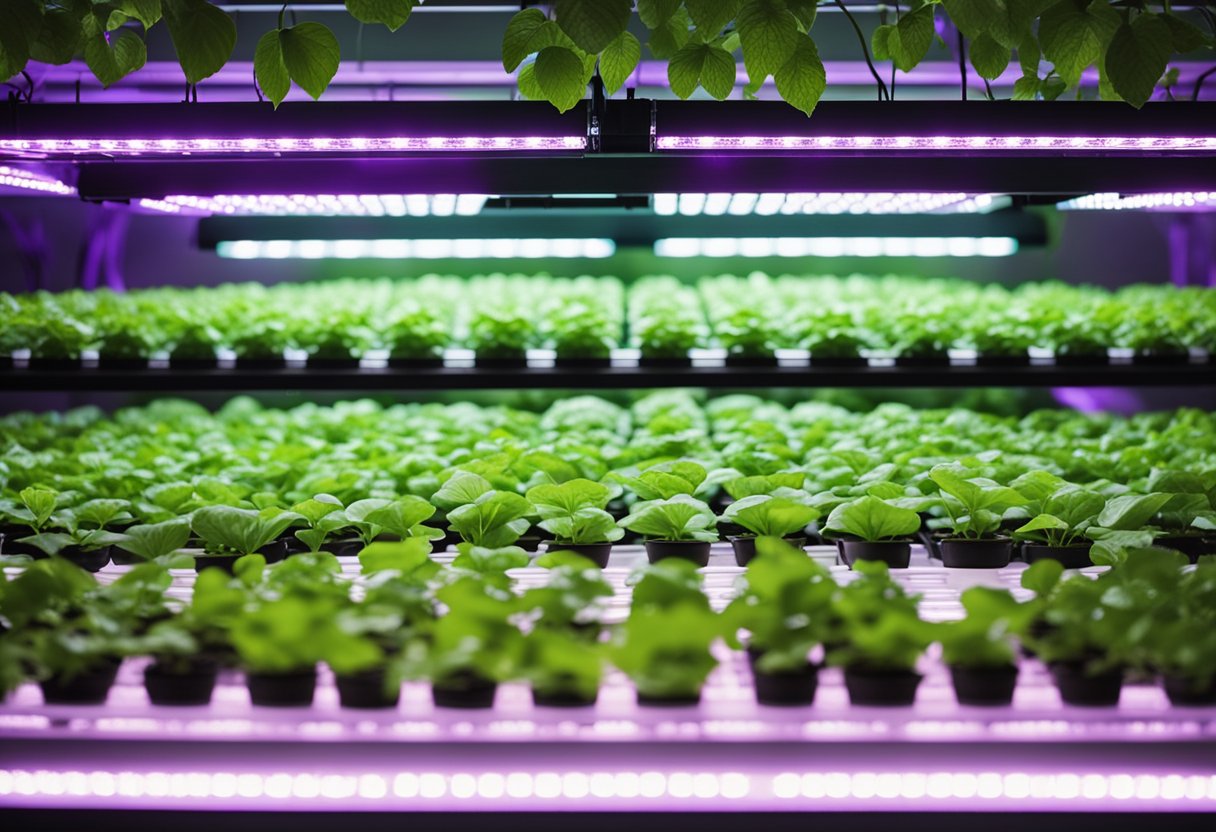
FREE Delivery Over £99*

Discreet Packaging

Best Price Guaranteed

Pay In Instalments

Safe & Secure Checkout

Chat to an Expert

FREE Delivery Over £99*

  • FREE Delivery Over £99*

  • Discreet Packaging

  • Best Price Guaranteed

  • Pay In Instalments

  • Safe & Secure Checkout

  • Chat to an Expert

Plant Lighting

Plant Lighting

How Much Light For Hydroponics

how-much-light-for-hydroponics

How Much Light for Hydroponics?

When it comes to mastering hydroponic gardening, understanding the impact of lighting on our indoor garden is critical. Ever considered exactly how much light your hydroponic plants need to thrive? Just as humans need a balanced diet to stay healthy, our plants require the right amount of light to grow and produce. Indoor cultivation, where we control the very elements that our plants would traditionally seek from nature – lighting is perhaps the most important of these controlled conditions.

how-much-light-for-hydroponics-1

You're about to learn what hydroponic lighting is, delve into its crucial role in plant growth, and discover how to optimise your lighting system for different types of plants. With our collective experience in gardening, we've pieced together tips, tricks, and essential knowledge that will shed light (pun intended!) on creating the ideal environment for your hydroponic system.

Key Takeaways

  • Proper hydroponic lighting is essential for successful indoor plant growth.
  • The lighting system should be tailored to the specific needs of different plant types.
  • A well-designed lighting setup can significantly enhance your hydroponic garden's yield and health.

What Is Hydroponic Lighting?

how-much-light-for-hydroponics-2

Hydroponic lighting is an ingenious method that allows us to create an artificial substitute for sunlight, which is essential for plant photosynthesis and growth. Why is it so important, you ask? Well, without it, our indoor greens wouldn't stand a chance of sprouting.

Types of Hydroponic Lighting Systems:

  • LED Grow Lights: Highly energy-efficient and long-lasting, LEDs are the new kids on the block. They emit less heat and can be calibrated for different light spectrums.
  • Fluorescent Lights: These are budget-friendly, produce minimal heat, and work great for herbs and lettuce but may not be suitable for larger plants.
  • Metal Halide (MH) & High-Pressure Sodium (HPS) Lights: The old guard of hydroponics, these pack a punch in intensity, perfect for hungry bloomers. Be mindful, they can skyrocket your electricity bill!
  • Ceramic Metal Halide (CDM) or Ceramic Discharge Metal Halide (CMH) Lights: Think of these as the improved cousins of MH and HPS, with better efficiency and a fuller light spectrum.

We're spoiled for choice, aren't we? But what suits best? If it's energy efficiency you're after, LEDs might light up your life. On a shoestring budget? Fluorescents might be your pal. For those heavyweight champion plants? Consider HPS or MH. And for those who want a bit of everything, CDMs/CMHs are the way to go.

In the end, it's all about wavelength and intensity. Our leafy friends love a particular light spectrum for photosynthesis, and the intensity dictates how well they'll flourish. Don't forget, it's a delicate dance of light and dark—the duration of lighting should generally be 14-16 hours, mimicking the natural day cycle.

Understanding Light Cycles

how-much-light-for-hydroponics-3

We must understand that light cycles—patterns of light and darkness—are critical for hydroponic plant growth. They influence not only growth speed but also the overall health and yield of our plants.

Vegetative and Flowering Stage Lighting

Vegetative Stage: During the vegetative stage, our plants need long periods of light to grow leaves and stems—think of this light as their food. A common light cycle for vegging plants is 18 hours of light and 6 hours of darkness (18/6). This mimics the long days of summer and encourages lush, healthy growth.

Blue light spectrum is particularly beneficial during the vegetative stage as it promotes tight internodal spacing—that's the bit between branches—leading to bushier plants. For this stage, we're looking at a high-intensity glow, kind of like the plant's very own indoor sunshine.

Flowering Stage: When our plants hit the flowering stage, they like a bit more rest with 12 hours of light and 12 hours of darkness (12/12). This echoes the shorter days of autumn, triggering them to bloom. If the plants are kept in constant light, or the dark periods are too short, they might not flower properly, and we wouldn't want that, would we?

Red light spectrum now becomes the star of the show, encouraging those lovely blooms. The light intensity may be lowered a tad, creating a sunset effect, which is ideal for flower development.

Manipulating and controlling the light cycle is simple with technology like timers and dimmers. With timers, we can set our lights to switch on and off at the same times each day, while dimmers let us adjust the intensity without startling our leafy friends.

Transitioning from one stage to the next? Planning is key. You've got to tweak your setup slowly. This can be done by gradually adjusting timers and checking on plant health regularly. Remember, it's like nurturing a baby—you wouldn't rush that, would you?

By strategically managing the vegetative and flowering stage lighting, we give our hydroponic plants the best chance to thrive. Keep an eye on them, make adjustments as needed, and you'll have a verdant oasis before you know it!

Sunlight Versus Artificial Lighting

Let's chat about sunlight and artificial lighting and perhaps which is better or worse, what are the pros and cons or either. After all, we want the best for our leafy friends!

Natural sunlight is the real deal, providing a full spectrum of light that contains all the colours of the rainbow, necessary for plant growth. It's what plants have evolved to use, and it's packed with what's known as photosynthetically active radiation (PAR), which is crucial for the photosynthesis process.

Now here's a twist: we can actually replicate natural light indoors! Artificial lighting systems, like LED and fluorescent lights, come to the rescue. An LED setup can be tailored to emit specific light spectra—think red or blue, or a mix of both, which can encourage certain growth stages in plants.

Here's a quick comparison:

Natural Sunlight Artificial Lighting
Full spectrum of visible light Can be customised for various light spectrums
Free and abundant (weather permitting) Costs for purchase and electricity
Comes with UV rays (can be pros and cons) Generally lack UV rays unless designed to include them

But hold on, it's not just about blue and red light. Plants need a rest too, so we've got to balance light and darkness—typically around 14 to 16 hours of light, followed by 10 to 12 hours of darkness for many species.

Remember, whether we opt for sunbathing our plants or giving them a dose of LED goodness, the goal is happy, healthy hydroponic greenery. 

Optimising for Different Plant Types

how-much-light-for-hydroponics

Ever been in that embarrassing situation where your lettuce is as pale as a ghost while your neighbour's is vibrant green? It's all about getting the lighting right, folks. Plants are a bit like us; they have their own preferences. The secret sauce? The ability to provide sufficient light.

Light Needs by Plant Type

  • Lettuce & Leafy Greens: These chaps love light, but not too intense. Around 100-200 lux should do it. They favour a blue spectrum to thrive in their vegetative stage.
  • Tomatoes & Peppers: A bit more demanding, these plants need stronger light, think 400-600 lux. They enjoy a balanced spectrum with both blue and red, catering to both leafy growth and fruiting.
  • Herbs: A mixed bag here, but generally, they're quite happy with moderate light intensity similar to lettuce.

Spectrum, Intensity, and Duration

Spectrum: Get this — plants use specific light spectrums to grow. Blue light, around 400-500 nm, encourages vegetative growth, perfect for those leafy greens. Red light, in the neighbourhood of 600-700 nm, helps flowering and fruiting plants like our friend the tomato.

Intensity: This is measured in lux, and more isn't always better. If you're raising delicate herbs, you don't want to blast them with light fit for a tomato plant, right?

Duration: Some plants prefer long daylight hours; others are more laid-back. Our leafy greens typically enjoy a long day, while fruiting plants need appropriate periods of darkness to trigger their natural processes.

Lighting Setups

Ah, the tech stuff. Full-spectrum LEDs are splendid; they mimic natural sunlight and cater to all plant types. But why not get fancy and mix things up? Combine warm lights with cool ones, match your plants’ needs, and voilà, you'll be the talk of the town... or at least your plants will.

Tips and tricks:

  • Position your bulbs about 30-60 cm above the plants — just right so they don't get sunburned.
  • Adjust the light intensity according to plant type. Start low and increase as needed.
  • Timing is key. Use a timer to simulate natural day-night cycles.

That’s our quick guide to lighting in the hydroponic world. Match the light to the plant, and you’re golden.

Components of a Lighting System

When setting up a hydroponic system, we must get the lighting requirements right, as it's a key driver of plant growth. We'll cover the important components that'll need to slot together like pieces of a puzzle to create the ideal environment for our hydroponic garden.

Bulbs and LEDs

Bulbs are at the heart of any lighting system. There are several types, like High-Intensity Discharge (HID) bulbs which include Metal Halide (MH) for vegging plants and High-Pressure Sodium (HPS) for blooming. Then there are the popular Light light-emitting diodes (LEDs), known for their energy efficiency and long lifespan. Here are the specifics:

  • E27, E40, GU10, and E14 lamps
  • LEDs with a wide range of wavelengths and colour temperatures

Spectrum and Intensity

The spectrum of light influences plant growth, flowering, and fruiting, while light intensity can affect overall plant health. This means we should provide a full spectrum for most stages of growth and tailor the intensity to our plants' needs. Check these out:

  • Opt for LEDs between 3000-4000K colour temperature.
  • Aim for a balance since too much intensity can harm plants just as less can weaken them.

Efficiency and Heat Management

We can't just crank up the lights and forget about them; we've got to manage heat and cooling to avoid cooking our plants and wasting money. Reflectors, such as Euro or Adjust-A-Wings, and ballasts, which come in magnetic, digital, and electronic forms, help regulate power and distribute light evenly. Keep in mind:

  • Match your lamp's wattage with the ballast for efficiency.
  • Use air-cooled reflectors to manage heat, keeping your setup cool.

Remember, to adjust the height and distance of the lights from the plants – it's not just about plugging in and switching on. A bit of tweaking goes a long way!

Designing Your Hydroponic Lighting System

So, you've decided to hop onto the hydroponic gardening wagon — brilliant choice! Let's get you sorted with a lighting system that's spot-on for your plants. Navigating the world of hydroponics can be tricky, but fear not; we're in this together.

First off, grow light coverage is crucial. Think about your grow space — every square foot is precious, right? To keep your plants basking in artificial sunshine, target about 2000-4000 lumens per square foot. That's the sweet spot for bright, happy plants.

Now, onto watts. If you’re scratching your head over how many are needed, here’s a cheeky tip: It's not just about quantity; it's about quality too. Too many watts and you might just dry out your crops! Strike a balance, and as a baseline, look for energy-efficient options like LED or HID lights. They're not only better for your bills, but they're kinder to the environment as well.

Positioning is next. You don't want to scorch your greens, so place the lights about 12-24 inches above your plants for the best distance. Not too close, not too far, just right — just like Goldilocks, eh?

What about timing? We're all about that consistent light cycle. Aim for 14-16 hours per day for veggie stages, and about 10-12 hours of light per day for flowering.

Here’s a quick rundown for easy reference:

  • Coverage: 2000-4000 lumens/sq ft
  • Light Distance: 12-24 inches above plants
  • Lighting Period:
    • Vegetative stage: 14-16 hours/day
    • Flowering stage: 10-12 hours/day

And here's a bright idea — use a timer! It'll automate your light cycles, making your life easier and keeping your leafy friends on schedule.

By factoring in these key aspects, we create a lighting system for our hydroponic setup that's efficient, cost-effective, and just perfect for our plant pals. Now, let's shine some light on those hydroponic dreams of ours!

Technical Insights and Best Practices

how-much-light-for-hydroponics-5

Let's get technical, shall we? When it comes to hydroponics, the light source can make or break our plant's potential. But where do we begin in this when it comes to hydroponic grow lights?

First off, lumens are a big deal—they measure the light's brightness visible to our human eyes, but plants see things differently. They feast on a buffet of light in the range of 400–700 nanometers (nm) for photosynthesis, often called Photosynthetically Active Radiation (PAR). So, we should be eyeing lights that serve up the proper spectral feast for our leafy pals.

Different types of grow lights serve unique purposes:

  • High-intensity discharge (HID) lights, which include Metal Halide (MH) and High-Pressure Sodium (HPS), are like the big kahunas of grow lights. They pack a punch in terms of intensity and light penetration, crucial for big, bountiful yields but beware; they can be hefty on the energy bill.
  • LEDs are the new kids on the block, offering a dazzling energy efficiency performance. They might cost more upfront, but they'll make your wallet happier in the long run with lower energy costs.

Here's a tip-top tip: Maintaining an optimal distance between lights and plants is vital. For most setups, starting around 30 centimetres (12 inches) above the plants is recommended. Watch how the plants respond; they'll tell you if they need more personal space or want the lights closer to their growth patterns.

Now, let's not forget the tech-lifesaver, the lighting schedule! Consistency is key – establish a lighting schedule to mimic Mother Nature’s day and night. This simple routine can vastly improve growth and yield without overtaxing your plants with too much of a good thing.

So, let’s wrap up this enlightening session with a commitment to balance in our indoor gardens or greenhouses. Proper light, be it from HID, LED, or another reliable source, paired with the right schedule and intensity, will get us to the hydroponic harvests we're dreaming of!

Conclusion

When we dive into the world of hydroponics, lighting isn't just a detail—it's a cornerstone for plant success. Let's wrap our heads around the essentials we've learned:

  • Photosynthesis: It’s the lifeline of our plants, and without the right light, it’s a no-go. Remember, chlorophyll in the plant absorbs light to turn nutrients into yummy plant food.

  • Types of Hydroponic Lighting: From fluorescents to LEDs, each option brings something special to the table. It's like finding the perfect pair of gloves; it must fit our plants' needs perfectly.

  • Seedling Stage: Young plants are like toddlers, they need the right amount to flourish—typically 2000-3000 lumens per square foot.

  • Healthy Growth: For most plants, targeting between 2000-4000 lumens per square foot allows them to grow healthy.

  • Spectrum Specifics: Fancy a bushy plant? Blue light is your friend for vegging out. Dreaming of blooms? Red light helps transition our leafy pals to flower power mode.

  • Day-Length Consideration: Those long-day plants are the high-achievers of the plant world, thirsting for more of those bright rays.

We don’t need to be bogged down in complex jargon to understand that the right type of light equates to plant delight. Seedlings to blooming beauties, they all yearn for those lumens in just the right amounts. So, whether it's snugly blue wavelengths or the warm embrace of red, strategic lighting leads to bountiful, healthy growth. Remember, it's not just about giving our green friends a glow; it's about tailoring the lumens and spectrum for the ideal quality of light.

How Much Light For Hydroponics FAQs
What are the optimal lighting conditions for growing vegetables in a hydroponic setup?
For most vegetables, 2000-4000 lumens per square foot is the sweet spot. You'll also want to match the colour temperature to natural daylight, so aim for LED or HID lights with a temperature of 3000-4000K.
Can hydroponic plants receive excessive light, and if so, what are the consequences?
Absolutely, plants can get too much of a good thing—light included. Overexposure or too intense light can lead to issues like leaf burn and stunted growth, which is the last thing we want after nurturing our plants with such care!
For an efficient hydroponic system, how long should the grow lights be left on each day?
This depends on the plants you're cultivating. Typically, 14-16 hours caters well to a wide array of plants, but if you're tending to long-day plants, they'll thrive on 18-20 hours to mimic those long summer days.
What wattage of grow lights is recommended for a standard hydroponic garden?
The wattage requirements can vary, but as a rule of thumb, aim for around 30-50 watts per square foot. Of course, this is just a baseline to start from, and your plants might signal if they need adjustments.
Is it possible to utilise LED lights in hydroponic farming, and are they effective?
LEDs are not only possible; they're brilliant for hydroponics! They're energy-efficient, have a longer life span, and the heat they emit is minimal, which keeps our green friends comfortable.  
What are the different types of grow lights available for hydroponic systems, and how do they compare?
There are a few types to choose from: LED lights are energy-efficient and have a long lifespan. HID (High-Intensity Discharge) lights are powerful but can increase the temperature. Fluorescent lights are good for small spaces and produce minimal heat, but they're not as intense as LEDs or HIDs.

3 x Papillon on a Light Mover

3-x-Papillon-on-a-Light-Mover

3 x Papillon On A Light Mover

I have written a series of blogs testing the 315w Papillon in various setups. I really like the light it is without a doubt one of the best grow lights on the market. The reason for doing various tests was to find out how to get the most from this amazing light. I am looking for quality over quantity and I will never sacrifice quality over yield. But having the best quality with a 1g per watt minimum yield would be ever so nice.

  • 2 X 275mm ventilation ports.
  • 2 X 100mm cable ports.
  • 2 X 225mm air-cooled lighting vents
  • 2 X passive vents with Velcro covers.
  • ‘up-lift’ bar to allow for incoming irrigation lines.
  • Strong, black, powder-coated 25mm steel frame.
  • Quick lock, push & click pole assembly.
  • Green viewing window.
  • Very high-quality zips.

I have just finished testing this lighting system and I have been impressed by the results. The quality of the flowers is outstanding as they tend to be when using the 315 Papillons.

The Kit I Used

  • Jupiter light mover kit 2 for a maximum of 3 lights
  • 315w Papillon x 2
  • 1000w Papillon HPS 400v
  • Lumi rope ratchets

Always make sure that you have solid fixings when hanging lighting systems, ask a member of staff at Hyjo for the best instructions for your type of setup.

Set Up For Light Mover

I have mounted my light mover kit on rope ratchets so that I can adjust the heights of the lights as the plants grow. I will be keeping the lights 300mm from the canopy at all times, as this is the best distance to maximise yield. The lights will be travelling 1m on the light rail.

I have bolted the 315s at either end of the crossbar and the 1000w in the middle, for veg, I only use the 315 the 1000w HPS is turned on at day 21 of the flower when the plants have finished stretching.

I’ve set a delay on the light mover of 20 seconds this means it will stop at either end for 20 seconds giving the plants at the edge of the room equal light as those in the middle. I also hung 3 hygrometers from the light rail so I could monitor temp and humidity at all times under each light.

It’s also very important to have plenty of airflow between the lights and canopy, I use 3 wall fans for this 2 that come on with the lights and 1 is on permanently. If you’re leaving fans on permanently make sure you cover up any lights with insulation tape I also use ORCA to cover all of my fans.

Benefits Of Light Movers

  • Less heat build-up
  • The sun moves so why not indoor grow lights
  • The light hits the plants at different angles
  • Increased yield –up to 20%
  • Better quality due to less heat
  • Better use of a light source
  • Plants grow faster

Starting Conditions

Right let’s see what this setup can do, all plants have been in the veg room in 3.8L root pouches and have now been put into 78L root pouches under the 2 x 315s on the light mover.

The lights off temp is set to 24 with a greenhouse heater and humidity is 65% for veg.

Grow Test with Light Mover

Day 7

After a week the plants are all looking good very healthy and green (all plants are growing in DEM super soil) I’ve started to LST the plants now and they are recovering well. The temp between the light and canopy is 25 and the humidity is 70%

Day 14

The plants are growing much faster than normal and they seem to recover from LST a lot faster, I’m very impressed with the light mover so far, I like the fact that the plants get a break from the heat caused by the lights.

Light movers are definitely a good idea to stop heat from being pushed onto the plants. The light is hitting every part of the plant rather than a static light just hitting the top part.

All the way through veg the plants look amazing in every way, I think that by using a light mover I have taken 1 week off my veg time and the 315 Papillon has done an amazing job. Lights off temp is set to 23 and humidity is 50% for flower.

Day 21 

The 1000w Papillon is now turned on as all plants have finished stretching, and the light has been dimmed down to the lowest setting of 600w, I will increase it week by week as needed.

Results and Review

This may be the best lighting setup I’ve ever used. The introduction of the 600w from the Papillon has made a massive difference in flower production. I have flower sites all over the canopy now and the HPS is blending with the 315 at either side so the plants are getting the best of both worlds. I’m keeping the temp between plant and light at 26 and the humidity is 50% the 1000w pap is now set to 750w and will remain at that for the rest of the grow giving me 1380w over the plants. I decided to keep the 1000w pap at 750 as I think anything more than that would be too intense and I don’t want to burn away any terpenes.

This setup is producing massive amounts of flowers it’s a bit of a shock that it’s doing so well. I’m at day 60 now, 14 days until harvest. I feel like the HPS has now done its job and is turned off leaving me with just the 2 x 315’s to finish the plants off. I now set the temp between the light and canopy at 22 and the humidity at 45% until harvest day.

This is a stunning lighting setup: the quality of the flowers is amazing, and that break-in heat makes all the difference. Yield-wise I was able to hit 1g per watt which I’m only happy with. I would heavily advise avid growers to consider their own setups with movers from the extensive range of Hyjo’s products. If you’ve seen what I’ve seen, the right set-up can make a world of difference.

D-Papillon 315W CDM/CMH – AKA ‘the plasma killah’

D-Papillon-315W-CDM/CMH–AKA-‘the-plasma-killah’

D-Papillon 315W CDM/CMH – AKA ‘the plasma killah’

I have been reluctant to test this light purely on the basis that I have always done very well with the MH + HPS combo with adjust-a-wings.

But due to hearing nothing but good things about this light from various sources, I decided to give it a test. I will be testing these lights in various setups to see exactly how it perform and more importantly the quality of the flowers they can produce.

What Are CDM/CMH Grow Lights?

CMH is made with an arc tube that is constructed of a ceramic composite instead of quartz. This allows the tube to reach a higher temperature. To achieve the lower temperature in HID lamps made with quartz a combination of gasses must be used that don’t necessarily produce the optimal spectrum for photosynthesis.

The higher operating temperature of the ceramic tube allows for an ideal mixture of gasses. This creates a fuller spectrum of light that increases the growth, overall health and yield of a plant.

CDM/CMH Benefits

Some suppliers claim that one 315w is equivalent to one 1000w HPS in terms of yield this is dependent on other factors in the grow room and the grower's skills.

These lights also have a low heat output because of their low wattage. One watt from a grow light creates about 4 BTUs of heat that needs to be cooled. Let’s say you have 4 x 600w HPS in your grow room that’s 10.000 BTUs from your lights, now trade them for 4 x 315w which is 5.000 BTUs and more yield according to some suppliers. Heat is a massive problem for indoor growers in the summer months so halving your BTUs is a big help and you are doing it without sacrificing quality or yield.

One final advantage CDM/CMH bring to the table is their superior light quality compared to other HID lamps. First, they have a wider spectrum than other HID lamps as a result of the near-perfect, unique combination of salts, halides and gasses used in the arc tube.

This mixture creates a spectrum close to that of the sun and emits a stunning crisp, white light. In fact, the colour rendering index CRI for CDM/CMH lamps is 90-93. To give you some perspective the sun's CRI is 100, HPS lamps range from 20-35 and metal halides range from 60-65 the closer the CRI is to 100 the closer it is to sun light.

In terms of light quality, the CDM/CMH includes ultraviolet and infrared rays in their spectrum, which plants love. The higher amounts of UV rays create stronger woodier stalks, this means the growth and vigour of your plants will be unmatched, especially in the veg stage.

CDM/CMH Drawbacks

There are two main drawbacks to using CDM/CMH lights, 1 is the initial cost of the light, I have been growing for over ten years and have come to understand the value of quality lighting systems, and quality lighting pays dividends at harvest time. I understand that if you have a tight budget for setting up a grow the thought of spending £500 on a light may seem scary but lighting is key for yield so you should never sacrifice this aspect of your grow.

The second drawback (if you can call it that) is that you must wear grow room glasses to protect your eyes if you are spending more than 15 min in a room with 1 of these lights. I recommend that you should always wear grow room glasses at all times in grow rooms even with HPS they cost like £20 and exposure to HID will damage your eyes over time. I spend an average of 8 hours a day in grow rooms so protecting my eyes is a top priority.

The Set Up

A 3-light system with the 315 using the daylight lamp all the way through in the middle. MH for veg and HPS for flowers on either side, this is a 3-light, 3-plant system grown in 60/40 in 32L pots using a run-to-waste dripper system.


400w MH for V HPS for F


315 daylight


400w MH for V HPS for F

First Impressions

When I opened the box the first thing that hit me was the attention to detail and the build quality of the fitting it was far superior to any other fitting I have seen.

The Box Contains

  • 315 fitting
  • Very sturdy hanging brackets
  • Daylight lamp
  • Instructions for setup

Daylight Lamp      

The daylight lamp is optimized in a broad spectrum grow light with an increased share of blue light. The lamp can be used for the growth stage of the plant. 

Veg Cycle

All plants were given a 3-week pre-veg in the same room under CFL lighting to get the roots established all 3 plants will be grown from clones taken from the same mother plant.

I have never seen plants respond so well to a light source from day 1 the plants were super healthy, the light that was coming from the 315 was like nothing I had ever seen, it was crisp and brilliant white compared to the MH on either side. Every light has its own wall-mounted fan that blows air in between the light and the plant canopy, I also like to hang 1 hygrometer per light this is to see if certain parts of a room run hotter than other parts.

What I noticed was that you could put your hand directly under the 315 without any discomfort which meant you could have it closer to the plant, whereas the 600w MH if you put your hand within 10 inches of it your hand started to cook. The temperature difference between the 315 and the 600w MH was around 3-5 degrees C.

Very clever reflector design, you can feel the heat coming out of the sides and raising up around the reflector. Also, very impressed with the even light distribution

Open Reflector Concept

Assimilation lighting is generally known to cause an excess of unusable heat directly below the reflector. This leads to “hot” spots on the top of the plant canopy, which detrimentally affects the growth and development of the plants.

The brand-new Green Power lamps that are used in D-Papillon fittings with electronic ballast produce 34% PAR light, 34% infrared heat radiation and 32% convection heat. The reflectors that are used in the existing D-Papillon fixtures uniformly disperse the PAR light and infrared radiation heat. The convection heat (lighting heat) in contrast to radiation heat, is an indirect form of heat transfer.

The heat that is created on the lamp surface is not displaced directly to the plant, but indirectly, with the grow room air behaving as a carrier. The use of the open reflector concept, a natural air current is created; the heat is spread uniformly throughout the grow space, thus avoiding the development of hotspots on the plant canopy. The accumulation of convection heat is therefore removed and does not fall back into the lamp, and as a result, the lamp keeps cooler, resulting in longer lamp life.

The patented reflectors from Papillon have a yield of around 92% (determined in a laboratory certified by the British Standardisation Institute). The lux values obtained by luminaires with these grow light are as much as 10% greater than by conventional luminaires. These greater values represent an unmatched amount of growth light for the plant. In other words, increased growth for the same energy usage.

The reflector of the D-Papillon forms the light beam in a unique manner. Unlike regular production techniques, the reflector is produced by forcing (deep-drawing) the raw material, followed by the application of the reflector layer through vacuum metallizing or sputtering of aluminium.

Employing an entirely different production process, Papillon has the ability to use a reflector material of a high surface density and a high reflection ability. The reflector is purpose-made to cut down on the heating up of the lamp to the lowest possible extent. As a result, there is a lower drop in the light production of the lamp in the course of its life. In summary, their reflector produces more light (light output of 92% - Light Output Ratio), a broader beam of growth light that penetrates deeper into the plant and a lower lamp luminosity rate thanks to a comparatively low reflector temperature.

After about 14 days of veg the plant under the 315 was looking far superior to the ones on either side of it, it had more side arms, shorter internodes, and darker colour, and the stem seemed to be sturdier (apparently using silica with 315’s gives you a thicker harder stem).

For the next 7 days, all plants were super cropped to create 1m wide bushes and lolly popped to remove all the lower parts of the plant, the plant under the 315 recovered from this a lot faster than the other plants showing no signs of stress, she was just a beast thirsty for light all her leaves perky and pointing upwards.

After 21 days of veg, it’s time to flower, all plants are now 1m wide and roughly 1m from the top of the pot supported by canes and tied with loose twisty ties.

If I was using 3 x 315s in the room I think I could have shaved 3-5 days from my veg time

So far I am loving this light, for 315w it is unbelievably bright you can’t look anywhere near it without grow room glasses on. I have just ordered another light to start setup 2 in another location.

Flower Cycle

The daylight lamp was left in the 315 pappy this is because it was getting overlap of HPS from either side so I didn’t feel the need to swap the lamp to the Argo. Far less stretching under the 315 but still got healthy vigorous growth with close internodes.

Day 14 of flower and the plant under the 315 is covered in flower sites and already starting to flower, she is a wide bushy plant that is super healthy.

Day 28 of flower all plants are looking super healthy but the 1 under the 315 is in a different league she has amazing colour all the flower sites are starting to join up.

Day 42 of flower the smell that is coming off the plant under the 315 is far stronger than the other 2 plants, this is due to a better terpene profile due to less heat being forced on to the canopy and dissolving the resin glands, after looking at the flowers under a microscope you can see all the gland heads in tacked and standing upright-this light is amazing!!! 

Day 60 time to cut the plants down, the terpene profile and essential oil production on the plant grown with the 315 is off the chart it smells like a different strain than the other 2, it is dripping with crystal like it has been dipped in diamonds. All the flowers are nice and tight and perfect in every way.

I am in the process of testing these lights in other setups 1 light, 1 plant setup but swapping the lamp in flower to the Argo lamp, and the other setup is 2x 315 paps on 2m a light rail.

Summary Of The 315w Papillion

I have been blown away by this light fitting it is the best light fitting I have tested and could be the best grow light ever made. If I woke up in the morning and these lights were £1000 I would still buy them! This grow light is a game-changing piece of kit that will push the quality of your crop to the next level!!!!

Over the next few months, I will be looking to upgrade all my lighting systems to the 315w Papillion that’s how impressed I was by this test. My aim is always to produce the highest quality product and using this light gives me an advantage in doing that.

Tips from a Pro: Maximising your Light Source

Maximising Your Light Source: Tips From A Pro

Every grower at some point has asked the question “How close do I keep the light to my plant?”. While it is true the closer you can get it the bigger the yield will be, there is one very important consideration, the heat. Any mounted light that is simply too close to the plant can cause the flowers and the leaves to dry significantly, at worst, to the point of burning.

The Importance Of Temperature

The arena of temperature we most need to keep an eye on is between the top of the plant and the lamp. Now many of us will have wall fans installed targeting such areas, some of us may even be hanging hydrometers from lights to monitor temperatures and keep an eye out for hotspots. Generally speaking, this space between the light and the plant should be no hotter than 2 degrees warmer than the surrounding room.

Best Distance For Hanging Lights

The ideal distance to hang the light is 300mm or 0.3m from the top of the plant. However, this is entirely conditional on the temperature. This can only be done if the temperature is within the range you desire. For more customisation and variability to your setup, Digital dimmable ballasts are a good investment. It is pretty standard to be able to dim between 250 400 600 and 660w.

How To Measure Light Intensity

The equation used to measure light intensity is the “inverse square law”. Once you get this down, you can work out how to get the most from a light source. Inverse Square law goes something like this:

I = 1/D2

Light intensity (I) = 1 divided by the distance from the lamp squared (D2).

So let’s give the equation a try with a distance of 0.3m.


Example 1

I = 1 / 0.3x0.3

0.3 x 0.3 = 0.09

1 / 0.09 = 111 so the light intensity is 111 = 100% this equation proves that with a distance of 300mm from light to plant 100% is being absorbed by the plant.

Let’s do it again this time with a distance of 600mm or 0.6m.


Example 2

I = 1 / 0.6x0.6

0.6 x 0.6 = 0.36

1 / 0.36 = 2.7 this gives us a light intensity of 27% so by doubling the distance between the light and the plant we have lost 73% of the light intensity.


Finally, Remember…

Just because you grow with a 600w lamp doesn’t mean that 600w is being transferred to the plant. If due to excess heat, you are mounting the light 600mm from the top of the plant then you are only transferring around 200w. This is why dimmable ballasts are useful as you can choose to dim down to 400w, meaning, you can mount the light closer to the plant allowing for better light intensity absorption.

It wasn’t long ago I explained the inverse square law to a friend of mine who’d been growing as much as I had. At the time, he was using 1000w HPS lighting for flowering, hanging them 1m above the plant. A bet was made that I could produce a greater yield with 2x 400w HPS lights. He seemed pretty amused at the idea till I later won the bet. As I could mount both the 400w lamps closer to the plant, it could transfer more light and increase the yield.