FREE Delivery Over £99*

Discreet Packaging

Best Price Guaranteed

Pay In Instalments

Safe & Secure Checkout

Chat to an Expert

FREE Delivery Over £99*

  • FREE Delivery Over £99*

  • Discreet Packaging

  • Best Price Guaranteed

  • Pay In Instalments

  • Safe & Secure Checkout

  • Chat to an Expert

What is a Wick System in Hydroponics: Inspired Passive Growth

what-is-a-wick-system-in-hydroponics

What is a Wick System in Hydroponics?

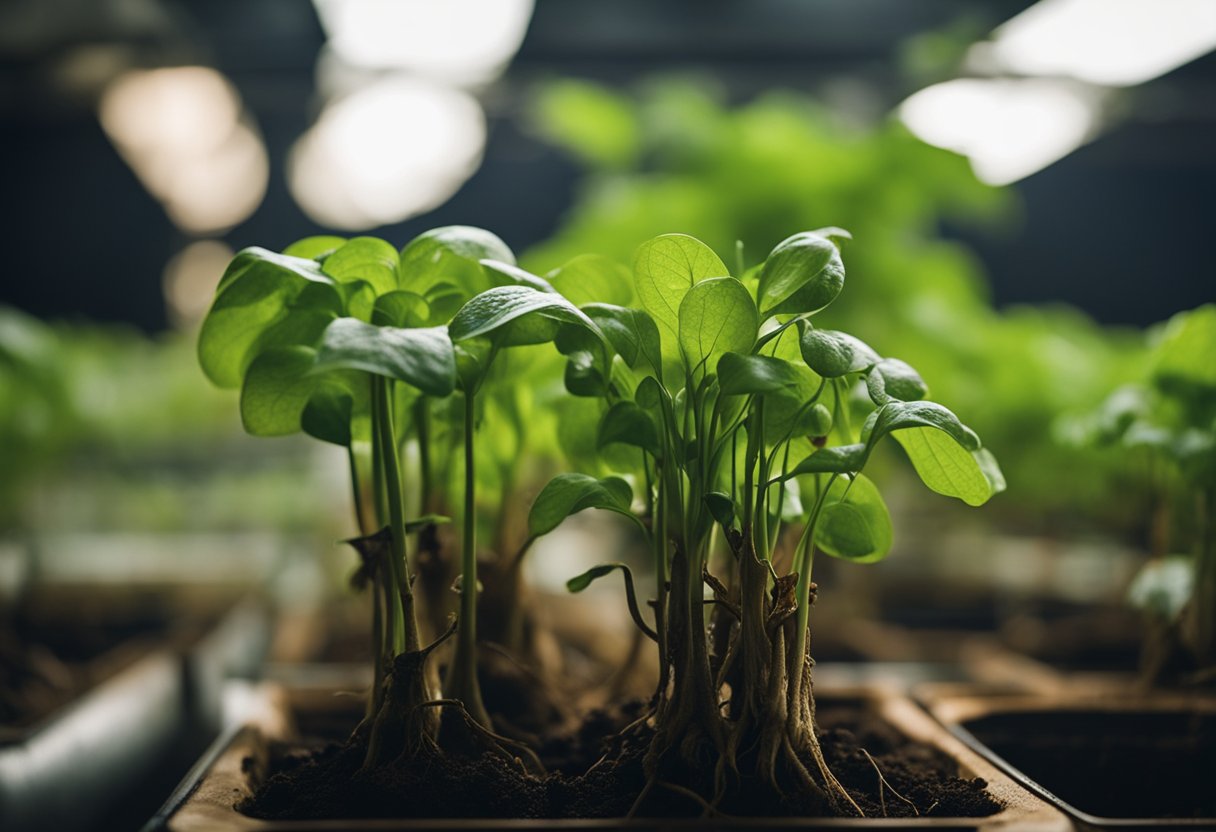
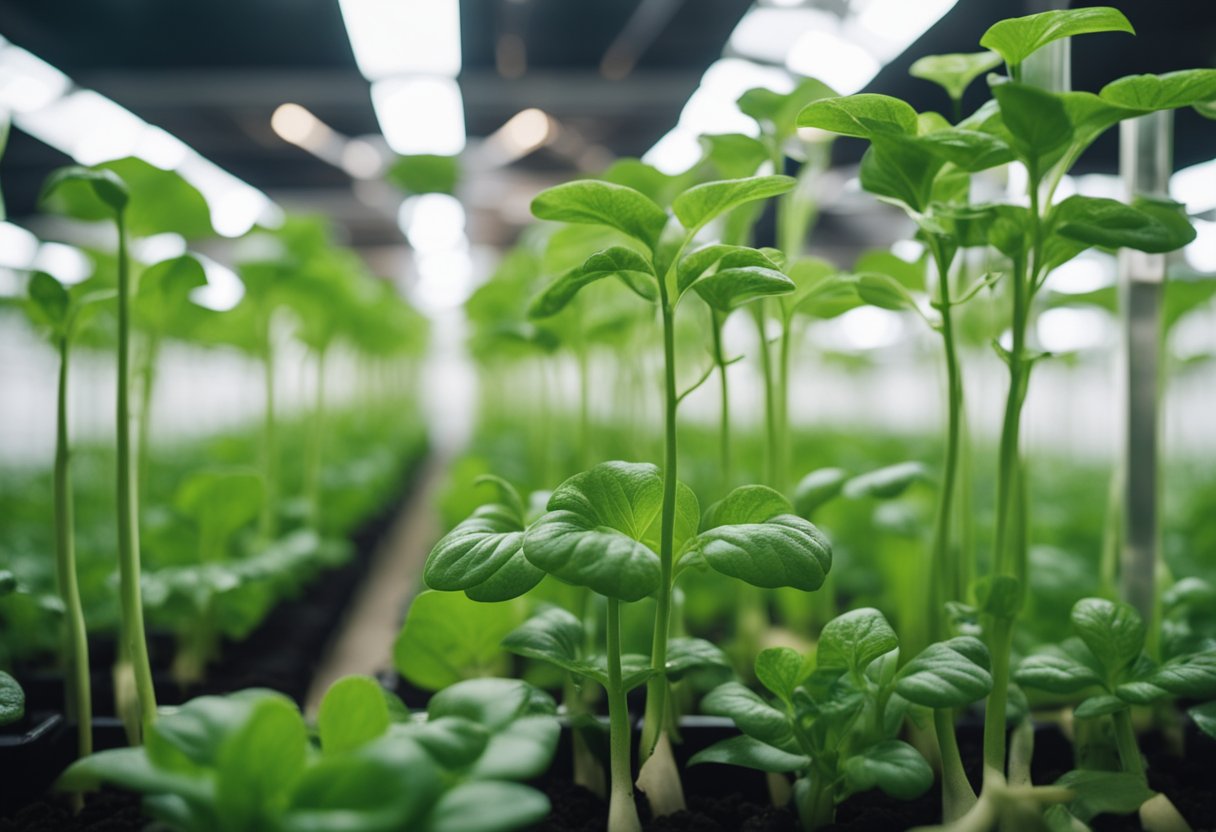
Hydroponics, the fascinating technique of using just water and nutrients rather than soil, has revolutionised the way we think of gardening. This soil-less cultivation method uses less water, requires fewer pesticides, and can result in higher plant yields. But for those just getting started, the various types of hydroponic systems might seem intimidating. That's where the wick system comes into play.

what-is-a-wick-system-1

The wick system is the most uncomplicated form of hydroponics, making it perfect for beginners. It’s a passive system, which means it doesn't rely on any moving parts like pumps or electrical components. We simply rely on a wick, hence the name, to draw nutrients and water up to the plant's roots. The beauty of this system is its simplicity and the relative ease with which it can be set up and maintained, even on a tight budget.

In this article, we'll explore the wick system's functioning, the necessary materials for setting up your own, and the maintenance involved to ensure healthy plant growth. We’re getting to grips with the different types of growing mediums that work best in a wick system, managing the nutrient solution to maximise plant health and yield, and how to tailor the system to suit a variety of plants.

Key Takeaways

  • Hydroponics allows for soil-free plant cultivation with potentially higher yields.
  • Wick systems are ideal for hydroponic beginners due to their simplicity and low cost.
  • Proper setup and maintenance of a wick system can promote healthy plant growth.

Understanding Wick Systems in Hydroponics

what-is-a-wick-system-2

Delving into hydroponics can be incredibly rewarding, especially when starting off with a method as straightforward as a wick system. Wick systems marry simplicity with efficiency, making them an excellent entry point and system for beginners.

What Is a Wick System in Hydroponics?

A wick system in hydroponics is pretty much the beginner's best friend. It's one of the oldest and simplest methods of hydroponic gardening, where plants are nourished directly without the fuss of complex mechanisms or electricity. At its core, wick systems utilise a passive system that banks on capillary action, much like a candle wick drawing wax, to transport the nutrient solution from the reservoir to the plant roots.

Now, what sort of greens can we coax from these systems, you ask? The beauty lies in their versatility! Herbs, lettuce, spinach, strawberries, and even vibrant peppers can thrive in the gentle embrace of a wick system's tender care.

Components of a Hydroponic Wick System

The anatomy of a wick system is pretty straightforward, involving just a few basic parts:

  • Reservoir: This is where the nutrient solution mingles, awaiting its journey upwards.
  • Wicks: Typically wick material is made of absorbent felt or cotton, these are the silent workers that pull up the nutrient solution via capillary action.
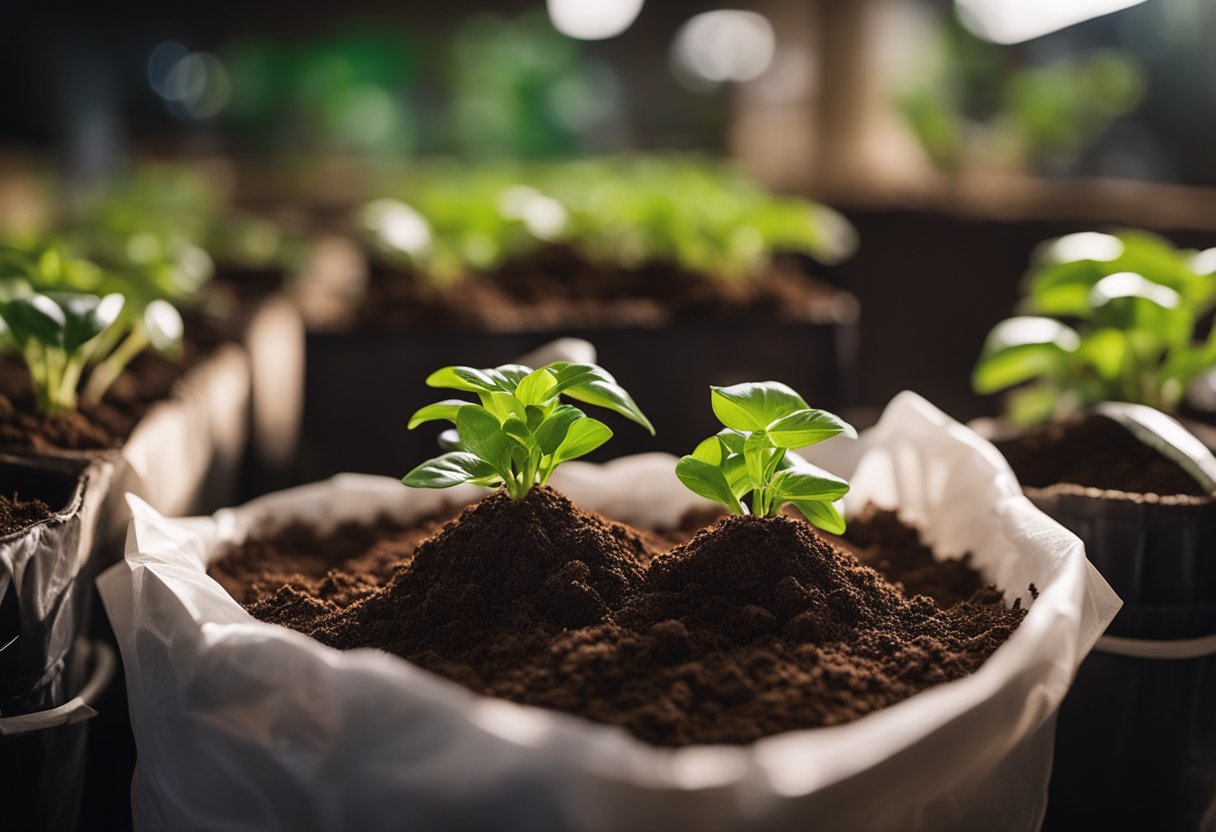
  • Growing Medium: Supports your plants and is in direct contact with the wicks to facilitate nutrient uptake. Choices are plenty; from coco coir to perlite or even vermiculite.
  • Plants: The living, breathing heart of any hydroponic system. Rooted in the growing medium, they sip on that nutrient-rich moisture.

So, we've laid out the components, but what about the perks? Low cost, minimal upkeep, and you don't have to worry about bumping up your water bill dramatically—it's a winning situation all around. Plus, being a passive system, it's the epitome of 'set it and forget it', perfect for busy or forgetful gardeners like myself at times.

Remember, while it's tempting to kit out your entire greenhouse with these bad boys, wick systems suit small to medium-sized plants best. For bigger plant aspirations, exploring other hydroponic systems might just be the ticket.

Dynamics of a Wick System

In this section, we're diving into how a wick system operates. We'll walk through its components and the science behind it to give you a clear picture of this simple yet efficient method of hydroponic gardening.

How a Wick System Operates

Components of a Wick System: Our wick system is composed of a few fundamental parts: a reservoir to hold the nutrient solution, a container for the plant and growing medium, the wick itself, and the nutrient solution. It's akin to a self-watering plant pot but with a focus on hydroponic efficiency.

Assembling the Wick System: To get started, choose a container and a reservoir that match in size and shape. You'd typically want a container that fits comfortably atop the reservoir. Drill a couple of holes in the bottom of the container, just right for the wick to slip through snugly. We'll then guide our wick down through these holes and let it soak in the reservoir. We fill our container with a well-aerated growing medium and then nudge in the seedlings.

Working Mechanics: The magic happens all thanks to capillary action. This nifty bit of science allows the nutrient solution to travel up the wick and supply our plants with much-needed nourishment. Think of when you watch a paper towel soaking up a spill — that's capillary action at work. Our growing medium, meanwhile, keeps hold of this moisture and offers a perfect place for roots to thrive, while any surplus solution finds its way back to the reservoir. 

Tips and Tricks: To get your wick system working like a dream, consider the wicking material.  A cotton wick? Classic choice. Nylon or propylene? They’re top-notch for a steady flow. It’s all about finding that perfect balance between nutrient delivery and aeration.

Keep an eye on pesky algae and salt build-up, as they can throw a spanner in the works. Regular checks of the nutrient solution’s pH and EC levels will keep your garden in tip-top condition. With a bit of tweaking here and there, your wick system will become a surefire hit.

Benefits of Using Wick Systems

Wick systems in hydroponic gardening offer a range of advantages that make them an excellent choice, especially for those of us just starting out or working with limited space. Plunge into the advantageous aspects and notice how they contribute to creating a sustainable and efficient growing environment.

Advantageous Aspects of Wick Systems

One of the main perks for us gardeners is the simplicity of wick systems. Building such a system is a doddle - no need for extravagant tools or materials. A few household items we might already have lying around, like old clothes for wicks and plastic containers, can be repurposed. It's not just thrifty; it's a crafty way to upcycle!

Their reliability is also quite splendid! Wick systems thrive without fuss — no electricity, no pumps, and not even a peep from timers or moving parts. Imagine that, a garden that doesn't hinge on complex gadgets!

For those of us looking to be prudent with both our pennies and our planet, wick systems tick the box. They're water-wise and environmentally friendly. The system reuses nutrient solutions, reducing waste and the need for a constant water supply, vastly more efficient than traditional soil gardens.

Now, let's talk about who this is really perfect for — beginners and small-scale gardeners. Regardless if we're growing basil on the windowsill or peppers in a small greenhouse, the wick system is suited to our pint-sized horticultural endeavours. Plus, it's wonderful if we're keen on keeping things low maintenance.

So, if we're into the idea of starting our own wee hydroponic garden that's budget-friendly, eco-conscious, and doesn't demand a horticulture degree, then the wick system might just be our cup of tea.

Limitations of Wick Systems

In our world of hydroponics, wick systems are known for their simplicity, but they come with their own set of challenges that we should consider.

Challenges and Drawbacks

Did you know, we might hit a bit of a snag while growing larger plants using wick systems? Growth limitations occur because these systems are better suited for the smaller type of plants that require lower nutrient intake. If we go for plants with higher demands, they might not flourish as expected.

Imagine trying to quench thirst with a straw that's too narrow—it's a bit like that. Wick systems can often lead to nutrient imbalance and, sadly, deficiencies since we can't precisely control nutrient delivery. Precision is key in hydroponics, and without it, our plants might not reach their full potential.

And here's a soggy problem for you: root rot and fungal diseases. These uninvited guests can crash the party due to over-saturation and anaerobic conditions. We certainly don't want our plants sitting in stagnant water, do we?

Lastly, a wick system can get clogged with minerals and salts over time. Plus, the unfortunate reality is that wicks can degrade and lose their capillary action, leaving plants thirsty.

When we get down to the nuts and bolts of it, wick systems have their place in hydroponics, but they need careful consideration to avoid these pitfalls. As we navigate the world of hydroponics, our understanding of these limitations can make all the difference.

Selecting the Right-Growing Medium

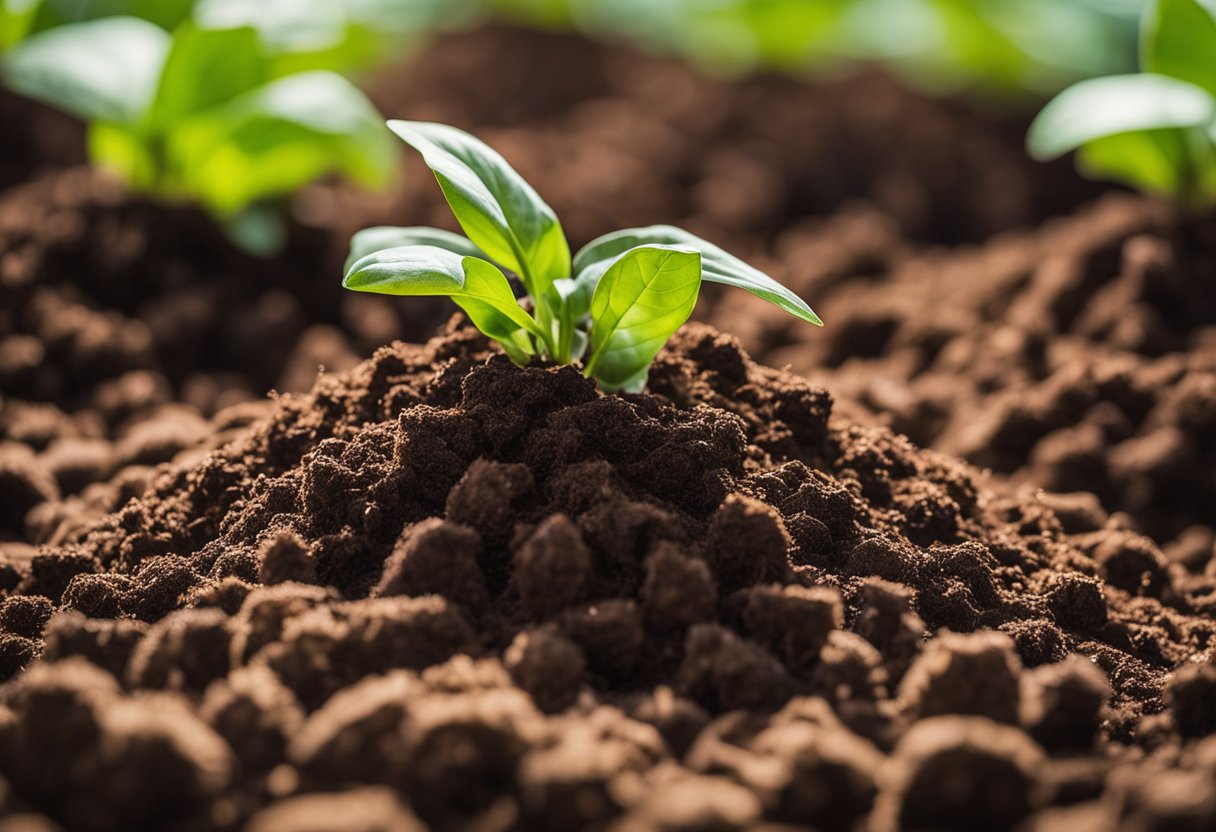
Choosing the right growing medium for a wick system is a pivotal step in setting up a successful hydroponic garden. The medium anchors the plants facilitates moisture delivery and ensures the roots have access to ample oxygen.

Suitable Mediums for a Wick System

When we talk about a growing medium, we're referring to a substance other than soil that plants can grow in. In a wick system, the medium is especially critical—it acts as the bridge that carries moisture and nutrients from the wick to the plant roots.

Soil or Soilless Mixes:
Soil-based mixtures might be the go-to choice for traditional gardening, but in hydroponics, they're less common. Although they are easy to obtain and inexpensive, they can complicate a wick system due to their weight and tendency to compact. Soilless mixes, on the other hand, typically combine components like coco coir, perlite, and vermiculite to create a lighter medium that's better suited for hydroponic setups.

  • Coco Coir Chips and Coco Coir: This organic product made from coconut husks retains moisture well whilst also providing good aeration. Although renewable and eco-friendly, it's worth noting that coco coir can have a high salt content and its pH levels can vary, so it may require pre-treatment.
  • Perlite: As a volcanic glass with high water content, upon heating, it pops like popcorn increasing in size and creating a porous structure. It's sterile and pH-neutral, making it a safe choice for our plants. Perlite is quite lightweight, but because of its size and weight, it can sometimes float, which could disrupt the wick's function.
  • Vermiculite: It's absorbent and retains nutrients effectively, which can be great for a wick system. Vermiculite is often mixed with other mediums to enhance moisture retention. But be aware, it's more alkaline and can break down over time.

  • Hydroton: These expanded clay pebbles are another fantastic option for wick systems. They offer excellent drainage and are pH-neutral. However, they’re not the best at holding onto water, so they might need to be mixed with a more absorbent medium.

For best practices, consider the needs of your plants. Young seedlings might thrive in finer mediums like vermiculite, while larger plants will need the stronger support hydroton can offer. We should always rinse and soak our chosen mediums to ensure they're free from dust, dirt, and any unwanted chemicals before introducing plants. Additionally, mixing mediums can sometimes offer the best of both worlds—like the moisture retention of coco coir with the drainage of perlite.

Let's make a conscious effort to periodically check and refresh our growing medium, as old or degraded material can affect our plants' growth. Regularly inspecting the health of our plants can also provide clues as to whether our medium is still performing as it should. Remember, the perfect growing medium for our wick system is out there; it might just take a little experimentation to find it.

Designing Your Wick System

When we talk about building a hydroponic garden, the wick system is one the simplest yet effective methods to consider. Let’s dive into how we can construct our very own.

Build a Hydroponic Wick System

First things first, we'll need some basic materials and tools. Here's what we'll need:

  • A reservoir: Think buckets, tubs, or even repurposed plastic bottles.
  • A container: This could range from pots to trays, or even cups.
  • Wicks: These can be made from cotton rope, nylon rope, wool rope, or even tiki torch wicks.
  • Growing medium: Options include soil, coco coir, perlite, vermiculite, or rockwool.
  • Nutrient solution: Either ready-made hydroponic fertilizer or a homemade organic mix.
  • Tools: Get your drill, scissors, ruler, and marker ready.

Alright, let's get our hands dirty (not literally, since there's no soil involved).

  1. Use the marker to measure and mark where we need holes for the wick and any drainage on our container.
  2. Take the drill and carefully make the holes where we marked. Always safety first.
  3. Using the scissors, cut the wick to the length that will reach from the bottom of the container into the reservoir with a bit of slack.
  4. Thread the wick through the container holes, making sure one end touches the bottom of the reservoir.
  5. Fill the container with our chosen growing medium; the ruler can help make sure it's evenly spread.
  6. Now, it's time to plant those seeds or tuck in the seedlings into the growing medium.
  7. Fill the reservoir with the nutrient solution, right up to the mark.
  8. Place the container on top of the reservoir and ensure the wick is properly positioned.

Voilà! We've got ourselves a wick system.

Choosing the Right Wicks

When it comes to wicks, not all materials are created equal.

  • Cotton rope: Highly absorbent and a popular choice, but it can decompose over time.
  • Nylon rope: More durable than cotton, though it may not have the same wicking capability.
  • Wool rope: Another great option that provides excellent wicking, but again, longevity might be an issue.
  • Tiki torch wicks: These are made for a similar purpose and can also be a good hydroponic wick.

Remember, the wick is key for moving nutrients and water to our plants, so we want a material that's highly absorbent but won't break down easily. Take into account the size of our container, too, since this will affect the wick size we need.

Nutrient Solution Management

what-is-a-wick-system-3

In our hydroponic wick systems, the nutrient solution is the lifeline of the plants. We must manage it right to ensure plants get all they need.

Maintaining Nutrient Levels and pH

To keep our plants thriving, it's vital to monitor nutrient levels and pH closely. We aim to maintain a nutrient balance that's just right—nutrient-rich water that's neither too diluted nor too concentrated. Our plants absorb these nutrients, so regular checks are a must. Here's what we need to keep an eye on:

  • pH levels: The ideal range is usually between 5.5 and 6.5. It affects nutrient uptake, and staying within this range ensures maximum absorption.
  • Nutrient balance: The concentration of nutrients should match the growth stage of our plants.
  • Temperature: Keep it between 18°C and 24°C to prevent plant stress.
  • Aeration: Oxygenated water helps roots breathe; we can't let them suffocate!

Monitoring tools like pH meters and EC (electrical conductivity) meters are our allies here. Regularly testing the water ensures we're not flying blind and can make adjustments when needed.

When and How to Change Nutrient Solution

We need to change the nutrient solution because, over time, it gets used up and can harbour unwanted guests like algae. If we notice the solution looks a tad funky, or our green friends look like they're having a rough day, it's time for action. Here are a few signs:

  • Changed colour, smell, or texture of the solution, which can indicate contamination.
  • Reduction in solution level, meaning our plants are more thirsty than we thought.
  • Deviations in pH or EC readings, signalling it's time for a fresh batch of nutrients.
  • Unhappy-looking plants might mean they are missing out on vital nutrients.

When these signs appear, we should:

  1. Empty the old solution: Dump it away from our garden.
  2. Cleanse everything: Give the reservoir, wick, and growing medium a good rinse to remove residues.
  3. Mix new nutrient solution: Tailor it to our plants' current needs and adjust pH accordingly.
  4. Refill with the fresh solution: Ensure that our wick is in top-notch condition to continue delivering nutrients effectively.

Changing the nutrient solution at least every fortnight is a good rule of thumb. It's like giving our plants a new lease on life every couple of weeks—and they do appreciate it!

Tailoring to Diverse Plants

When we talk about setting up wick hydroponics, we need to consider the variety of plants that thrive in such environments. Let's focus on what really works for this passive and simple system.

what-is-a-wick-system-4

Optimal Crops for Wick Systems

Have you ever wondered if your beloved leafy greens or tangy tomatoes could flourish in a wick system? Let’s find out. Our wick systems are fab for smaller plants that are known to have moderate to low water needs. Lettuce and herbs? They love it! These little champs are perfect because they don't guzzle up water like it's going out of fashion.

  • Suitable Veg:
    • Lettuce
    • Spinach
    • Herbs (e.g., basil, mint)
    • Microgreens

And what about tomatoes, you ask? While we can coax them to grow happily in a small-size wick setup, they become quite the divas as they mature, requiring more water and care than our simple wick system might offer. It's best to stick to smaller varieties.

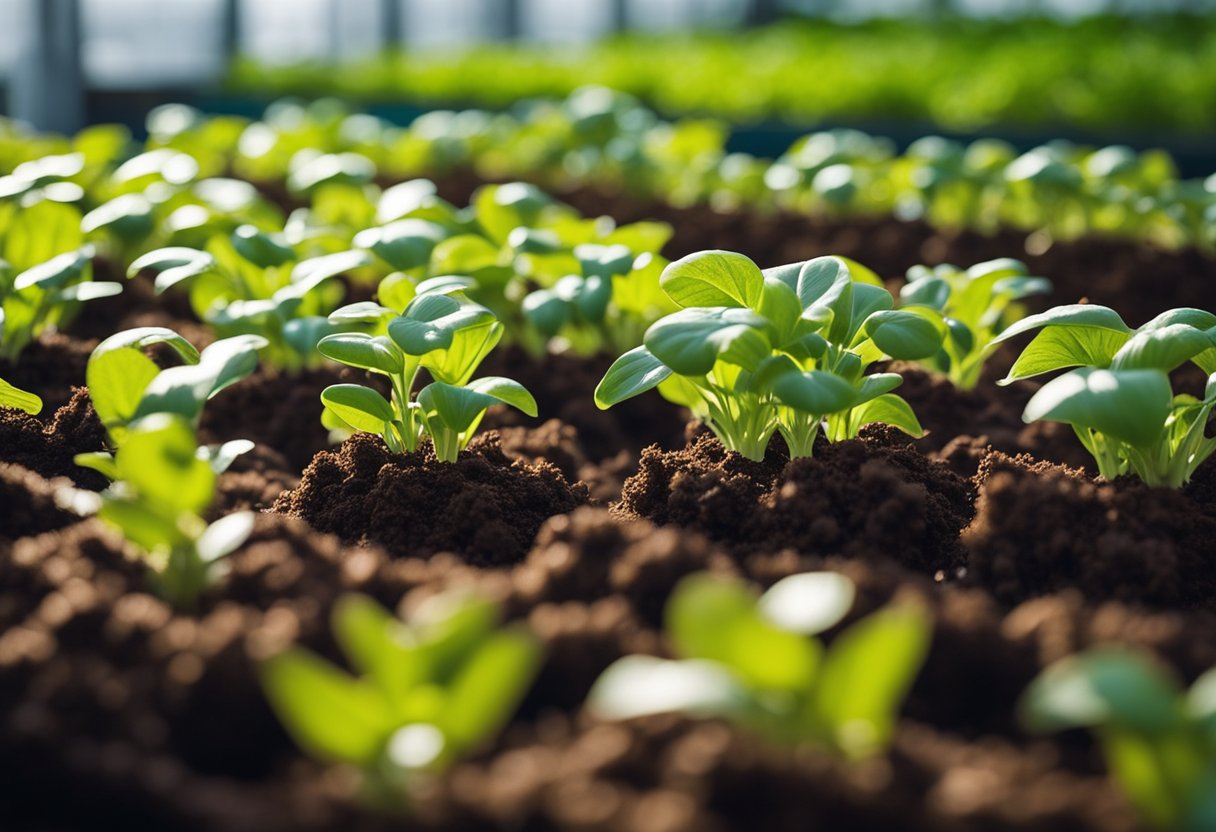
For seedlings, it's spot on! A wick setup is gentle, providing moisture without disturbing their delicate new roots. Yet, for root vegetables that need more room to spread out and lots of water, it's a no-go. They're better off in more advanced hydroponic systems designed to cater to their hefty appetites.

  • Plants to Think Twice About:
    • Larger tomato varieties
    • Root veggies (e.g., carrots, beets)

Remember, our wick systems need a good balance. One wick per plant is the golden rule for smaller plants, while water-hungry ones might need a bit more persuasion with two, to keep them from throwing a strop. Keep this in mind, and you'll see your plants thrive and give you the lush, green sanctuary you're yearning for.

Ongoing System Maintenance and Troubleshooting

Keeping our wick hydroponics system in tip-top shape is crucial for the success of our endeavours. It's like keeping a bike well-oiled; regular checks and timely tweaks can make all the difference. Now, let's dive into how we can fend off those pesky problems!

Preventing Common Issues

No one likes to see their plants in distress, do we? To prevent common issues such as rot, mould, and algae growth, we need a vigilant eye and a gentle hand for maintenance. Here's what we've got to keep an eye out for:

  • Rot and Mould: Keep the humidity in check! These fungi love a damp environment, so let's make sure our space is well-ventilated. Periodically, we should inspect our wicks and root system for any signs of decay, giving them a quick once-over with a safe fungicidal solution if needed.
  • Algae: A bit of sunlight is good for the soul, but not so much for our nutrient reservoir – it's a pool party for algae. Covering our reservoirs with an opaque material will keep these uninvited guests at bay. Regularly cleaning out the system is also a must to prevent build-up.
  • Aeration System: Roots crave oxygen just like we do! While wick systems generally don't involve complex aeration, ensuring that the growing medium isn't too dense to allow air circulation can help prevent the dreaded root rot, so let's stick to lighter, airier materials.
  • Drawing up Nutrients: Check that the wicks are efficiently pulling up the nutrient solution. This can be affected by the number of wicks you use. If they're not, it might be time to replace them or perhaps tweak the density of the solution. Remember, the wicks are like the straws for our plants – they need to be clear for a good sip.
  • Regular Checks: Make a schedule and stick to it. Visual checks and adjusting the nutrient levels should be part of our weekly gardening ritual.

Conclusion

In exploring wick system hydroponics, we've uncovered its essence as a remarkably straightforward approach to soilless gardening. It's a passive system; one that cleverly utilises the natural phenomenon of capillary action to deliver nutrients to the plants' roots. This simplicity not only makes it accessible for those of us starting out but also offers a peaceful gardening experience without the hum of pumps.

Advantages:

  • Low Maintenance: There are no moving parts, and no electricity needed, hence less that can go wrong.
  • Cost-Effective: With minimal components required, initial set-up and running costs are kept low.
  • Space-Efficient: The wick system can be easily integrated into small spaces, making it ideal for urban dwellers.

Limitations:

  • Growth Rate and Size: Some plants may grow slower compared to other active hydroponic systems.
  • Plant Type Limitations: It's most effective with smaller, less thirsty plants, as larger plants may require more water than the wicks can supply.

Summary: We've learned that the wick system is an excellent starter kit for the world of hydroponics. If we're looking to dip our toes into these waters, the wick method ensures we aren't immediately swamped. From minimal equipment and setup fuss to the delights of low maintenance, it's a method that respects both our time and wallets.

We must acknowledge, however, that while the wick system has its charms and is a fantastic entry point, larger-scale aspirations might necessitate more complex systems. But if a cosy, intimate garden is what we're after, the wick system is our steadfast ally.

What is a Wick System in Hydroponics FAQs
How can one set up a basic wick system for hydroponic gardening at home?
To get started with a basic wick system at home, combine a simple container like a plastic bottle or tub with a growing medium such as a mixture of perlite and coco coir. Insert one end of a cotton or synthetic wick into the container and the other into a reservoir of nutrient solution. The wick will pull the solution up to feed the plants. It's a doddle!
Could you explain the mechanisms of how a wick hydroponic system operates?
Sure thing! A wick system operates through capillary action, meaning the nutrient-rich water is drawn up from the reservoir through the wicks and directly into the plant's roots nestled in the growing medium. It's like the plant's personal waiter, delivering a steady flow of meals directly to the table.
What are the primary benefits and drawbacks of using a wick system in hydroponics?
The perks of a wick system are its simplicity, affordability, and low maintenance—ideal for beginners dipping their toes into hydroponics. However, it's not all plain sailing. The system can struggle to support larger plants or those with high nutritional needs, and it's less efficient than some high-tech alternatives.
In what scenarios would a wick system be the preferred choice for hydroponic cultivation?
When simplicity and cost-effectiveness are top priorities, the wick system is a stellar match. It's perfect for small indoor gardens, educational projects, or anyone giving hydroponics a go for the first time. Small herbs and lettuce types find it particularly comfy.
How does the wick system compare to other types of hydroponic systems, such as the water culture or the ebb and flow methods?
While the wick system is the epitome of low-tech gardening, water culture and ebb and flow methods are like the flashy urban cousins. They employ pumps and timers for greater control but can be overkill for our modest needs. The wick system's ease makes it a solid starting block before possibly advancing to these more intricate setups.

How to Get Rid of Pythium: Prevention for Hydroponic Systems

how-to-get-rid-of-pythium

How to Get Rid of Pythium in Hydroponics

Hydroponics, a method of growing plants without soil, is becoming increasingly popular amongst gardening aficionados. Instead of soil, roots bask in a nutrient-rich water solution, allowing us to conserve space and water. This innovative approach not only works year-round, irrespective of the season but also satisfies our inner techie, as it involves a fair amount of gadgets and gear. However, with great innovation comes new challenges, and among our many new obstacles is Pythium root rot.

Pythium, also regarded as root rot, is a notorious root disease that haunts the watery realms of our hydroponic systems. As the roots are consistently submerged, any slight imbalance can be the harbinger of this pathogen. Identifying and scouting for the telltale signs of this ailment—such as discolouration and a mushy texture of the roots—is crucial in maintaining the health of our leafy friends. This article is crafted to equip you with the knowledge on how to spot, banish, and most importantly, keep Pythium at bay. Our objective is to embrace the benefits of hydroponic gardening without letting Pythium dampen our spirits or leaving our grow with infected roots.

Rest assured, we're not just talking about organic chemistry but also practical tips and tried-and-tested products that will ensure your water culture endeavour is both a leafy paradise and a Pythium-free zone.

Key Takeaways

  • Maintaining a healthy hydroponic system requires vigilant monitoring for Pythium.
  • Treatment of Pythium involves the removal of affected parts and the use of specific solutions.
  • Prevention of Pythium centres around proper water management and system maintenance.

What Is Pythium?

Pythium species belong to the Oomycetes class – a group often cheekily masquerading as fungi. However, don't let their appearance fool you; these water moulds are a completely different kettle of fish. Imagine them as distant cousins who only show up at family gatherings to cause a stir. And stir they do, in the form of root rot, spreading despair among plant roots far and wide.

Here's the scoop:

  • Not Fungi: Despite their fungal fashion sense, Pythium isn't a true fungus! That means they play by a different set of rules, evading typical fungal control tactics.
  • Moist Mischief Makers: Wet conditions are their playground, and our water-loving friends thoroughly enjoy invading a range of moist-abiding plants, especially in hydroponic setups where they thrive.
  • Species Galore: It's not just one, but many different species of Pythium that might be plotting to crash your plant party.
  • The Spore War: Pythium's elite troops are their spores – akin to tiny submarines equipped with the ability to swim in water to invade new root territories with ruthless efficiency.

In short, if your hydroponic plants are taking an unexpected turn for the worse, Pythium could very well be your uninvited guest. We need to show them the door with some smart and targeted methods before they turn all our hard work into sludge. 

Symptoms Of Pythium

how-to-get-rid-of-pythium-in-hydroponics-1

Recognising the symptoms of Pythium in our hydroponic system is crucial. We'll learn to spot the tell-tale signs of root rot and understand how this pathogen affects plant growth.

Identification Of Root Rot

When we peer into the roots of our hydroponic plants, healthy ones appear white and robust. However, an encounter with Pythium leads to distinct changes:

  • Discolouration: Roots shift from their vital white to shades of beige, yellow, and ultimately brown or black.
  • Texture: Affected roots become soft and may decay. If we gently tug at a suspect root, the outer sheath might slough away, leaving only a central core behind.

It's important to remember that different species of plants and Pythium can exhibit variations in these symptoms, so keep a vigilant eye out.

Effects On Plant Growth

Pythium doesn't just stop at the roots—its impact climbs up to hinder the overall vitality of the plant:

  • Wilting: Plants might begin to wilt despite adequate water, as the damaged roots fail to transport nutrients effectively.
  • Yellowing and Stunting: Leaves can turn yellow and growth may become stunted, echoing a cry for help from beneath the surface.

We mustn't rush to conclusions, as these symptoms can mimic nutrient deficiencies or other ailments. Only a proper diagnosis can confirm our suspicions of Pythium. Our task is to be thorough detectives in our hydroponic environment.

Causes Of Pythium

how-to-get-rid-of-pythium-in-hydroponics

Pythium is a troublemaker for hydroponic growing and it can be difficult to control. To prevent disease, we first need to understand the conditions that give this pest a party invite.

Contributing Conditions

Moist environments serve as a launchpad for Pythium, offering the damp conditions in which it thrives. Here's a bit more granularity on what we're up against:

  • Temperature: This fungoid enjoys a good bask in a warm set-up. Water temperatures above 72°F are pretty cosy for Pythium.
  • Dissolved Oxygen Levels: Just like us when we're tired, Pythium gets a boost when oxygen levels are low in the nutrient solution. It's an opportunistic little thing.
  • pH or EC Levels: Both the pH and Electrical Conductivity (EC) levels of our nutrient solution can roll out the red carpet if they skew too high. A balanced environment is less inviting.
  • Sanitation: Poor water quality or inadequate sanitation practices might as well be an engraved invitation to Pythium.
  • Water Management: Overwatering or poor drainage is like throwing the party of the year—and guess who loves to attend? You guessed it—Pythium.
  • Contamination: It can hitch a ride on infected plants, media, or even our tools and equipment. So, we've got to keep things clean.

Now, the spread of pythium can occur in other sly ways:

  • Incoming Plants: It may sneak in with infected seeds or cuttings. Always double-check your sources.
  • Plant Debris: Soil or plant leftovers clinging to our gear or clothes? That's a VIP pass for Pythium.
  • Airborne Invaders: Dust or water droplets in the air can float this troublemaker right into our systems.
  • Recirculating Water: Sharing equipment or water can be like sharing secrets – they can spread quickly and not always with good outcomes.

Keep an eye out for these risk factors and you'll be better prepared to keep Pythium at bay. 

Prevention Of Pythium

how-to-get-rid-of-pythium-in-hydroponics-3

Before Pythium infects our hydroponics system, prevention is crucial—it saves us money, time, and the heartache of seeing our plants suffer. Knowing that an ounce of prevention is worth a pound of cure, let's focus on specific practices to keep this pesky water mould at bay.

Sanitation And Hygiene

We all know cleanliness is next to godliness, right? In hydroponics, it's no different:

  • Routine Cleaning: Every nook and cranny of our system, from reservoirs to pipes and trays, must be regularly disinfected. This means using approved sanitisers and diligently cleaning out any organic matter that could harbour pathogens.

  • System Checks: Before we add any new plant or material into our precious environment, we should inspect and quarantine. After all, why invite trouble?

Cultural Practices

Creating an inhospitable environment for any unwanted guests is an art. And by guests, we mean Pythium:

  • Balanced Temperatures: Keeping the temperature of our nutrient solution within the optimal range (18-22°C) isn’t just for the comfort of our plants; it deters Pythium too.

  • Airflow and Humidity: Ever had a stuffy room make you uncomfortable? Our plants feel the same. Adequate ventilation and humidity control can keep pathogens like Pythium away.

  • Monitor Closely: Use tools such as sticky traps to catch fungus gnats and shore flies, indicators for the prevalence of Pythium. If a plant does look under the weather, we isolate it faster than you can say "quarantine."

Biological Control

Sometimes, we need allies, and beneficial microbes are the friends we didn't know we needed:

  • Introduce Good Bacteria and Fungi: These little chaps engage in a bit of biological warfare and can prevent Pythium from occurring, outcompeting it and keeping our system clean.

  • Good Bugs to Fight Bad Bugs: There are beneficial insects that feed on the larvae of pests like fungus gnats and shore flies. Let's enlist these helpful critters to maintain order.

In our quest to contain Pythium, we've armed ourselves with the best defensive strategies. A clean, well-monitored, and biologically balanced system is our best line of defence. Let's keep our green thumbs up, and our plants thriving!

Treatment Products

how-to-get-rid-of-pythium-in-hydroponics-4

When tackling the stubborn water mould Pythium in our hydroponic set-ups, we must choose the right arsenal. Isn't it just the worst when our plants' roots go soft and brown? Here's what we've got on hand to fight back.

Chemical Treatments

For those of us who prefer a more immediate and powerful approach, chemical treatment options are available:

  • Hydrogen Peroxide: A quick splash of this common chemist's shelf substance can not only knock out Pythium spores but also add a boost of oxygen to the solution.
  • Fungicides: Got a tough case of Pythium? Synthetic fungicides such as fosetyl-Al, propamocarb, or cyazofamid are known to inhibit the growth or germination of Pythium spores, but let's use them judiciously because they can be harsh on the environment and might not be friends with our wallets either.
  • Potassium Silicate: Want to beef up those plant cell walls? Introducing a bit of potassium silicate can make them a tougher nut for Pythium to crack.

Organic Alternatives

Now, for those of us looking to go the green route, here are some natural soldiers to enlist:

  • Beneficial Bacteria: Introducing allies like Trichoderma, Bacillus or even Streptomyces can help our plants by outcompeting the nasty Pythium. They're like the good folks in the neighbourhood watch.
  • Neem Oil: This isn't just a hit in skincare; neem oil is quite the nemesis for Pythium infection. Plus, it's all-natural, so we can sleep well knowing we're not adding nasties to the system.
  • Botanical Extracts: Oils from garlic, cinnamon, and the like can give our plants a fighting chance with their antifungal mojo.
  • Compost Teas & Seaweed Extracts: These aren't just for our mid-garden tea break; they're brilliant at boosting our plants' immune systems.

By integrating these products sensibly, we're armed to the teeth to ensure our hydroponic gardens stay lush, thriving, and Pythium-free.

How To Get Rid Of Pythium

how-to-get-rid-of-pythium-in-hydroponics-5

When dealing with Pythium in our hydroponic systems, the main goal is to halt the spread of this water-borne fungus, safeguarding our plants' health. It's all about understanding and implementing effective remediation strategies to tackle this pesky problem!

Effective Remediation

Got a case of the dreadful plant disease Pythium in your hydroponic setup? Fret not, we've got some clear-cut methods to kick this fungal disease to the kerb. Let's get cracking!

1. Sanitise Your System:

  • Start Fresh: Before we plant our next crop, we must ensure every nook and cranny of our system is as clean as a whistle. Disassemble, scrub, and sanitise with a reliable disinfectant.
  • Sterilise Tools: It's not rocket science, but cleaning our tools is a must. After all, we wouldn't want to inadvertently spread the fungus, would we?

2. Filtration and Water Quality:

  • Filter It Out: A proper filtration system is our first line of defence. It can catch pesky pathogens before they wreak havoc.
  • Water Quality Checks: Regular testing of water quality can prevent a world of trouble. Keep an eye on pH, nutrients, and temperature. Unwanted fluctuations? We nip those in the bud, pronto!

3. Oxygenate the Nutrient Solution:

  • Boost Dissolved Oxygen: Higher levels of dissolved oxygen can stave off Pythium. It's time to inject some air and keep that nutrient solution oxygen-rich.

4. Use Disease-Resistant Varieties:

  • Choose Wisely: Opt for plant varieties known for their resistance to fungal diseases. It's like picking a footballer for their striking skills – they just make the team better.

5. Routine Maintenance:

  • Monitor and Adapt: Keep a tight schedule for checking on your plants. At the first sign of Pythium, we act swiftly to stop it in its tracks.

6. Chemical Controls:

  • Fungicides: In times of crisis, a targeted fungicide for hydroponics can be a real lifesaver. Just remember, timing your application right can make all the difference.

Remember, beating Pythium is all about vigilance and proper care. Stick to these steps, and we can keep our hydroponic gardens thriving, minus any uninvited fungal guests.

Conclusion

To effectively combat Pythium in our hydroponic systems, we've gathered valuable insights into maintaining healthy plant growth and safeguarding production quality. Let's briefly recap the essential measures we, as responsible growers, should implement in our pest management programme.

  • Proactivity is Key: Regularly inspect your hydroponic setup to catch any signs of infection early on. Keep root observation as a top priority. Soft, discoloured roots are a giveaway that Pythium may be at work.

  • Diverse Strategies: Combining various methods, such as good hygiene practices, effective water treatment, and crop rotation, can greatly enhance our chances of keeping Pythium at bay.

  • Follow Guidelines: When using fungicides to tackle Phytophthora and other pathogens, be meticulous about adhering to label instructions and prioritise safety.

  • Seek Expertise: If despite our best efforts the problem escalates, we shouldn't hesitate to consult professionals for advice. After all, we're all in this to achieve the best for our plants.

Remember, the health of our hydroponic system is a reflection of the care we put into it. So let's stay vigilant and nurture our passion for horticulture to its full potential. Here's to our success in creating thriving, productive hydroponic gardens!

How to Get Rid of Pythium FAQs
What are effective methods for controlling Pythium in a hydroponic system?
To control Pythium in our hydroponic systems, we need to focus on water quality and system hygiene. Keeping the nutrient water temperature between 18-24°C and maintaining a pH of around 5.5 to 6.5 are crucial steps. Regularly changing the nutrient solution and cleaning the system prevent the zoospores from swimming towards any damaged roots they're attracted to.
Can you suggest organic solutions for combating root rot in hydroponics?
Certainly! Applying beneficial bacteria and mycorrhizal fungi can strengthen root systems and prevent Pythium naturally. Other organic methods include using hydrogen peroxide or tea tree oil solutions as disinfectants to keep those pesky pathogens at bay.
What steps should I take to prevent Pythium from infecting my hydroponic plants?
Prevention is key. Start with sanitising your seeding area since seedlings are incredibly vulnerable. Ensure your system's tools, containers, and surfaces are sterile. Root health is paramount, so providing adequate oxygenation to the nutrient solution and avoiding overwatering help prevent infections.
Are there any natural predators or biological controls for Pythium in hydroponics?
Indeed! Introducing biocontrol agents such as Trichoderma harzianum can effectively attack Pythium. These beneficial organisms colonise the root zone and compete with the pathogen, thereby reducing its chance of causing harm.
How can I identify and deal with Pythium before it damages my hydroponic crops?
Keep an eye out for discolouration in roots, shifting from white to brown, and a soft, mushy texture. In the early stages, gently tug on the suspect root. If the outer sheath slips off, leaving behind the central core, it's time to act by removing the affected areas and applying treatments promptly.
What are the most common signs of Pythium in hydroponic systems, and how do I address them?
Discoloured, brown, or yellow roots that are soft to the touch are common red flags. If you encounter these symptoms, remove the infected parts and disinfect the system. Use clean water and consider incorporating friendly microorganisms to outcompete the pathogens. It's all about striking swiftly and maintaining cleanliness in our hydroponic haven.

How Much Light For Hydroponics

how-much-light-for-hydroponics

How Much Light for Hydroponics?

When it comes to mastering hydroponic gardening, understanding the impact of lighting on our indoor garden is critical. Ever considered exactly how much light your hydroponic plants need to thrive? Just as humans need a balanced diet to stay healthy, our plants require the right amount of light to grow and produce. Indoor cultivation, where we control the very elements that our plants would traditionally seek from nature – lighting is perhaps the most important of these controlled conditions.

how-much-light-for-hydroponics-1

You're about to learn what hydroponic lighting is, delve into its crucial role in plant growth, and discover how to optimise your lighting system for different types of plants. With our collective experience in gardening, we've pieced together tips, tricks, and essential knowledge that will shed light (pun intended!) on creating the ideal environment for your hydroponic system.

Key Takeaways

  • Proper hydroponic lighting is essential for successful indoor plant growth.
  • The lighting system should be tailored to the specific needs of different plant types.
  • A well-designed lighting setup can significantly enhance your hydroponic garden's yield and health.

What Is Hydroponic Lighting?

how-much-light-for-hydroponics-2

Hydroponic lighting is an ingenious method that allows us to create an artificial substitute for sunlight, which is essential for plant photosynthesis and growth. Why is it so important, you ask? Well, without it, our indoor greens wouldn't stand a chance of sprouting.

Types of Hydroponic Lighting Systems:

  • LED Grow Lights: Highly energy-efficient and long-lasting, LEDs are the new kids on the block. They emit less heat and can be calibrated for different light spectrums.
  • Fluorescent Lights: These are budget-friendly, produce minimal heat, and work great for herbs and lettuce but may not be suitable for larger plants.
  • Metal Halide (MH) & High-Pressure Sodium (HPS) Lights: The old guard of hydroponics, these pack a punch in intensity, perfect for hungry bloomers. Be mindful, they can skyrocket your electricity bill!
  • Ceramic Metal Halide (CDM) or Ceramic Discharge Metal Halide (CMH) Lights: Think of these as the improved cousins of MH and HPS, with better efficiency and a fuller light spectrum.

We're spoiled for choice, aren't we? But what suits best? If it's energy efficiency you're after, LEDs might light up your life. On a shoestring budget? Fluorescents might be your pal. For those heavyweight champion plants? Consider HPS or MH. And for those who want a bit of everything, CDMs/CMHs are the way to go.

In the end, it's all about wavelength and intensity. Our leafy friends love a particular light spectrum for photosynthesis, and the intensity dictates how well they'll flourish. Don't forget, it's a delicate dance of light and dark—the duration of lighting should generally be 14-16 hours, mimicking the natural day cycle.

Understanding Light Cycles

how-much-light-for-hydroponics-3

We must understand that light cycles—patterns of light and darkness—are critical for hydroponic plant growth. They influence not only growth speed but also the overall health and yield of our plants.

Vegetative and Flowering Stage Lighting

Vegetative Stage: During the vegetative stage, our plants need long periods of light to grow leaves and stems—think of this light as their food. A common light cycle for vegging plants is 18 hours of light and 6 hours of darkness (18/6). This mimics the long days of summer and encourages lush, healthy growth.

Blue light spectrum is particularly beneficial during the vegetative stage as it promotes tight internodal spacing—that's the bit between branches—leading to bushier plants. For this stage, we're looking at a high-intensity glow, kind of like the plant's very own indoor sunshine.

Flowering Stage: When our plants hit the flowering stage, they like a bit more rest with 12 hours of light and 12 hours of darkness (12/12). This echoes the shorter days of autumn, triggering them to bloom. If the plants are kept in constant light, or the dark periods are too short, they might not flower properly, and we wouldn't want that, would we?

Red light spectrum now becomes the star of the show, encouraging those lovely blooms. The light intensity may be lowered a tad, creating a sunset effect, which is ideal for flower development.

Manipulating and controlling the light cycle is simple with technology like timers and dimmers. With timers, we can set our lights to switch on and off at the same times each day, while dimmers let us adjust the intensity without startling our leafy friends.

Transitioning from one stage to the next? Planning is key. You've got to tweak your setup slowly. This can be done by gradually adjusting timers and checking on plant health regularly. Remember, it's like nurturing a baby—you wouldn't rush that, would you?

By strategically managing the vegetative and flowering stage lighting, we give our hydroponic plants the best chance to thrive. Keep an eye on them, make adjustments as needed, and you'll have a verdant oasis before you know it!

Sunlight Versus Artificial Lighting

Let's chat about sunlight and artificial lighting and perhaps which is better or worse, what are the pros and cons or either. After all, we want the best for our leafy friends!

Natural sunlight is the real deal, providing a full spectrum of light that contains all the colours of the rainbow, necessary for plant growth. It's what plants have evolved to use, and it's packed with what's known as photosynthetically active radiation (PAR), which is crucial for the photosynthesis process.

Now here's a twist: we can actually replicate natural light indoors! Artificial lighting systems, like LED and fluorescent lights, come to the rescue. An LED setup can be tailored to emit specific light spectra—think red or blue, or a mix of both, which can encourage certain growth stages in plants.

Here's a quick comparison:

Natural Sunlight Artificial Lighting
Full spectrum of visible light Can be customised for various light spectrums
Free and abundant (weather permitting) Costs for purchase and electricity
Comes with UV rays (can be pros and cons) Generally lack UV rays unless designed to include them

But hold on, it's not just about blue and red light. Plants need a rest too, so we've got to balance light and darkness—typically around 14 to 16 hours of light, followed by 10 to 12 hours of darkness for many species.

Remember, whether we opt for sunbathing our plants or giving them a dose of LED goodness, the goal is happy, healthy hydroponic greenery. 

Optimising for Different Plant Types

how-much-light-for-hydroponics

Ever been in that embarrassing situation where your lettuce is as pale as a ghost while your neighbour's is vibrant green? It's all about getting the lighting right, folks. Plants are a bit like us; they have their own preferences. The secret sauce? The ability to provide sufficient light.

Light Needs by Plant Type

  • Lettuce & Leafy Greens: These chaps love light, but not too intense. Around 100-200 lux should do it. They favour a blue spectrum to thrive in their vegetative stage.
  • Tomatoes & Peppers: A bit more demanding, these plants need stronger light, think 400-600 lux. They enjoy a balanced spectrum with both blue and red, catering to both leafy growth and fruiting.
  • Herbs: A mixed bag here, but generally, they're quite happy with moderate light intensity similar to lettuce.

Spectrum, Intensity, and Duration

Spectrum: Get this — plants use specific light spectrums to grow. Blue light, around 400-500 nm, encourages vegetative growth, perfect for those leafy greens. Red light, in the neighbourhood of 600-700 nm, helps flowering and fruiting plants like our friend the tomato.

Intensity: This is measured in lux, and more isn't always better. If you're raising delicate herbs, you don't want to blast them with light fit for a tomato plant, right?

Duration: Some plants prefer long daylight hours; others are more laid-back. Our leafy greens typically enjoy a long day, while fruiting plants need appropriate periods of darkness to trigger their natural processes.

Lighting Setups

Ah, the tech stuff. Full-spectrum LEDs are splendid; they mimic natural sunlight and cater to all plant types. But why not get fancy and mix things up? Combine warm lights with cool ones, match your plants’ needs, and voilà, you'll be the talk of the town... or at least your plants will.

Tips and tricks:

  • Position your bulbs about 30-60 cm above the plants — just right so they don't get sunburned.
  • Adjust the light intensity according to plant type. Start low and increase as needed.
  • Timing is key. Use a timer to simulate natural day-night cycles.

That’s our quick guide to lighting in the hydroponic world. Match the light to the plant, and you’re golden.

Components of a Lighting System

When setting up a hydroponic system, we must get the lighting requirements right, as it's a key driver of plant growth. We'll cover the important components that'll need to slot together like pieces of a puzzle to create the ideal environment for our hydroponic garden.

Bulbs and LEDs

Bulbs are at the heart of any lighting system. There are several types, like High-Intensity Discharge (HID) bulbs which include Metal Halide (MH) for vegging plants and High-Pressure Sodium (HPS) for blooming. Then there are the popular Light light-emitting diodes (LEDs), known for their energy efficiency and long lifespan. Here are the specifics:

  • E27, E40, GU10, and E14 lamps
  • LEDs with a wide range of wavelengths and colour temperatures

Spectrum and Intensity

The spectrum of light influences plant growth, flowering, and fruiting, while light intensity can affect overall plant health. This means we should provide a full spectrum for most stages of growth and tailor the intensity to our plants' needs. Check these out:

  • Opt for LEDs between 3000-4000K colour temperature.
  • Aim for a balance since too much intensity can harm plants just as less can weaken them.

Efficiency and Heat Management

We can't just crank up the lights and forget about them; we've got to manage heat and cooling to avoid cooking our plants and wasting money. Reflectors, such as Euro or Adjust-A-Wings, and ballasts, which come in magnetic, digital, and electronic forms, help regulate power and distribute light evenly. Keep in mind:

  • Match your lamp's wattage with the ballast for efficiency.
  • Use air-cooled reflectors to manage heat, keeping your setup cool.

Remember, to adjust the height and distance of the lights from the plants – it's not just about plugging in and switching on. A bit of tweaking goes a long way!

Designing Your Hydroponic Lighting System

So, you've decided to hop onto the hydroponic gardening wagon — brilliant choice! Let's get you sorted with a lighting system that's spot-on for your plants. Navigating the world of hydroponics can be tricky, but fear not; we're in this together.

First off, grow light coverage is crucial. Think about your grow space — every square foot is precious, right? To keep your plants basking in artificial sunshine, target about 2000-4000 lumens per square foot. That's the sweet spot for bright, happy plants.

Now, onto watts. If you’re scratching your head over how many are needed, here’s a cheeky tip: It's not just about quantity; it's about quality too. Too many watts and you might just dry out your crops! Strike a balance, and as a baseline, look for energy-efficient options like LED or HID lights. They're not only better for your bills, but they're kinder to the environment as well.

Positioning is next. You don't want to scorch your greens, so place the lights about 12-24 inches above your plants for the best distance. Not too close, not too far, just right — just like Goldilocks, eh?

What about timing? We're all about that consistent light cycle. Aim for 14-16 hours per day for veggie stages, and about 10-12 hours of light per day for flowering.

Here’s a quick rundown for easy reference:

  • Coverage: 2000-4000 lumens/sq ft
  • Light Distance: 12-24 inches above plants
  • Lighting Period:
    • Vegetative stage: 14-16 hours/day
    • Flowering stage: 10-12 hours/day

And here's a bright idea — use a timer! It'll automate your light cycles, making your life easier and keeping your leafy friends on schedule.

By factoring in these key aspects, we create a lighting system for our hydroponic setup that's efficient, cost-effective, and just perfect for our plant pals. Now, let's shine some light on those hydroponic dreams of ours!

Technical Insights and Best Practices

how-much-light-for-hydroponics-5

Let's get technical, shall we? When it comes to hydroponics, the light source can make or break our plant's potential. But where do we begin in this when it comes to hydroponic grow lights?

First off, lumens are a big deal—they measure the light's brightness visible to our human eyes, but plants see things differently. They feast on a buffet of light in the range of 400–700 nanometers (nm) for photosynthesis, often called Photosynthetically Active Radiation (PAR). So, we should be eyeing lights that serve up the proper spectral feast for our leafy pals.

Different types of grow lights serve unique purposes:

  • High-intensity discharge (HID) lights, which include Metal Halide (MH) and High-Pressure Sodium (HPS), are like the big kahunas of grow lights. They pack a punch in terms of intensity and light penetration, crucial for big, bountiful yields but beware; they can be hefty on the energy bill.
  • LEDs are the new kids on the block, offering a dazzling energy efficiency performance. They might cost more upfront, but they'll make your wallet happier in the long run with lower energy costs.

Here's a tip-top tip: Maintaining an optimal distance between lights and plants is vital. For most setups, starting around 30 centimetres (12 inches) above the plants is recommended. Watch how the plants respond; they'll tell you if they need more personal space or want the lights closer to their growth patterns.

Now, let's not forget the tech-lifesaver, the lighting schedule! Consistency is key – establish a lighting schedule to mimic Mother Nature’s day and night. This simple routine can vastly improve growth and yield without overtaxing your plants with too much of a good thing.

So, let’s wrap up this enlightening session with a commitment to balance in our indoor gardens or greenhouses. Proper light, be it from HID, LED, or another reliable source, paired with the right schedule and intensity, will get us to the hydroponic harvests we're dreaming of!

Conclusion

When we dive into the world of hydroponics, lighting isn't just a detail—it's a cornerstone for plant success. Let's wrap our heads around the essentials we've learned:

  • Photosynthesis: It’s the lifeline of our plants, and without the right light, it’s a no-go. Remember, chlorophyll in the plant absorbs light to turn nutrients into yummy plant food.

  • Types of Hydroponic Lighting: From fluorescents to LEDs, each option brings something special to the table. It's like finding the perfect pair of gloves; it must fit our plants' needs perfectly.

  • Seedling Stage: Young plants are like toddlers, they need the right amount to flourish—typically 2000-3000 lumens per square foot.

  • Healthy Growth: For most plants, targeting between 2000-4000 lumens per square foot allows them to grow healthy.

  • Spectrum Specifics: Fancy a bushy plant? Blue light is your friend for vegging out. Dreaming of blooms? Red light helps transition our leafy pals to flower power mode.

  • Day-Length Consideration: Those long-day plants are the high-achievers of the plant world, thirsting for more of those bright rays.

We don’t need to be bogged down in complex jargon to understand that the right type of light equates to plant delight. Seedlings to blooming beauties, they all yearn for those lumens in just the right amounts. So, whether it's snugly blue wavelengths or the warm embrace of red, strategic lighting leads to bountiful, healthy growth. Remember, it's not just about giving our green friends a glow; it's about tailoring the lumens and spectrum for the ideal quality of light.

How Much Light For Hydroponics FAQs
What are the optimal lighting conditions for growing vegetables in a hydroponic setup?
For most vegetables, 2000-4000 lumens per square foot is the sweet spot. You'll also want to match the colour temperature to natural daylight, so aim for LED or HID lights with a temperature of 3000-4000K.
Can hydroponic plants receive excessive light, and if so, what are the consequences?
Absolutely, plants can get too much of a good thing—light included. Overexposure or too intense light can lead to issues like leaf burn and stunted growth, which is the last thing we want after nurturing our plants with such care!
For an efficient hydroponic system, how long should the grow lights be left on each day?
This depends on the plants you're cultivating. Typically, 14-16 hours caters well to a wide array of plants, but if you're tending to long-day plants, they'll thrive on 18-20 hours to mimic those long summer days.
What wattage of grow lights is recommended for a standard hydroponic garden?
The wattage requirements can vary, but as a rule of thumb, aim for around 30-50 watts per square foot. Of course, this is just a baseline to start from, and your plants might signal if they need adjustments.
Is it possible to utilise LED lights in hydroponic farming, and are they effective?
LEDs are not only possible; they're brilliant for hydroponics! They're energy-efficient, have a longer life span, and the heat they emit is minimal, which keeps our green friends comfortable.  
What are the different types of grow lights available for hydroponic systems, and how do they compare?
There are a few types to choose from: LED lights are energy-efficient and have a long lifespan. HID (High-Intensity Discharge) lights are powerful but can increase the temperature. Fluorescent lights are good for small spaces and produce minimal heat, but they're not as intense as LEDs or HIDs.

How Much Space is Needed for Hydroponics: Plant Spacing Needs

how-much-space-is-needed-for-hydroponics

How Much Space is Needed for Hydroponics?

Hydroponics is a fascinating form of horticulture that we embrace with open arms. It's how plants are grown without soil, using nutrient-rich water to deliver all the sustenance they require. The beauty of hydroponics lies in its efficiency; it offers us higher yields, significantly less water usage, and unparalleled control over the growing environment. 

how-much-space-is-needed-for-hydroponics-1

One burning question that we often ponder is the amount of space needed for hydroponic growing. You see, space optimisation is the key to promoting healthy plant growth. This article will cover the golden rules of plant spacing—what it is, why it's crucial in a hydroponic garden, and how it affects every aspect of your plant's life. We'll take you through the varying requirements depending on plant types and systems, and share the best tips and tricks on how to maximise your plants' potential.

Key Takeaways

  • Hydroponics maximises space efficiency and controls plant growth conditions.
  • Correct plant spacing is crucial for preventing disease and ensuring healthy yields.
  • Optimising plant arrangement can lead to better results in hydroponic systems.

What Is Hydroponic Plant Spacing?

how-much-space-is-needed-for-hydroponics-2

Ever wondered how close is too close when it comes to setting up our plants in a hydroponic garden? Well, plant spacing is essentially the distance between our green pals, allowing them the room they need to thrive without competing for those vital resources. 

In a hydroponic system, space is at a premium, and we want to utilise every inch. However, cramping plants together is a no-go. They need enough space not just above the ground, but below too, where their roots seek out nutrients and a little breathing room.

The space between plants is not just about elbow room. Spacing affects how we move through our hydroponic garden, manage pests, and a sufficient amount of light and airflow for each plant. Too tight a space can lead to a jungle of trouble, so let’s stick to these guides to keep our green sanctuary peaceful and productive. Let's space out those plants and ensure they want to grow!

Why Is Plant Spacing Important for Hydroponics?

how-much-space-is-needed-for-hydroponics-3

Plant spacing is an important factor in giving our green friends what they need to flourish! Here's the dirt—or should I say the water—on why spacing matters:

Root Space: Our plant's roots are like their private quarters. Just as we need our elbow room, a healthy root system requires space to expand. By ensuring adequate space between our plants, we're ensuring space for their roots, leading to better nutrient absorption and overall health. This is vital in a hydroponics system, where root space can be more limited than in soil.

Airflow & Disease Prevention: Crowd your plants, and you're asking for trouble. Plants crammed together suffer from poor air circulation, which boosts the chances of nasty diseases and pests setting up camp. By spacing plants properly, we help minimise this risk and let our plant pals breathe easy.

Light & Nutrient Access: Plants need ample access to food—step forward nutrients. If they're all squished together, some will hog the light, while others wither in the shade. Correct spacing means each plant gets its fair share of light and nutrients, which can directly influence yield.

Healthy Competition: A bit of competition is healthy, right? Not so much for plants in a hydroponic system. Too close, and they'll battle for oxygen, water, and food. A sensible spacing strategy lets them coexist peacefully, without any veggie warfare.

So, what's the verdict? Keep your plants adequately spaced, and you'll likely see a bounty of benefits:

  • Happy roots with room to grow
  • Fresh airflow and fewer unwanted plant squatters (pests and diseases, that is)
  • A generous helping of light and nutrients for all
  • Peace among the plant kingdom, without a fight for survival resources

Remember, folks, every plant needs its personal bubble to reach its potential. Give them that space, and they'll reward you with growth and giggles (okay, maybe not the giggles, but definitely the growth).

Spacing Requirements

how-much-space-is-needed-for-hydroponics-4

When setting up our hydroponic garden, we need to be mindful of giving our plants enough space to flourish! Here's the lowdown on different spacing for a variety of greens and veggies.

Leafy Greens

Our leafy green friends such as lettuce and spinach love to get closer than most. They thrive well with just 4-8 inches (10-20 cm) of space. This snug fit works wonders, especially when using an NFT (Nutrient Film Technique) system, which perfectly suits their modest footprint with spacing often at 4-6 inches (10-15 cm).

Tomatoes

Tomatoes are the extroverts of the plant world, demanding more space to spread their branches. A comfortable 12-18 inches (30-45 cm) between each tomato plant is recommended. If they're part of a drip system, keeping them at the wider end, about 12 inches (30 cm), should give them everything they need to thrive.

Herbs

Basil, chives, and their aromatic pals prefer a bit of room to breathe and grow, typically needing 6-10 inches (15-25 cm). It's also spot-on for systems like wick or aeroponic, which often recommend spacing around 6-8 inches (15-20 cm) and 8-10 inches (20-25 cm) respectively.

Larger Plants

For larger plants that need more room to stretch out, like peppers and cucumbers, giving them 18-24 inches (45-60 cm) allows them to mature nicely without competing fiercely. If we're talking about systems like DWC (Deep Water Culture) or Ebb and Flow, they generally work best with more generous spacing, sometimes up to 14-16 inches (35-40 cm) between plants.

Optimising Space in Hydroponics

When we dive into hydroponics, our goal is often to make the most of every square inch. It's about cleverly arranging our green friends to grow up, not just out, and ensuring every precious spot is utilised wisely. Here's how we get creative with our space.

Hydroponic Towers

Hydroponic towers are our clever vertical allies that see plants grow upwards rather than sprawl out, making them ideal for use in limited spaces like urban dwellings or compact greenhouses. These towers come in various forms, such as:

  • Tower Gardens: A self-contained system perfect for leafy greens and herbs.
  • ZipGrow Towers: These stackable units are fantastic for greens and can be productive in a commercial setup.

The beauty of these towers is that they use less land while maximizing yield. Here are some tips:

  • Deep Water Culture (DWC): A system where we suspend our plant roots in nutrient-rich water. Great for a tower, wouldn't you agree?
  • Nutrient Film Technique (NFT): This involves a thin film of nutrient solution running over the roots, a neat match for those vertically stacked greens.

We can take lettuce as our classic tower crop:

  1. Spacing: About 6-8 inches apart. This allows plants to grow without choking their neighbours.
  2. Pruning: Regularly removing any sad or sagging leaves to keep our towers neat and tidy.

Bonus Tip: Ensure all plants get their fair share of light by rotating the towers periodically.

Vertical Hydroponics

With vertical hydroponics, we're not just stacking; we're also facilitating a symphony of growing techniques to expand vertically while nurturing each plant. Consider:

  • Greenhouses: Perfect environments for vertical hydroponics. They protect our plants from the weather's mood swings while letting them bask in the glow of the sun.
  • Aeroponics: Lettuce loves this; suspended in air with misted roots. When stacked, it's a sight to behold and a pleasure for the palate.
  • NFT: It's like a conveyor belt of nutrients for our vertically stacked green buddies. It's an efficient way to go up in the world of hydroponics.

We can guide our plants lovingly up the path we choose with:

  • Pruning: For example, our tomato plants appreciate a tidy-up, keeping one strong main stem by removing those sneaky suckers.
  • Training: Cucumbers enjoy climbing, so we've got to give them a trellis or stake to shimmy up.
  • Trellising: Peppers don't have the strength to go it alone - a bit of support keeps them upright and fruitful.

Remember, whether we are working with NFT, DWC, or any other hydroponic setup, it's all about maximising our resources and getting creative with spacing for hydroponic plants. It's not just about verticality; it's about intelligent, sustainable growth. Happy stacking!

Benefits of Spacing

how-much-space-is-needed-for-hydroponics-5

Why fuss about plant spacing in hydroponics, you ask? A successful hydroponic system gives its plants enough space to grow. It's about their health and how much they'll reward us with their bounty.

Better Light, Better Life: When we space our leafy friends correctly, we ensure they get equal invites to the sun's party - meaning each plant gets its fair share of light for photosynthesis. No one gets overshadowed, literally. This could lead to an increase in harvest—envisioning 25% more lettuce just because we spaced it 6 inches apart instead of 4. Who wouldn't love that?

Disease? Not on Our Watch: By spacing plants, we promote adequate airflow, creating an unsavoury environment for those pesky fungi and bacteria. For example, by giving tomatoes a luxury of 12 inches of space, we could slash the likelihood of infections by half. Who knew elbow room could be so powerful?

Drinks on Us: With proper spacing, water and nutrient solution access is no longer a game of Musical Chairs. Each plant has its VIP section for roots to drink up and absorb nutrients without hustle, reducing stress and resource competition. This special treatment can also lead to more robust growth and stability.

So let's give our plant pals the space they need, and they'll thank us with a bounty we can all be proud of at harvest time. It's a win-win scenario.

Conclusion

We've seen that an understanding of plant spacing is critical for successful hydroponics, and it's clear how essential it is for optimising resource use and enhancing plant health. For various plant types, we recognise that space needs aren't one-size-fits-all.

  • Leafy Greens: Small spaces work fine.
  • Tomatoes: Space at 45-60 cm for healthy growth.
  • Peppers: Approximately 25-45 cm between plants.

With hydroponics, we cleverly utilise otherwise limited space and, with techniques such as vertical growth and pruning, we ensure each plant has just what it needs to thrive. And it's not just about maximising space; it's about maximising plant potential.

The boons we've uncovered are compelling. Hydroponics, when done right, leads us to bountiful yields while being stingy on water usage. It places us at the helm, steering the growing conditions to perfection. What's more, we're not so reliant on traditional farming resources—think how much soil we're saving, and let's not start on the reduced need for pesticides. Plus, we're harnessing energy effectively, with many systems leaning on solar power or other green energy sources, meshing sustainability with modern farming practices.

Let's take a moment to appreciate the innovation here. We have found smart ways to do more with less and the environment is sending us a big thank you. As we continue to fine-tune our hydroponic systems, we're not just farming—we're helping the planet.

How Much Space Is Needed for Hydroponics? FAQs
What is the minimum area required to set up a basic hydroponics garden?
The smallest footprint for a hydroponic system could be as limited as 10 cm by 30 cm. It also requires around 28 cm in height, which is perfect if you're tight on space.
How does plant spacing vary for different crops in hydroponic systems?
It very much depends on the type of plant you're growing. Tomatoes, for instance, need about 35-50 cm between each other, with rows standing 60-90 cm apart. Peppers need a bit less elbow room, requiring 25-45 cm between plants and 45-60 cm between rows.
Can you suggest a space-efficient layout for a hydroponic setup at home?
Absolutely! A vertical or tower system is like a high-rise for plants. It maximises space upwards, allowing for an impressive 40 plants in just about 0.15 square metres. Quite the space-saver, isn't it?
What considerations should be made for spacing in a commercial hydroponic farm?
On a commercial scale, it's a bigger picture. You need to balance plant density with accessible paths for maintenance. Usually, larger plants and high-yielding crops require more space per unit, ensuring they get ample light and nutrients. It’s all about planning with growth in mind.
How does the space requirement for hydroponic gardening compare with traditional soil gardening?
Generally speaking, hydroponics can be more space-efficient than traditional soil gardening. We’re talking fewer weeds, less spacing needed for root expansion, and the ability to stack systems vertically. Your plants are happier, and so are you with all that saved space!
What size hydroponic system would be suitable for a small-scale commercial operation?
For small commercial ventures, we're looking at a system perhaps starting at a few square metres. It could support a variety of crops with varying space needs. The key is to tailor your system size to the market demand and growing conditions—there's no one-size-fits-all here. Remember, the best space is the one that works for you and your plants, whether you've got a window sill or a warehouse!

Do You Need a Grow Tent for Hydroponics: Perfecting Indoor Grow

Do You Need a Grow Tent for Hydroponics: Perfecting Indoor Grow

Do You Need a Grow Tent for Hydroponics

Engaging in hydroponic gardening means we're taking the reins in our quest for fresh produce, sidestepping the reliance on traditional soil-based methods. By delivering water and nutrients directly to our plants' roots, we're able to turbo-charge their growth. Now, if you're just like us, always on the hunt for the most efficient indoor gardening setup, you might be asking, "Do we really need a grow tent for our hydroponic system?"

A grow tent with hydroponic equipment set up inside, surrounded by plants and artificial lighting

The simple answer is, not necessary, but hear us out. Quality grow tents can be like secret gardens. A hydroponic tent is a box that can give us complete control over the growing environment. From tweaking the climate to keeping pests out, a good indoor grow tent sets the stage for plants to thrive. Think about it, a grow tent kit isn't just a purchase, it's an investment in our green-fingered hobbies or businesses, ensuring healthier plants and potentially larger yields.

By diving into this article, we're going to learn all about the ins and outs of grow tents and how they can elevate our hydroponic gardening game. Our collective experience in the field has taught us that having a solid structure and the right equipment can make a world of difference. So, let's cut through the greenery and get straight to the root of whether we should get a grow tent into our indoor hydroponics.

Key Takeaways

  • Grow tents offer a controlled environment for different types of hydroponic systems.
  • Selecting the right grow tent involves considering size, materials, and equipment compatibility.
  • Maintenance is crucial for the longevity and effectiveness of a grow tent in hydroponic setups.

What Is a Grow Tent?

Want to grow hydroponic plants that thrive indoors? Meet the grow tent. This nifty invention is essentially a portable enclosure that provides an optimal habitat for plant growth. The fabric of a grow tent is typically light-proof and water-resistant, ensuring your plants get exactly the right amount of light and no unwanted moisture gets in. Its sturdy frame usually comprises metal poles and connectors, laying the foundation for a resilient structure.

Within these engineered confines, the inner lining boasts highly reflective material—a boost for plants needing reflections of light to reach all their parts. The idea is, no photon goes to waste. To keep conditions ideal, there’s also a system in place for ventilation and filtration: it manages airflow and filters out any unwelcome odours.

Here’s the diverse family of grow tents:

  • Small Tents: Perfect for beginners or those with limited space.
  • Medium to Large Tents: Ideal for hobbyists looking to expand.
  • Extra-Large & Multi-Chamber Tents: For the serious growers out there, these provide ample space and environment control.

Setting up is straightforward. First, pick a spot in your home. Next, mount the frame, drape over the fabric, and kit out the interiors with essentials like lighting and, of course, your hydroponic system.

While not indispensable, a grow tent is like a best friend for hydroponic gardening. It’s there to battle light leaks, pests, fluctuating temperatures, and humidity mishaps. Also, should you wonder about the noise or odour, a grow tent has it sorted.

What if you ditch the tent for a spare room or a greenhouse? These alternatives have their perks, but they often fail to match the convenience and control a dedicated grow tent offers. We've looked into this, and the evidence points towards grow tents solving a majority of the problems faced when growing without one. It’s no surprise that scores of plant enthusiasts are singing praises about their grow tents. So why not join the hydroponic harmony and give your plants the home they deserve?

Benefits of Grow Tents

A grow tent sits in a bright, spacious room with hydroponic equipment inside. Plants thrive under the grow lights, surrounded by the benefits of controlled environment

When we venture into hydroponic gardening, grow tents quickly become our best allies. The advantages of using a grow tent are tailored for indoor cultivation. Let’s walk through the specifics and see exactly how these handy tools elevate our gardening game.

Light Control and Reflection

Have you ever noticed how plants turn towards the sun? Light is their lifeblood, and in a grow tent, we have total command over it. Grow tents are lined with reflective material, like mylar, that bounces light back to our plants inside the tent, ensuring no photon goes to waste. We can also wave goodbye to any worries about light leakage, both in and out. By having light-proof features, these tents prevent any pesky external light from disrupting our plants' precious sleep during their dark cycle.

To enhance photosynthesis and productivity, we can adjust our lights to match the needs of different life stages. Different lights such as LED (light-emitting diode), HPS (high-pressure sodium), CFL (compact fluorescent lamps), or CMH (ceramic metal halide) can be optimised with timers, dimmers and sensors – a perfect buffet of options for our green friends.

Pest Management

Picture this: a sanctuary for our plants, safe from the outside world of creepy crawlies. Grow tents act as a fortress, keeping out uninvited guests like insects and their pesky pathogens. By creating an isolation zone, we reduce the risk of infestation from common pests and the spread of diseases they bring.

Keeping a grow tent clean is simpler than open spaces, and introducing non-toxic but effective deterrents—like diatomaceous earth and neem oil—adds another layer of defence. Regular plant and equipment inspections are a snap in the organised space of a grow tent, complementing our pest control strategies.

Energy Efficiency and Cost-Effectiveness

Here's a win-win situation: grow tents are energy efficient. They’re like a snug cocoon, maintaining a consistent climate by retaining the warm or cool air produced by our systems. This reduces the need for heavy reliance on extra temperature control equipment.

It's not just about a comfortable environment; it's about the bills too. By cutting down on additional heating or cooling, we are being kind to our wallets and the environment. LED lights, paired with variable speed fans and carbon filters, are some nifty gadgets we can choose to maximise energy efficiency.

Optimising the Growing Environment

The beauty of a grow tent lies in its ability to create a micro-universe where we have the power to fine-tune the environment. We're talking about absolute control over factors such as temperature, humidity, and airflow. Add in extras like CO2 enhancement, and nutrient management and our plants are living the high life.

Customising the environment isn't just about pampering our plants; it lets us cater to a diverse array of crops, each with its unique environmental appetites. With the help of automated systems like timers and sensors, we can ensure that our plants thrive in conditions that are just right for them.

Selecting the Right Grow Tent

When venturing into hydroponics, it's crucial that we select a grow tent that not only fits our space but also meets our growing needs in terms of quality and budget. This decision dramatically impacts our plant yield and overall gardening satisfaction.

Considerations by Size and Space

When determining tent sizes, we have to consider the available space and the expected yield. A common size for personal use is 120cm x 120cm x 200cm, which fits comfortably in most grow rooms. We also need to account for the height of our plants and the room required for lighting and ventilation systems, which can affect our potential yield. Here are key size metrics to keep in mind:

  • Room Dimensions: Measure our available space.
  • Tent Height: Ensure it allows for plant growth and equipment.
  • Yield Projection: Balance size with the expected yield to avoid crowding plants.

Assessing Quality and Features

Quality and features should not be compromised due to budget constraints. Good grow tents like Gorilla Grow Tents or Secret Jardin are renowned for their durability and thoughtful designs. The material should be robust, typically canvas with a reflective interior lining; heavy-duty zippers lessen wear and tear. The frame's strength is pivotal for supporting equipment. We should look for:

  • Material: Dense fabric with a reflective lining.
  • Zippers: Should be heavy-duty for durability.
  • Ventilation and Filtration: Proper holes and ports for air circulation.
  • Accessories: Check if there are extras like tool pockets or viewing windows.

Budget-Friendly Options

We want to make the most of our investment without sacrificing quality. Brands like BAY6 or BudBox offer affordable alternatives with essential features for successful hydroponic cultivation. We need to:

  • Research: Look into various brands and read reviews.
  • Compare Prices: Check for the best deals within our budget.
  • Warranty: A good warranty can save us from future costs.
  • Deals: Seasonal discounts can lead to great savings without cutting corners in quality.

Remember, a reliable grow tent can be the difference between a bountiful harvest and a disappointing one. Taking our time to weigh these considerations will lead us to the perfect grow tent match for our hydroponic garden.

Key Grow Tent Equipment and Accessories

A grow tent with hydroponic equipment, including lights, fans, and nutrient systems, set up in a controlled environment

When we're setting up a hydroponic grow tent, there's an array of equipment and tent accessories we can't do without. Let me walk you through what's essential for an effective operation.

Lighting Systems and Grow Lights

Grow tents rely on robust lighting systems to simulate sunlight and promote plant growth. The star of this show is usually LED grow lights. These lights are energy-efficient, reduce heat output, and can be tailored to various plant types. Most growers opt for full-spectrum LEDs to cater to all stages of plant development.

  • LED Grow Lights: Provide a full spectrum of light, crucial for plant photosynthesis.
  • Timers: Enable automatic light cycling, mimicking natural day/night patterns.

Ventilation and Airflow Components

Good air circulation is vital for plant health, and it starts with fans and a carbon filter. These aren't just fancy add-ons; they're crucial for maintaining air quality and temperature.

  • Fans: Create airflow, strengthen plant stems and prevent mould.
  • Carbon Filter: Eliminates odours and filters out contaminants.

Climate Control Devices

Controlling the microenvironment within your grow tent is vital to make plants grow. We're talking about installing heaters and humidifiers to manage the temperature and humidity levels, along with a control system to keep everything in check automatically.

  • Heaters: Keep your plants toasty when the temperature drops.
  • Humidifiers: Add moisture to the air, essential for young plants.
  • Control System: Automates climate adjustments, keeps your hands free.

Hydroponic Systems Integration

Lastly, our tent makes a cosy home for the hydroponics system. This is the heart of the operation, where the magic happens, and integrating it seamlessly with the tent ensures your plants get the nutrients and water they need without any hassle.

  • Hydroponic Systems: The foundation of your grow tent, allowing plants to thrive without soil.
  • Timers & Controllers: Automating nutrient and water cycles is a no-brainer for consistent feeding.

And there you have it! With these key pieces of equipment and accessories, we're good to set up a grow tent that's the envy of hydroponic gardeners everywhere.

Maintenance and Cleaning

A grow tent sits in a clean, organized space with maintenance tools nearby

When we're talking about hydroponics, keeping our grow tent in top shape is crucial. This isn't just about making it look good, it's about ensuring our plants thrive in a clean environment. So, what's the drill for maintenance and cleaning?

Firstly, let's tackle cleanliness: Weekly check-ups prevent dirt accumulation that can lead to mould or pests, which we certainly don't want. Here’s a quick list to keep us on track:

  • Remove Debris: Get rid of fallen leaves or unused plant matter. It keeps things tidy and disease-free.
  • Wipe Surfaces: A gentle cloth with mild soap and water should do the trick for most surfaces.
  • Disinfect: After harvests or periodically, it's a good plan to use a horticultural disinfectant. Remember to follow the product’s instructions carefully – safety first!

Table 1: Suggested Cleaning Schedule

Frequency Task
Daily Inspect plants, check for pests
Weekly Surface cleaning, tidying up
Monthly Thorough cleaning, equipment check
Bi-annually Replace wear-prone parts

Durability plays a significant role too. By regularly maintaining our equipment, we’re not just looking after the plants, are we? We’re also ensuring our gear lasts longer, saving us money in the long run.

And let’s discuss the need for odour control. Hydroponics can get a bit smelly, so we use carbon filters or odour neutralizers to keep that freshness intact. Keep an eye, or rather a nose, on those!

Finally, maintenance isn’t just about cleanliness. Keep an eye on signs of wear and tear. Hoses and nozzles might need replacing, and lights checked for optimal performance.

Remember folks, a little upkeep goes a long way. It keeps our green friends happy, and isn't that what we all want?

Enhancing Grow Tent Functionality

A grow tent with hydroponic setup, LED lights, and ventilation system

Have you ever pictured your grow tent performing beyond its basic functions? Let's dive into some nifty tweaks and safety tips that can elevate our indoor gardening game to the next level!

Advanced Customisations and DIY Modifications

Let's get our hands dirty with a bit of DIY, shall we? Using grow tents with reflective materials can significantly boost light efficiency. You might want to consider lining the walls, ceiling, and even the floor with a highly reflective mylar sheet or reflective white paint. This ensures that our precious plants receive light from all angles, maximising growth potential.

Talking about DIY modifications, we can seal any gaps with weather stripping to ensure the environment remains controlled and consistent. It's also a fab idea to integrate automated systems for temperature, humidity, and lights, which keeps things running smoothly even when we're out and about.

Furthermore, installing extra bars or mounts gives us the flexibility to hang additional lights or fans as our plant babies grow taller. We're creating a custom palace for our greens; how exciting is that?

Safety and Discreet Gardening

Now, who wouldn't appreciate a sneaky little garden that's also safe and sound? Privacy, discretion and safety – the trifecta for peace of mind in indoor gardening. By ensuring our grow tent is properly sealed and using carbon filters, we can avoid any tell-tale scents from becoming a social faux pas.

If we speak safety, upgrading to fire-resistant materials and ensuring our electrical setups are up to standard can prevent any unexpected hot surprises. 

And for the ninja gardeners among us, quiet fans and soundproofing materials are lifesavers to keep that low-key profile. After all, we wouldn't want the entire neighbourhood chatting about our secret garden, would we?

Conclusion

Hydroponics is an innovative method of indoor farming that allows us to grow plants without soil. As beginners embarking on an indoor growing adventure, we might consider placing our grow in a tent. Through our journey, we've discovered several compelling reasons to invest in a grow tent for your indoor set-up.

First and foremost, a grow tent creates a controlled environment. We can tailor conditions like temperature, humidity, and light to our plants' specific needs. The importance of such precision cannot be overstated—it's the difference between a thriving garden and a lacklustre one.

We’ve gathered that grow tents:

  • Increase plant growth rates and yields
  • Protect plants from pests and environmental contaminants
  • Save energy due to reflective interiors that maximise light efficiency
  • Offer odour control with carbon filters, keeping our homes fresh

In the scope of hydroponics, the use of a grow tent is akin to giving our plants a first-class ticket to optimal growth. They flourish in the consistent conditions nurseries provide, something particularly crucial for sensitive crops.

Let's not forget the space efficiency! Grow tents come in various sizes, ensuring that we make the most out of our available space, no matter the size constraints.

So, do we need a grow tent for hydroponics? If we seek optimal yields, healthy plants, and a sustainable indoor garden, the answer leans heavily towards yes. Remember, the right tools in gardening can make all the difference, and a grow tent certainly fits the bill. Let's embrace this fantastic addition to our hydroponic systems and watch our green friends thrive!

Do You Need A Grow Tent For Hydroponics FAQs
Can you successfully grow hydroponic plants without using a grow tent?
Absolutely! You can grow hydroponic plants without a grow tent by ensuring they still receive the right amount of light, nutrients, and care. Maintaining an appropriate environment is key, whether it's in a sunny room or under specialised grow lights.
Are grow tents necessary for hydroponic gardening indoors?
Grow tents aren't necessary, but they're quite helpful for creating an ideal growing environment indoors. They're great at keeping things tidy and can help you control temperature and humidity levels. If you're space-constrained or want a neat setup, they're worth considering.
For those new to hydroponics, is investing in a grow tent a must?
Investing in a grow tent isn't a must for hydroponic beginners, but it might make the learning curve less steep. It simplifies variables like light and temperature control, which can otherwise be quite daunting to manage when you're just starting out.
What are the alternatives to using a grow tent for hydroponic vegetable cultivation?
There are quite a few alternatives to using a grow tent: Use a sunny spot in your home, Construct a greenhouse, Repurpose a cabinet or closet with grow lights and reflective material, Simply use open space with correctly set up light sources and environmental controls.
Beyond just grow lights, what are the essential requirements for a thriving hydroponic system?
A thriving hydroponic system requires: A reliable water circulation system, Proper nutrient mix solutions, Controlled temperatures and humidity, Adequate air circulation, Regular monitoring and pH balancing, Appropriate light cycles with either natural lighting or grow lights.
What are the pros and cons of creating a DIY grow tent compared to purchasing a ready-made one?
Creating a DIY grow tent can be cost-effective and allows for customisation to suit your specific needs. On the flip side, it might be time-consuming and requires some DIY skill. Purchasing a ready-made one is about convenience; however, it can be pricier and you might end up with more features than you really need.

How to Use Coco Peat in Hydroponics: Tips for Perfect Growth

How to Use Coco Peat in Hydroponics: Tips for Perfect Growth

How to Use Coco Peat in Hydroponics

Imagine our plants thriving, their roots immersed not in the earth, but in nutrient-rich water. This is the essence of hydroponics, the innovative gardening method where soil is replaced by water, allowing for an efficient, space-saving way to grow plants. Indeed, hydroponics changes the game for apartment dwellers and urban farmers alike, turning balconies and rooftops into lush gardens.

how-to-use-coco-peat-in-hydroponics-1

In the heart of hydroponic gardening lies a range of growing media – and one worth our attention is coco peat. Derived from coconut husk, the finer form of peat has become a popular choice for its affordability and effectiveness. It acts like a sponge, holding water and nutrients in a form accessible to our plants. By choosing coco peat, we opt for a sustainable and renewable medium that helps our hydroponic gardens flourish.

Throughout the article, we will dive into the practicalities of using coco peat in hydroponic systems. We will explore its benefits, such as its high water retention and aeration properties, and look at potential drawbacks, such as the need for buffering. We'll see how it stands up against other hydroponic media and offer guidance on how best to integrate coco peat into our hydroponic endeavours. 

Key Takeaways

  • Coco peat is a sustainable medium that's superior for hydroponic gardening.
  • It stores water and nutrients well but requires proper preparation.
  • Comparing media and following usage guidance enhances hydroponic success.

What Is Coco Peat?

how-to-use-coco-peat-in-hydroponics-2

Have you ever wondered what coco peat is? It's a fantastic growing medium, especially if we're delving into the world of hydroponics! Coco peat, or cocopeat, is a natural by-product made from the dust, or 'pith', of coconut husks—the tough exterior of coconuts. Coconut Coir is also made up of ground coconut husk but in a coarser, fibre form. There are many growers using coco coir in hydroponics but our focus today will be on the finer, dust form of coco peat. Let's dive in and see why it's a darling in the hydroponic community.

The properties of coco peat are rather impressive:

  • High water retention: It acts like a sponge, holding moisture superbly well.
  • Low nutrient content: It's pretty inert, which means it doesn't come packed with nutrients.
  • Neutral pH: Plants love stability, and coco peat provides a stable pH environment, usually between 5.7 and 6.8.

When you're browsing the shelves, you'll likely come across coco peat in various forms, such as:

  • Bricks
  • Discs
  • Plugs
  • Bales

Why the popularity, you ask? Well, this organic medium is not only biodegradable but also widely available and quite affordable. It's versatile too—suitable for all sorts of plants.

Using coco peat in our hydroponic setup includes:

  1. Hydration: We soak it in water, and voilà, it expands into a fluffy material.
  2. Washing: It's given a good rinse to shed any excess salts – no one likes an overly salty situation.
  3. Mix it up: Combining coco peat with perlite or vermiculite adds that extra oomph for better aeration and drainage.

We plant our seeds or seedlings in the coco peat and make sure they're watered with a nutrient solution tailored for coco peat's needs, rich in calcium and magnesium. What's special about coco peat in hydroponics, you ask? It's all about being a snug home for plant roots, offering a constant moisture level whilst ensuring they have enough oxygen. Plus, it becomes a hotspot for friendly microbes that are great for plant health.

So, we can say Coco Peat is quite the hydroponic hero, don't you think?

Coco Peat Advantages

how-to-use-coco-peat-in-hydroponics-3

When we discuss hydroponics, the medium we choose is crucial for the success of our plants. Coco peat comes to the fore not only for its incredible capacity to foster robust plant growth but also for its remarkable sustainability credentials.

Boosts Plant Growth

Coco peat is a star performer in the hydroponic medium lineup, primarily for its ability to support and accelerate plant growth. Its porous nature allows roots to breathe and grow freely, while its excellent nutrient-holding capacity ensures that our seedlings get all the sustenance they need. The result? Thriving plants and impressive yields!

Environmentally Friendly Option

We're all looking for ways to garden more sustainably, and using coco peat is a step in the right direction. As an organic by-product of the coconut industry, it's both renewable and biodegradable. We're repurposing what would otherwise be waste, turning it into something that benefits us and our plants—a true eco-win!

Excellent Water Retention

Ensuring consistent moisture for our plants can be a hassle, but not with coco peat! Its structure allows it to hold water up to eight times its weight, providing optimal hydration for seedlings and reducing the need for frequent watering. And don't worry about drainage; coco peat has got that covered too, ensuring no waterlogging and happy, healthy root systems.

Coco Peat Disadvantages

how-to-use-coco-peat-in-hydroponics-4

In hydroponics, coco peat can be a bit tricky to master. It requires a good deal of initial preparation and some know-how to get it just right. Let's look deeper into what can make coco peat less than ideal for our hydroponic adventures.

Nutrient Uptake Considerations

When using coco peat, we must be on our toes about the salt content, which affects the nutrient solution. You see, coco peat naturally has high levels of sodium and potassium.

  • Sodium: Too much can cause leaf burn.
  • Potassium: Excessive amounts might inhibit the uptake of other nutrients.

So, it's essential to balance these elements with a fertilizer that is low in sodium and potassium. It's also crucial to monitor the EC (electrical conductivity) and pH levels to ensure that our plants can absorb all the nutrients they need without a hiccup.

Maintenance and Monitoring

Now, don't let the low-maintenance allure of coco peat fool you. To get the best out of it, there's a fair bit of upkeep involved:

  • Hydration: Got to soak it right to avoid a parched block.
  • Buffering: A bit like seasoning your cooking pan, so it’s non-stick, we need to prep our coco peat to avoid unwanted chemical reactions with our precious nutrients.
  • Rinsing: We'll need to rinse out the excess sodium and potassium, so our plants don't get a case of the “burns”.
  • Tech watch: Keep an eye on all those gadgets like pumps and timers. They're a bit like us — they can have their off days and need some TLC.

All this to say, while coco peat is a stellar medium in many ways, it's not a 'set and forget' system. It beckons for our attention and a bit of elbow grease to prevent issues like salt buildup or nutrient depletion. But if you're up for the challenge, the rewards can be bountiful!

Coco Peat Compared to Other Hydroponic Media

Choosing the perfect growing medium is pivotal for a hydroponics system. Let's weigh up coco peat against other popular mediums to find the best fit for our plants.

Coco Peat vs Peat Moss

Coco peat, a by-product of the coconut industry, offers superb aeration and moisture retention, making it an ideal medium for various hydroponic setups. It's reusable and has an almost neutral pH, usually ranging between 5.7 to 6.8, which is great for plant growth.

  • Aeration: Coco peat excels with better aeration than peat moss.
  • Sustainability: It's also more sustainable, as peat moss extraction can damage peat bogs, which are important carbon sinks.

Coco Peat vs Perlite and Vermiculite

Perlite is formed from volcanic glass and provides excellent aeration with its coarse structure, but it holds less water than coco peat. Vermiculite, on the other hand, retains water well but can sometimes retain too much, leading to less aeration.

  • Aeration and water retention: Coco peat balances both, while perlite and vermiculite can be too extreme on either end of the spectrum.

Coco Peat vs Rockwool

Lastly, rockwool, with its outstanding water-holding capacity and neutral pH, is a popular choice in hydroponics. However, it's worth noting that coco peat is far more environmentally friendly as rockwool is non-renewable and can be hazardous to produce and handle.

  • Environmental impact: Coco peat is a clear winner here with its eco-friendly features.
  • pH neutrality: Rockwool generally has a more reliable pH neutrality, which can be an advantage over coco peat for certain plants.

Each medium serves particular types of plants and setups well. For example, coco peat is excellent for beginners, while rockwool might suit commercial growers. Perlite is the go-to for those growing drought-loving plants, and clay pebbles are ideal for more substantial plants requiring robust support. Deciding on the right medium often comes down to our specific needs and the desired outcome for our hydroponic garden.

Tips for Using Coco Peat in Hydroponics

how-to-use-coco-peat-in-hydroponics-5

When using coco peat in hydroponics, we're aiming to create a hospitable environment for plant growth. Let’s embark on making coco peat the best substrate it can be for our hydroponic system.

Preparing Coco Peat

To start, we need to properly hydrate our coco peat. Place it in a bucket or large container, and pour in enough water (tap, distilled, or rainwater) to thoroughly soak the coco peat. If it's in brick form, this may take a few hours. The goal is to have it expand and become moist and fluffy.

Next, we'll need to balance the pH. Rinse the now hydrated coco peat with pH-adjusted water — aiming for a pH level between 5.5 and 6.5 is ideal — until the runoff water is clear. This washing process reduces excess sodium and other elements that might be harmful to our plants.

Now, mix the coco peat with other materials like perlite, vermiculite, or coco chips to enhance aeration and drainage. A good mix ratio is 70% coco peat to 30% other materials.

Coco Peat in Different Hydroponic Systems

Coco peat is versatile and suits various hydroponic systems. In systems like Nutrient Film Technique (NFT) or Deep Water Culture (DWC), coco peat is usually placed in net pots or grow bags to support the plants.

Fill your chosen containers with the prepared coco peat mix. We can measure the container's depth with a ruler and ensure we have the right substrate volume.

If we're starting from scratch with seeds — sprinkle them directly onto the coco peat. For seedlings, make a hole with scissors and gently place the plant in, firming the coco peat around it. Label the pots or containers to keep track of our green friends.

Regular watering with a nutrient solution is key, and don't forget to monitor the pH. Keep it steady with our pH meter and adjust as needed to maintain the sweet spot between 5.5 and 6.5.

These steps will help us achieve successful germination and let our plants thrive in their hydroponic home.

Further Considerations

Before diving into the nuances of using coco peat in hydroponics, let's ensure we're setting ourselves up for success. We'll cover how to keep the environment optimal for our plants, tackle unwanted guests, and sustainably manage our resources.

Managing pH and EC

Maintaining proper pH levels and Electrical Conductivity (EC) is crucial for the health of plants grown in coco peat. The ideal pH range is between 5.5 and 6.5, ensuring the nutrient solution is readily available to plants. We need to monitor the EC closely to avoid nutrient burn or deficiency. Here's how we can keep on top of these two parameters:

  • Regular Testing: Use a pH/EC meter weekly to check the levels in the nutrient solution and runoff water.
  • Corrective Measures: Adjust pH by adding pH up or down solutions, and manage EC by modifying the concentration of the nutrient solution.

Addressing Potential Pests and Diseases

Our plants are always at risk from pests and diseases, and coco peat is no exception. Keeping an eye out for and preventing issues is better than dealing with outbreaks. Here are a few tips:

  • Sterilize your Coco Peat: Before reuse, ensure the medium is clean to prevent disease carryover.
  • Monitoring: Regularly inspect plants for signs of pests or disease. Early detection is crucial.
  • Integrated Pest Management (IPM): Use beneficial insects or organic pesticides to manage infestations and avoid harsh chemicals.

Sustainability and Reusability

Coco peat, a renewable resource, boasts excellent sustainability credentials, but only if we use it responsibly. Here's what we need to keep in mind to make the most of its reusable nature:

  • After-harvest Care: Wash the used coco peat to remove old roots and salts. Then, buffer it with a calcium solution to reset nutrient content.
  • Composting: Once coco peat reaches the end of its life, compost it. This returns nutrients back to the soil, completing the sustainability cycle.
  • Mix in New Coco Peat: Add some fresh coco peat to the washed and buffered old medium to maintain the structure and porosity.

Conclusion

We've explored the virtues of using coco peat as a growing medium in hydroponic systems, and it's clear that our research underscores its considerable advantages. Lightweight and sustainable, this medium stands out as an ideal choice for both novice and professional growers aiming to enhance their hydroponic techniques.

Here's what we've learned:

  • Benefits: The unique structure of coco peat provides excellent water retention and aeration, key factors for root development and plant growth.
  • Growing Medium: Its ability to act as a buffer for nutrients allows for more forgiving water and feeding schedules, easing the route to horticultural success.
  • Techniques: Incorporating coco peat into our hydroponic systems is uncomplicated. We start by properly hydrating the medium, balancing its natural sodium and potassium content with a carefully selected nutrient solution.

Remember, the key to making the most out of coco peat is preparation and maintenance. If you've been following our journey, you'll know that detailed attention to the nutritional balance and consistent rinsing will push you towards a bountiful harvest.

Do we face challenges? Of course. But by understanding our plants' needs and giving our coco peat the TLC it deserves, we turn those challenges into milestones of our gardening adventure. The lightweight nature of coco peat also means we save our backs some trouble during setup!

So, let's grab that net cup, hydrate our coco pith, and watch as our hydroponic dreams take root! If we persevere with our chosen techniques and trust in the robustness of coco peat as a growing medium, success in our hydroponic garden isn't just possible – it's within reach.

How to Use Coco Peat in Hydroponics FAQs
What are the best practices for using coco peat in a hydroponic system?
To ensure the success of our hydroponic system, first, we must prepare the coco peat properly. It's crucial to expand the coco peat by soaking it in water, followed by fluffing it to avoid clumping. Then, we rinse it to remove any residual salts. Always maintain a proper water-to-air ratio; this fosters robust root development. During the growing process, we monitor the pH and electrical conductivity regularly to ensure nutrient availability remains optimal for our plants.
Could you explain how to properly buffer coco peat before incorporating it into hydroponics?
Sure, buffering coco peat is essential. This process involves soaking the coco peat in a calcium and magnesium solution for at least 8-12 hours. This step allows the coco peat to absorb these beneficial elements, which in turn displace the naturally occurring potassium and sodium, preventing them from inhibiting nutrient uptake by our plants.
What steps are involved in sterilising coco peat for use in hydroponic gardening?
Sterilising coco peat is pivotal in warding off pathogens that could harm our plants. We can do this by steam treatment or using a biofungicide. It's key to ensure that the material reaches the correct temperature for an adequate amount of time to be effective. Typically, we'd bring the core temperature of the coco peat to at least 70°C and hold it for 30 minutes to ensure we've eliminated any potential threats.
How does coco peat compare to other hydroponic media like Perlite and Rockwool?
Coco peat boasts superior water retention and is renewable, which marks it as a more sustainable choice. It also provides a natural root-stimulating environment. Unlike perlite, which can compact over time, coco peat maintains a good structure. Compared to rockwool, it's more environmentally friendly and easier to dispose of after use. However, each medium has its pros and cons, so our choice depends on plant type and personal preference.
What types of plants thrive best in coco coir when used for hydroponic cultivation?
We’ve found that almost all types of vegetables, herbs, and ornamental flowers prosper in coco coir due to their porous texture and water-holding capacity. Particularly, plants that require a higher air-to-moisture ratio, like tomatoes, peppers, and lettuce, enjoy coco coir. Its versatility makes it an excellent medium for us to experiment with a range of plants in our hydroponic setup.

3 x Papillon on a Light Mover

3 x Papillon On A Light Mover

I have written a series of blogs testing the 315w Papillon in various setups. I really like the light it is without a doubt one of the best grow lights on the market. The reason for doing various tests was to find out how to get the most from this amazing light. I am looking for quality over quantity and I will never sacrifice quality over yield. But having the best quality with a 1g per watt minimum yield would be ever so nice.

  • 2 X 275mm ventilation ports.
  • 2 X 100mm cable ports.
  • 2 X 225mm air-cooled lighting vents
  • 2 X passive vents with Velcro covers.
  • ‘up-lift’ bar to allow for incoming irrigation lines.
  • Strong, black, powder-coated 25mm steel frame.
  • Quick lock, push & click pole assembly.
  • Green viewing window.
  • Very high-quality zips.

I have just finished testing this lighting system and I have been impressed by the results. The quality of the flowers is outstanding as they tend to be when using the 315 Papillons.

The Kit I Used

  • Jupiter light mover kit 2 for a maximum of 3 lights
  • 315w Papillon x 2
  • 1000w Papillon HPS 400v
  • Lumi rope ratchets

Always make sure that you have solid fixings when hanging lighting systems, ask a member of staff at Hyjo for the best instructions for your type of setup.

Set Up For Light Mover

I have mounted my light mover kit on rope ratchets so that I can adjust the heights of the lights as the plants grow. I will be keeping the lights 300mm from the canopy at all times, as this is the best distance to maximise yield. The lights will be travelling 1m on the light rail.

I have bolted the 315s at either end of the crossbar and the 1000w in the middle, for veg, I only use the 315 the 1000w HPS is turned on at day 21 of the flower when the plants have finished stretching.

I’ve set a delay on the light mover of 20 seconds this means it will stop at either end for 20 seconds giving the plants at the edge of the room equal light as those in the middle. I also hung 3 hygrometers from the light rail so I could monitor temp and humidity at all times under each light.

It’s also very important to have plenty of airflow between the lights and canopy, I use 3 wall fans for this 2 that come on with the lights and 1 is on permanently. If you’re leaving fans on permanently make sure you cover up any lights with insulation tape I also use ORCA to cover all of my fans.

Benefits Of Light Movers

  • Less heat build-up
  • The sun moves so why not indoor grow lights
  • The light hits the plants at different angles
  • Increased yield –up to 20%
  • Better quality due to less heat
  • Better use of a light source
  • Plants grow faster

Starting Conditions

Right let’s see what this setup can do, all plants have been in the veg room in 3.8L root pouches and have now been put into 78L root pouches under the 2 x 315s on the light mover.

The lights off temp is set to 24 with a greenhouse heater and humidity is 65% for veg.

Grow Test with Light Mover

Day 7

After a week the plants are all looking good very healthy and green (all plants are growing in DEM super soil) I’ve started to LST the plants now and they are recovering well. The temp between the light and canopy is 25 and the humidity is 70%

Day 14

The plants are growing much faster than normal and they seem to recover from LST a lot faster, I’m very impressed with the light mover so far, I like the fact that the plants get a break from the heat caused by the lights.

Light movers are definitely a good idea to stop heat from being pushed onto the plants. The light is hitting every part of the plant rather than a static light just hitting the top part.

All the way through veg the plants look amazing in every way, I think that by using a light mover I have taken 1 week off my veg time and the 315 Papillon has done an amazing job. Lights off temp is set to 23 and humidity is 50% for flower.

Day 21 

The 1000w Papillon is now turned on as all plants have finished stretching, and the light has been dimmed down to the lowest setting of 600w, I will increase it week by week as needed.

Results and Review

This may be the best lighting setup I’ve ever used. The introduction of the 600w from the Papillon has made a massive difference in flower production. I have flower sites all over the canopy now and the HPS is blending with the 315 at either side so the plants are getting the best of both worlds. I’m keeping the temp between plant and light at 26 and the humidity is 50% the 1000w pap is now set to 750w and will remain at that for the rest of the grow giving me 1380w over the plants. I decided to keep the 1000w pap at 750 as I think anything more than that would be too intense and I don’t want to burn away any terpenes.

This setup is producing massive amounts of flowers it’s a bit of a shock that it’s doing so well. I’m at day 60 now, 14 days until harvest. I feel like the HPS has now done its job and is turned off leaving me with just the 2 x 315’s to finish the plants off. I now set the temp between the light and canopy at 22 and the humidity at 45% until harvest day.

This is a stunning lighting setup: the quality of the flowers is amazing, and that break-in heat makes all the difference. Yield-wise I was able to hit 1g per watt which I’m only happy with. I would heavily advise avid growers to consider their own setups with movers from the extensive range of Hyjo’s products. If you’ve seen what I’ve seen, the right set-up can make a world of difference.

Tips from a Pro: Winning Compost Tea Recipe with DEM

Compost Tea with DEM

One of the very best ways to supplement your soil is a potent compost tea. Below I will share two recipes appropriate for both veg and flower cycles. Every ingredient used is organic and goes a long way to produce the finest smelling and tasting flowers you could possibly hope for.

Required Items:

  • Large Flexi Tank or 20L bucket – you’ll need this to bubble your tea. Choose a size appropriate for your use or set-up.
  • Air Pump – be sure to not purchase a cheap air pump, they don’t last long and soon prove a waste of money. The Hailea 9810 is a good choice if you’re not sure where to begin.
  • Air stones – cheaper gold ball stones may not be so reliable, consider a large flat hailea stone.
  • 1 pair of tights – this will function as a perfect tea bag for the ingredients. Can be bought from any local supermarket for under £5.
  • Product from the DEM Range – take your pick; lush roots, radiant green, brilliant black, fat flowers, etc.
  • Worm castings
  • Seaweed - Bloom nutrients product is particularly outstanding
  • Seafuel- Bloom nutrients
  • Cal mag- Bloom nutrients
  • Alaskan fish mix
  • Guanokalong-bat dung 
  • 1m bamboo cane
  • Reverse Osmosis Water – Using standard tap water can eliminate all living organisms. Considering a reverse osmosis unit is advisable, simply bubbling tap water for 24 hours is not going to do the job.

Compost Tea For The Veg Cycle:

Step 1

Fill Flexi tank with 50L of RO water

Step 2

The air stone needs to be connected to the air pump and placed at the bottom of the tank. Then turn on the pump.

Step 3

2 cups of worm casts should be added to the tights. The tights should then be tied to the cane allowing the tea bag to be suspended in the water. The bottom of the bag should be kept some 15cm off the bottom of the tank. All being well, the cane can be laid across the top of the tank to hold the bag in place.

Step 4

Add the DEM product one or two teaspoons per gallon. Radiant green requires 2 teaspoons. The rest typically demand 1.

Step 5

Add both Bloom Seaweed and Cal-Mag, 50ml each to the water.

Step 6

Finally, 4 caps of Alaskan fish and mix it all up.

Step 7

Let the mix brew for some 48 hours. The ideal temperature range for brewing in the grow room is between 23-27 degrees C. You’ll know when it’s done as there will be a foam head on the top of the mix. Brewing in colder places is inadvisable.

Step 8

Give your plants a drenching of the tea once a week. Ideally, they are to be kept on this tea until the 7th day of flower.  For added goodness, add fat flowers to the tea a week before, approximately 2 teaspoons per gallon. Then feed the compost tea for 3 back-to-back days.

Compost Tea For The Flower Cycle:

This tea is best started come the 7th day of the flower cycle. The same tank/bucket can be used, but be sure to scrub it clean from the previous brew.

Step 1

2 cups of worm casts should be added to 1 leg of the tights.

Step 2

Half a cup of bat dung can be added to the other leg of the tights.

Step 3

Add the DEM product one or two teaspoons per gallon. Fat flowers require 2 teaspoons. The rest typically demand 1.

Step 4

Add both Bloom Seaweed and Cal-Mag, 50ml each to the water.

Step 5

Bubble for 48 hours uncovered.

Step 6

Once a week, drench your plants with the tea. RO water can only be added in between the tea feeding.

Feed up to 14 days to the harvest. Come 2 weeks to harvest, only feed plants with lush roots with 1 teaspoon per gallon. Reverse osmosis water for only one feed. From then on until harvest, RO water only. The soil should be allowed to dry for 2-3 days before harvest.

Final Thoughts

Remember, compost tea is like a super supplement to your plant’s vitality and growth. The recipes provided above are tried and tested concoctions but feel free to experiment and add ingredients of your own. Extra additions like the Organic Bloom Booster are worth a try, it’s about finding what works for you.

It can seem like a lot of products and a fair bit of alchemy going into the compost tea, but give it a try and if you’re unsure, start modestly. Attempt with just one plant in super soil feed. Maybe after one attempt, you’ll never look back!

Growing with super soils and compost teas is one of the very cleanest forms of organic growing. This is a sure-fire way to produce beautiful smelling and tasting flowers and quality is what we’re aiming for in any and every grow.

Dragonfly Earth Medicine: Living Organic Super Soil

Dragonfly Earth Medicine: Living Organic Super Soil

Have you found yourself seeking all the benefits of organic soul but you can’t really be fussed with its slow working? Step forward living organic super soils. These absolute marvels provide potent certified 100% organic products that get to work in a matter of weeks as opposed to years. You can achieve incredible yields of beautiful fragrant flowers with these products and it may change the way you grow forever. This blog will cover DEM’s range in particular, give a breakdown of the entire range of products, how to mix the soil and even a test run of these powerful products themselves. 

What Is Living Organic Super Soil?

If you search online for a super soil recipe you will probably find everyone talking about “subcools recipe”. Subcool is a grower and breeder from the United States who owns the TGA seed company and is regarded as the pioneer for super soil. The problem with subcools super soil is that in the UK we can’t get hold of a lot of the ingredients needed to make it. This is where Dragonfly Earth Medicine’s amazing products come in. DEM has done all the hard work for us and created a range of powdered amendments. These can be used to create an amazing super soil and even better the range is 100% pure organic made from plants.

The idea of super soil is to mix the soil before you fill your pots with amendments. This will give your plants everything they need for the full cycle, once your soil is mixed and your pots are filled you just add water… simple.

DEM Range

Lush Roots

  • A Powerful Organic Herbal Endomycorrhizae Inoculant that encourages ultimate nutrient uptake.
  • Expands root mass and brings biodiversity to your garden. I love this stuff it’s my favourite product at the moment.
  • Use it when you transplant clones I like to dip the jiffy in water and then coat the jiffy to get the roots going

Radiant Green

  • Ideal base nutrient.
  • A Complete Organic Herbal and Bacteria Supplement that supports Ultimate Immune Health for your gardens.
  • A Bio stimulant that is good for every feeding during a plant's vegetative stage. The quintessential brew and soil amendment.
  • This is really good stuff and does an amazing job as a base feed.

Fat Flowers

  • A superb Organic blend of Herbs and Bacteria’s that specifically aide in extraordinary yields.
  • Excellent as an everyday nutrient during the flowering and fruiting stages of a garden cycle.
  • Makes a fantastic brew and soil amendment.
  • This stuff works really well to give you amazing flowers.

Brilliant Black

  • Organic Alfalfa blended with micronized humates and beneficial bacteria.
  • A replenishing and restorative soil amendment for all stages of plant growth.

Natural Mistik

  • A wicked organic herbal blend that is used to nourish plants through foliar spraying.
  • Can be used regularly for clean leaves and Essential Vitamin and Mineral Nutrient Uptake.
  • Pro Tip: Use every other day in the veg stage to keep all the leaves clean and very healthy.

Required Items For Soil Mix

  • Guanakalong soil 45L – One of the best soils on the market. Airy and full of goodness
  • Guanakalong bat dung 450g - This stuff will make your flowers taste amazing and it’s 100% organic it gives a depth of flavour that no bottled nutrients can match
  • Worm castings 5L - You can buy plagron worm castings that are really good these help promote root development and helps with nutrient uptake; full of trace elements, enzymes, and bacteria all needed for a healthy living soil
  • Hydro stones washed- added for extra drainage and aeration of the soil
  • DEM range product
  • Live earthworms x 30 optional - I like adding live worms they create tunnels when they move in the soil creating pockets of air for the roots. Also, you feed the worms and in turn the worms feed the plants just like in nature
  • 56L root pouch- In our opinion, a well-utilised root pouch can help plants grow faster and assure the soil will never get too wet
  • Light mix soil plagron
  • Black and white to mix the soil on
  • Straw to cover the top of the pouch-only if using live worms

Step-by-Step Guide

  1. Lay the black and white sheeting on the ground and empty the 45L bag of soil on to it + worm castings + bat dung
  2. Add 1 teaspoon of all the DEM products per 5L of soil for a short veg time up to 3 weeks so that’s 9 of each and mix it into the soil, add 2 teaspoons per 5L of soil for a long veg time up to 6 weeks. All strains feed at different rates so these ratios are guidelines but don’t panic you can’t do any harm to your plants by over-feeding with DEM products.
  3. Add 10L of the washed hydro stones to the soil and mix them in this is to help with drainage
  4. Add the worms to the mix
  5. Fill the root pouch, add a layer of washed hydro stones to the bottom of the pouch. This is to help with drainage you want a 3inch layer at the bottom
  6. Start to fill the pouch with the soil mix. Fill the pouch leaving a 6inch space at the top
  7. Add clone which has been in the veg room for 2 weeks in a 3.8L pouch. Carefully remove the clone from the pouch and sit it on top of the soil mix in the 56L pouch.
  8. Take the light mix and fill in the space around the clone.
  9. Lay the straw evenly over the top of the pouch. This will protect the worms from the light when they come to the surface. Feel free to add fruit scraps to the surface of the pouch (under the straw) every week for the worms to feed on.
  10. Water the plant every other day with RO water with a ph. of between 6 and 7. Optionally, you can also use a compost tea once a week.

Results

I have just finished my first grow using this method, I could go into major details from the grow journal about this and that but I don’t think I need to. In the last 3 years, my focus has been on producing the best organic flowers that I can and I have tried nutrient ranges from bio bizz and bloom to try and achieve this. Bear in mind that even organic bottled nutrients are not 100% organic as they contain synthetic stabilisers to prevent the contents from going off.

DEM is a step above. What you could call “true” or “pure” organics: all the products are made from plant extract. You're feeding your plants with plants…can it get any more organic than that?

The flowers that I have just produced are the best I’ve ever had in all my life. A mentor to me for many years when I started growing and is probably the best grower I’ve met said he has never witnessed flowers that good from an indoor garden. The results of this product are miles and above anything under the ‘bottled nutrients’ label and I find myself wholly committed to this style of growing. If these results are anything to go by, DEM will give you the ability to produce the most amazing crop you will ever taste or smell.

A massive thank you to everyone at DEM for bringing this range to market, hopefully in time people will come to realise the potential of this fantastic range.

D-Papillon 315W CDM/CMH – AKA ‘the plasma killah’

D-Papillon 315W CDM/CMH – AKA ‘the plasma killah’

I have been reluctant to test this light purely on the basis that I have always done very well with the MH + HPS combo with adjust-a-wings.

But due to hearing nothing but good things about this light from various sources, I decided to give it a test. I will be testing these lights in various setups to see exactly how it perform and more importantly the quality of the flowers they can produce.

What Are CDM/CMH Grow Lights?

CMH is made with an arc tube that is constructed of a ceramic composite instead of quartz. This allows the tube to reach a higher temperature. To achieve the lower temperature in HID lamps made with quartz a combination of gasses must be used that don’t necessarily produce the optimal spectrum for photosynthesis.

The higher operating temperature of the ceramic tube allows for an ideal mixture of gasses. This creates a fuller spectrum of light that increases the growth, overall health and yield of a plant.

CDM/CMH Benefits

Some suppliers claim that one 315w is equivalent to one 1000w HPS in terms of yield this is dependent on other factors in the grow room and the grower's skills.

These lights also have a low heat output because of their low wattage. One watt from a grow light creates about 4 BTUs of heat that needs to be cooled. Let’s say you have 4 x 600w HPS in your grow room that’s 10.000 BTUs from your lights, now trade them for 4 x 315w which is 5.000 BTUs and more yield according to some suppliers. Heat is a massive problem for indoor growers in the summer months so halving your BTUs is a big help and you are doing it without sacrificing quality or yield.

One final advantage CDM/CMH bring to the table is their superior light quality compared to other HID lamps. First, they have a wider spectrum than other HID lamps as a result of the near-perfect, unique combination of salts, halides and gasses used in the arc tube.

This mixture creates a spectrum close to that of the sun and emits a stunning crisp, white light. In fact, the colour rendering index CRI for CDM/CMH lamps is 90-93. To give you some perspective the sun's CRI is 100, HPS lamps range from 20-35 and metal halides range from 60-65 the closer the CRI is to 100 the closer it is to sun light.

In terms of light quality, the CDM/CMH includes ultraviolet and infrared rays in their spectrum, which plants love. The higher amounts of UV rays create stronger woodier stalks, this means the growth and vigour of your plants will be unmatched, especially in the veg stage.

CDM/CMH Drawbacks

There are two main drawbacks to using CDM/CMH lights, 1 is the initial cost of the light, I have been growing for over ten years and have come to understand the value of quality lighting systems, and quality lighting pays dividends at harvest time. I understand that if you have a tight budget for setting up a grow the thought of spending £500 on a light may seem scary but lighting is key for yield so you should never sacrifice this aspect of your grow.

The second drawback (if you can call it that) is that you must wear grow room glasses to protect your eyes if you are spending more than 15 min in a room with 1 of these lights. I recommend that you should always wear grow room glasses at all times in grow rooms even with HPS they cost like £20 and exposure to HID will damage your eyes over time. I spend an average of 8 hours a day in grow rooms so protecting my eyes is a top priority.

The Set Up

A 3-light system with the 315 using the daylight lamp all the way through in the middle. MH for veg and HPS for flowers on either side, this is a 3-light, 3-plant system grown in 60/40 in 32L pots using a run-to-waste dripper system.


400w MH for V HPS for F


315 daylight


400w MH for V HPS for F

First Impressions

When I opened the box the first thing that hit me was the attention to detail and the build quality of the fitting it was far superior to any other fitting I have seen.

The Box Contains

  • 315 fitting
  • Very sturdy hanging brackets
  • Daylight lamp
  • Instructions for setup

Daylight Lamp      

The daylight lamp is optimized in a broad spectrum grow light with an increased share of blue light. The lamp can be used for the growth stage of the plant. 

Veg Cycle

All plants were given a 3-week pre-veg in the same room under CFL lighting to get the roots established all 3 plants will be grown from clones taken from the same mother plant.

I have never seen plants respond so well to a light source from day 1 the plants were super healthy, the light that was coming from the 315 was like nothing I had ever seen, it was crisp and brilliant white compared to the MH on either side. Every light has its own wall-mounted fan that blows air in between the light and the plant canopy, I also like to hang 1 hygrometer per light this is to see if certain parts of a room run hotter than other parts.

What I noticed was that you could put your hand directly under the 315 without any discomfort which meant you could have it closer to the plant, whereas the 600w MH if you put your hand within 10 inches of it your hand started to cook. The temperature difference between the 315 and the 600w MH was around 3-5 degrees C.

Very clever reflector design, you can feel the heat coming out of the sides and raising up around the reflector. Also, very impressed with the even light distribution

Open Reflector Concept

Assimilation lighting is generally known to cause an excess of unusable heat directly below the reflector. This leads to “hot” spots on the top of the plant canopy, which detrimentally affects the growth and development of the plants.

The brand-new Green Power lamps that are used in D-Papillon fittings with electronic ballast produce 34% PAR light, 34% infrared heat radiation and 32% convection heat. The reflectors that are used in the existing D-Papillon fixtures uniformly disperse the PAR light and infrared radiation heat. The convection heat (lighting heat) in contrast to radiation heat, is an indirect form of heat transfer.

The heat that is created on the lamp surface is not displaced directly to the plant, but indirectly, with the grow room air behaving as a carrier. The use of the open reflector concept, a natural air current is created; the heat is spread uniformly throughout the grow space, thus avoiding the development of hotspots on the plant canopy. The accumulation of convection heat is therefore removed and does not fall back into the lamp, and as a result, the lamp keeps cooler, resulting in longer lamp life.

The patented reflectors from Papillon have a yield of around 92% (determined in a laboratory certified by the British Standardisation Institute). The lux values obtained by luminaires with these grow light are as much as 10% greater than by conventional luminaires. These greater values represent an unmatched amount of growth light for the plant. In other words, increased growth for the same energy usage.

The reflector of the D-Papillon forms the light beam in a unique manner. Unlike regular production techniques, the reflector is produced by forcing (deep-drawing) the raw material, followed by the application of the reflector layer through vacuum metallizing or sputtering of aluminium.

Employing an entirely different production process, Papillon has the ability to use a reflector material of a high surface density and a high reflection ability. The reflector is purpose-made to cut down on the heating up of the lamp to the lowest possible extent. As a result, there is a lower drop in the light production of the lamp in the course of its life. In summary, their reflector produces more light (light output of 92% - Light Output Ratio), a broader beam of growth light that penetrates deeper into the plant and a lower lamp luminosity rate thanks to a comparatively low reflector temperature.

After about 14 days of veg the plant under the 315 was looking far superior to the ones on either side of it, it had more side arms, shorter internodes, and darker colour, and the stem seemed to be sturdier (apparently using silica with 315’s gives you a thicker harder stem).

For the next 7 days, all plants were super cropped to create 1m wide bushes and lolly popped to remove all the lower parts of the plant, the plant under the 315 recovered from this a lot faster than the other plants showing no signs of stress, she was just a beast thirsty for light all her leaves perky and pointing upwards.

After 21 days of veg, it’s time to flower, all plants are now 1m wide and roughly 1m from the top of the pot supported by canes and tied with loose twisty ties.

If I was using 3 x 315s in the room I think I could have shaved 3-5 days from my veg time

So far I am loving this light, for 315w it is unbelievably bright you can’t look anywhere near it without grow room glasses on. I have just ordered another light to start setup 2 in another location.

Flower Cycle

The daylight lamp was left in the 315 pappy this is because it was getting overlap of HPS from either side so I didn’t feel the need to swap the lamp to the Argo. Far less stretching under the 315 but still got healthy vigorous growth with close internodes.

Day 14 of flower and the plant under the 315 is covered in flower sites and already starting to flower, she is a wide bushy plant that is super healthy.

Day 28 of flower all plants are looking super healthy but the 1 under the 315 is in a different league she has amazing colour all the flower sites are starting to join up.

Day 42 of flower the smell that is coming off the plant under the 315 is far stronger than the other 2 plants, this is due to a better terpene profile due to less heat being forced on to the canopy and dissolving the resin glands, after looking at the flowers under a microscope you can see all the gland heads in tacked and standing upright-this light is amazing!!! 

Day 60 time to cut the plants down, the terpene profile and essential oil production on the plant grown with the 315 is off the chart it smells like a different strain than the other 2, it is dripping with crystal like it has been dipped in diamonds. All the flowers are nice and tight and perfect in every way.

I am in the process of testing these lights in other setups 1 light, 1 plant setup but swapping the lamp in flower to the Argo lamp, and the other setup is 2x 315 paps on 2m a light rail.

Summary Of The 315w Papillion

I have been blown away by this light fitting it is the best light fitting I have tested and could be the best grow light ever made. If I woke up in the morning and these lights were £1000 I would still buy them! This grow light is a game-changing piece of kit that will push the quality of your crop to the next level!!!!

Over the next few months, I will be looking to upgrade all my lighting systems to the 315w Papillion that’s how impressed I was by this test. My aim is always to produce the highest quality product and using this light gives me an advantage in doing that.

1 2