How to Make a Kratky Hydroponic System
Developed by Dr. Bernard Kratky at the University of Hawaii, this Kratky hydroponic system allows us to grow a variety of plants in a water-based environment that doesn't require soil or even electricity! It's a set-it-and-forget-it approach that relies on the basic principle of supplying plants with all they need to thrive—water, nutrients, and oxygen.
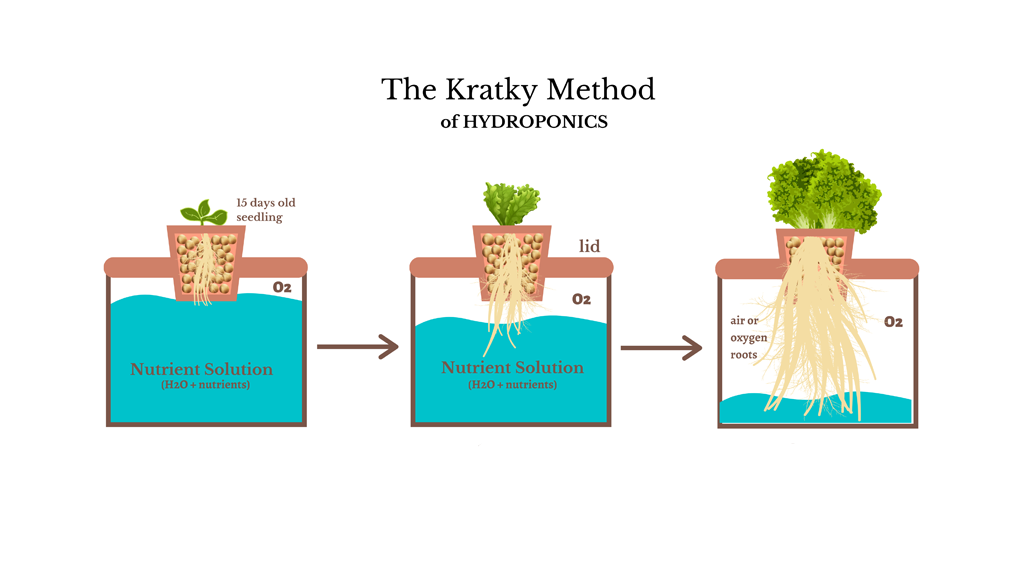
The beauty of the Kratky method lies in its simplicity. By setting up a container with a nutrient-rich solution and suspending plants above it, we enable the roots to absorb oxygen from the air and nutrients from the solution below. As the plants grow, the water level decreases, which naturally allows more air space for the roots to breathe. It's a passive system that mimics a plant's natural environment, making it an ideal choice for beginners or those of us with limited time or resources.
Key Takeaways
- The Kratky method enables plant growth in water, without the need for soil or electricity.
- It's a beginner-friendly hydroponic system that's low-maintenance and cost-effective.
- Our article outlines how to set up and maintain a Kratky hydroponic system for successful plant growth.
Understanding the Kratky Method of Hydroponics
Developed by Dr. B.A. Kratky, created this passive hydroponic system to keep it simple while growing lush plants. So, let's dive into how we can create our own Kratky setup!
First, we'll need a few basic components:
- Container: This holds our nutrient solution.
- Lid: It keeps light out and supports our plants.
- Net Pot: A basket where our plant sits snugly.
- Growing Medium: This can be anything from perlite to rockwool.
- Plant: Let's choose one that thrives in water.
- Nutrient Solution: A mix of water and essential nutrients.
Here’s the kicker: we suspend our plant's roots directly in the nutrient solution. But we're clever; we leave an air gap between the water surface and the lid to let our plant breathe. No air pumps or timers are needed!
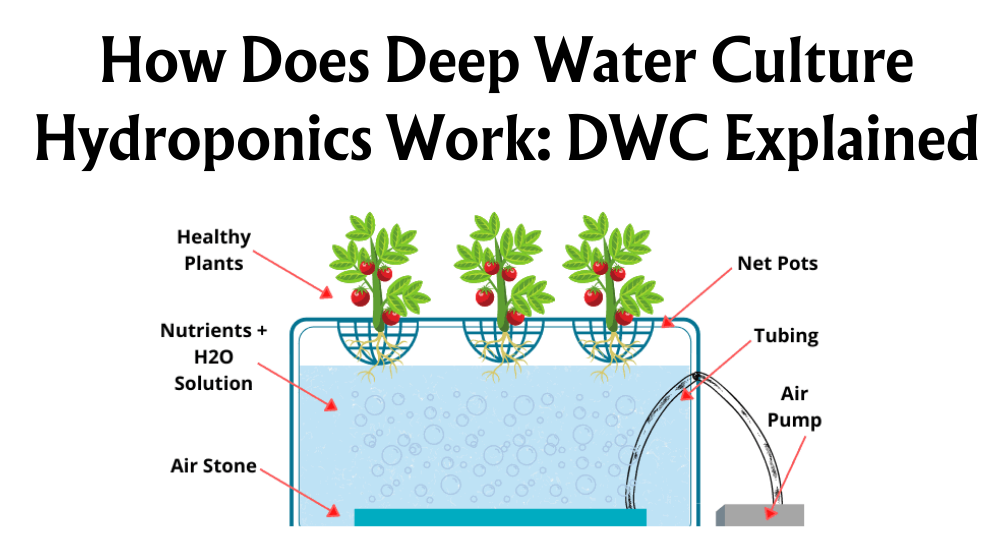
Compared to other hydroponic systems such as deep water culture or nutrient film technique, the Kratky method is a breath of fresh air. There are no moving parts, no noise, just nature doing its thing.
What can we grow in our Kratky system? Loads! Think leafy greens like lettuce and spinach, herbs such as basil and mint, or even tomatoes and strawberries!
So, we've got our passive, reliable, and cost-effective system all set up. By following these simple principles and choosing the right plants, we’ll have our own vibrant garden flourishing in no time. Isn't it fantastic?
Setting Up a Basic Kratky System
Embarking on a Kratky adventure is a fantastic way to grow plants hydroponically, an approach that can save us space and resources. Now, let's roll up our sleeves and dive into the process.
Choosing the Right Container
Our choice of container sets the stage. Essentially, any water-tight reservoir will do, but here are some specifics for our setup:
- Plastic containers: Lightweight and easy to modify.
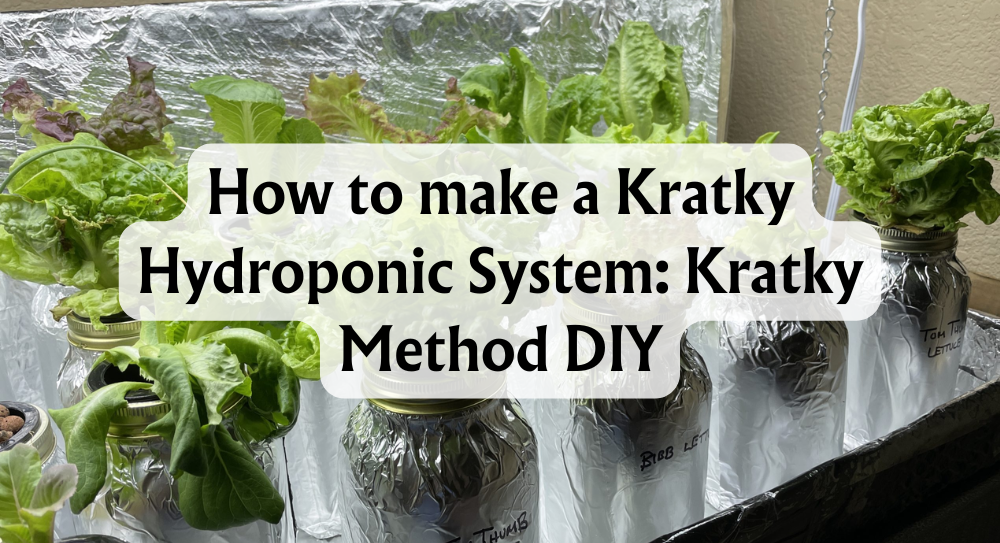
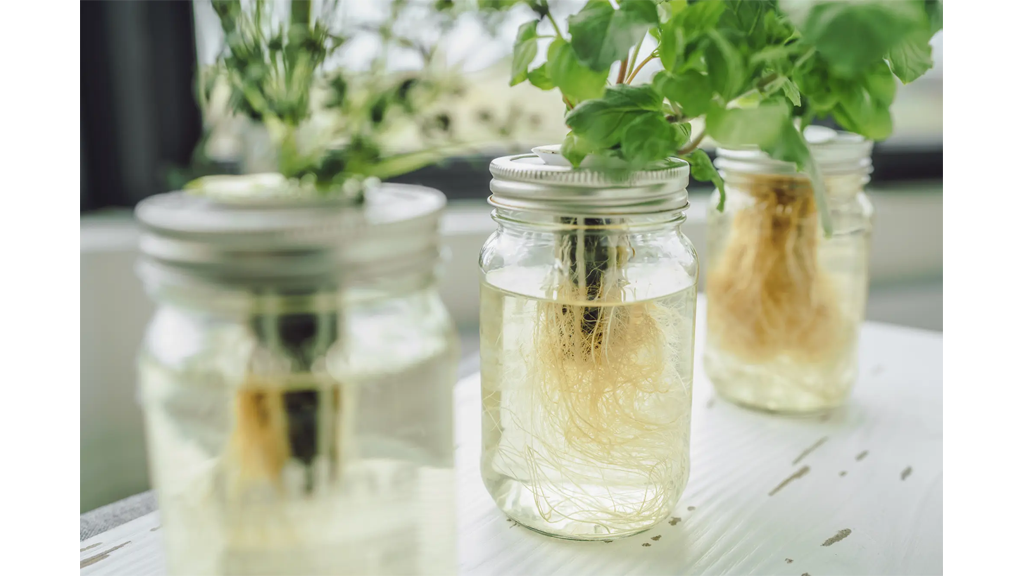
- Mason jars: Ideal for small plants like herbs.
- Food-grade buckets: Excellent for larger leafy greens.
The container should match the size of your plants. Lettuce, basil, and spinach thrive in smaller containers, while kale may demand more space.
Selecting Plants and Seeds
Concentrate on plants well-suited to the Kratky method:
- Leafy greens: Lettuce, kale, and spinach are super choices.
- Herbs: Basil's a classic, flavourful option.
Opt for seeds or seedlings that can be transitioned into our hydroponic system. Perlite, hydroton, or rockwool make for effective growing mediums that support the roots and facilitate nutrient uptake.
Preparing the Nutrient Solution
Here's how we whip up the perfect nutrient cocktail:
- Fill the container with water.
- Adjust the pH level using a pH control kit; aim for a pH between 5.5 and 6.5.
- Mix hydroponic nutrients into the water as per the label's instructions.
Remember, the nutrient solution should just touch the bottom of the net pots, allowing the roots to reach down and absorb these essential minerals.
Now, with everything in place, let's talk about getting things started. First things first: Gather up all the bits and bobs we'll need — a container, a lid, a net pot, a growing medium, a plant or seeds, a nutrient solution, plus a drill with a hole saw attachment, scissors, and a marker.
Step one is a doddle: Mark where the net pot will sit on the lid and drill a hole to fit it snugly. Then, prepare the water and add the nutrient solution detailing each step with images or diagrams for clarity. Populating the net pot with your chosen medium comes next, with the seeds nestled in to sprout or a seedling placed carefully in the centre.
Finally, place the net pot in the hole, put the whole kit and caboodle in a sunny spot, and let nature do the rest until harvest.
The Science of Plant Growth in Kratky Hydroponics
Ever wondered how plants thrive without soil? Kratky hydroponics might just be the answer! This method allows plants to grow in a water-based environment with minimal fuss. Let's dive into the wonders beneath this soilless cultivation.
Understanding Root Development
In Kratky hydroponics, the plant roots develop uniquely. By suspending the plant's roots in a nutrient-rich solution, we see that only a portion of the roots is submerged. This lower root mass absorbs the nutrients and water, while the upper root area is exposed to air, allowing for the absorption of crucial oxygen. This exposure is key for maintaining a healthy root system that boosts the plant's overall growth and health.
- Submerged roots: Absorb water and dissolved nutrients.
- Air-exposed roots: Take in oxygen, preventing root rot and allowing for growth.
This balance guarantees the roots remain healthy without the need for additional aeration or maintenance.
The Role of Light and Air
In hydroponic growing, light and oxygen play vital roles:
-
Light: Whether from the sun or supplemental grow lights, light is essential for photosynthesis, which powers plant growth. The quality and duration of light must be tailored to the plant’s specific needs to optimise growth.
-
Air: Oxygen availability allows the root system to respire. In Kratky systems, as the water level drops, an increasing amount of the root system is exposed to air naturally. This gap is where the magic happens; the roots get the right amount of oxygen without requiring pumps or aerators.
Keep in mind the delicate balance between moisture and air – too much water and the plants may drown; too little and they dehydrate. The Kratky method navigates this balance with a passive approach, ensuring that the roots can access both resources as needed.
- Grow lights: Ensure plants have the right spectrum and intensity of light.
- Aeration: Mitigated naturally as the water level decreases, exposing more roots to air.
By understanding these components, we can appreciate how the Kratky method supports plant growth by providing a near-natural environment with the right mix of water, oxygen, and light. And best of all, it's low-maintenance, turning hydroponic growing into a beginner-friendly venture!
Advantages of the Kratky Method
Ever wondered how we can grow plants without the hassle of traditional gardening? Well, the Kratky method is our low-maintenance hero! One of the key advantages is its simplicity. We're talking about a setup so straightforward that even a newcomer to hydroponics can get the hang of it with minimal fuss. Plus, it's gentler on our wallets compared to more complex hydroponic systems. Cheaper setup, cheaper maintenance – who wouldn't love that?
Now, let's chat about electricity or the lack thereof. In a Kratky set-up, no electricity is needed. That means no pumps, no air stones, no timers, and no filters. We can breathe easy knowing our leafy friends are growing using the power of nature alone.
Less water and nutrient consumption? Oh yes! The Kratky method is a passive system, making it more eco-friendly. We don't waste resources, which is not only good for our environment but also for our pockets in the long run.
And then there's the reduced risk of pests and diseases because we wave goodbye to the soil. Hello, healthier plants and goodbye pesky bugs and pathogens!
Finally, how about more control and flexibility over our growing conditions? We can move our system wherever the sun kisses the earth or the shade embraces the cool. Indoors, outdoors – the world is our oyster.
To sum it up the Kratky method is our go-to for an eco-friendly, budget-friendly, and just plain friendly approach to gardening.
Limitations and Challenges
While the Kratky method of hydroponics is a breeze for beginners, we can't ignore a few hiccups along the way. Here's what we might bump into:
-
Maintaining Water and Nutrient Levels: Keeping an eagle eye on our nutrient solution is key. Since there's no pump, we need to ensure the water level doesn't dip too low, risking our plants' health.
- Our fix? A simple water level indicator can save the day.
-
Algae and Root Rot: Stagnant water can be an open invitation for algae. The roots can also suffocate without proper aeration, leading to dreaded root rot.
- Solutions at hand: Covering the reservoir with a light shield or using a small dose of hydrogen peroxide helps keep these issues at bay.
-
Bigger Plants? Not so fast: Large or tall plants craving more support can feel a bit cramped in a Kratky setup.
- How to tackle it: A trellis or support structure can offer that much-needed boost.
-
Scalability Issues: Dreaming big? Scaling up our Kratky requires more than just enthusiasm, as it lacks the modular nature of other systems.
- Growing bigger: Modular units may not be a go, but increasing reservoir size could be the next best step.
-
Pests and the Great Outdoors: Ah, pests. While not specific to Kratky, they can be uninvited guests in our hydroponic haven.
- Keeping them out: Natural pest control or a fine net can keep our plants snug and bug-free.
Remember, our green journey is about adapting and overcoming. With a sprinkle of vigilance and a dash of ingenuity, we can navigate these challenges like pros!
Maintaining Your Kratky Hydroponic System
Let's keep our plants thriving! Regular check-ups and a bit of TLC ensure our Kratky hydroponic system runs smoothly. Remember, happy roots mean a happy harvest!
Monitoring Water Levels and Nutrients
Checking our water level daily keeps our leafy friends adequately hydrated. If we spot the water's too low—beneath the root zone—it's time for a top-up. Also, maintaining the nutrient levels is just as crucial as the water itself. We test the nutrient solution's pH regularly, aiming for that sweet spot between 5.5 and 6.5 for optimal uptake.
Here's a quick list to help us monitor:
-
Water Level Checks
- Daily visual inspection
- Refill if below the root zone
-
Nutrient Checks
- pH testing weekly
- Adjust with supplements when necessary
Pest Management and Disease Control
Just like us, plants don't like uninvited guests—especially the troublesome pests and diseases! Spotting the early signs on our plants or in the water can save heaps of trouble. Healthy roots generally mean a healthy plant, so let's keep an eye on them for any changes in colour or texture that could indicate a problem.
Here's our to-do list for keeping pests and diseases at bay:
- Regular inspections for signs of pests and disease
- Immediate isolation and treatment of affected plants
By sticking to these routines, we're ensuring the longevity and productivity of our Kratky hydroponic system. It's all about the details and a bit of care. Now, let's get back to enjoying the bounty of our low-maintenance garden!
Scaling Up From a Single Vessel
Stepping up from experimenting with a single mason jar to a multi-plant setup is an exciting leap! We're looking at larger systems and how to embed a bit of tech to keep things running smoothly.
Building Larger Systems
Let's get our hands dirty and talk about building larger Kratky systems. The joy here is that the principles are much the same, but we'll need bigger gear. Imagine swapping out your cosy single flat for a spacious house — our plants need their room to grow too!
- Reservoir: Instead of a tiny jar, think large totes or custom-built water tanks that can hold enough nutrient solution for multiple plants.
- Net Cups: The humble abodes for your plant's roots will sit in holes drilled in the lid of your new, roomier reservoir.
- Equipment: Larger scale means more responsibility, so a quality pH testing kit is a must. Keep an eye on your nutrient levels too.
With DIY Kratky systems, the beauty is in the simplicity. There's no need for complicated pumps or electricity, but a bit of aeration never goes amiss in larger setups. Let's not overcomplicate things; the point is to enjoy the process as much as the lush greens we'll harvest!
Automation and Monitoring
Alright, so we've supersized our setup – what's next? Keep calm and possibly consider automation and monitoring. You don't have to be a technician wizard; some basic tech can save us time and keep our leafy mates in top condition.
- Aeration: Bigger pools of water can benefit from some air circulation. Simple air pumps with an air stone will keep the O2 flowing without breaking the bank.
- pH Testing: Get digital and snag a pH meter. Regular checks will prevent any underwater surprises that might upset our aqua farm.
- Monitoring: For those of us who like gadgets, there are water level sensors that can ping our phones when it's time to top up the tank.
Remember, while these add-ons can help, the Kratky method by its nature is a low-tech affair. Automation is not a necessity, but a nifty extra for us who enjoy playing with tech.
Scaling up can sound daunting, but it's just more of the same on a grander scale.
Exploring Variations of the Kratky Method
As we delve into the world of hydroponics, we discover that the basic Kratky method can be adapted in numerous ways to fit different gardening needs and contexts. Whether you're looking to enhance nutrient delivery or integrate the system with other hydroponic practices, there's a variation that's perfect for your green thumb adventures.
Incorporating Wicks and Other Modifications
One way to modify the basic Kratky setup is by using wicks. This involves placing wicks in the growing medium that draws the nutrient solution up to the plants. It's great for smaller plants that don't require as much water.
-
Dual-Root-Zone Kratky: Here's an interesting twist! A top layer of soil or compost supplements the nutrient film, adding a buffet of nutrients and moisture for the plants.
-
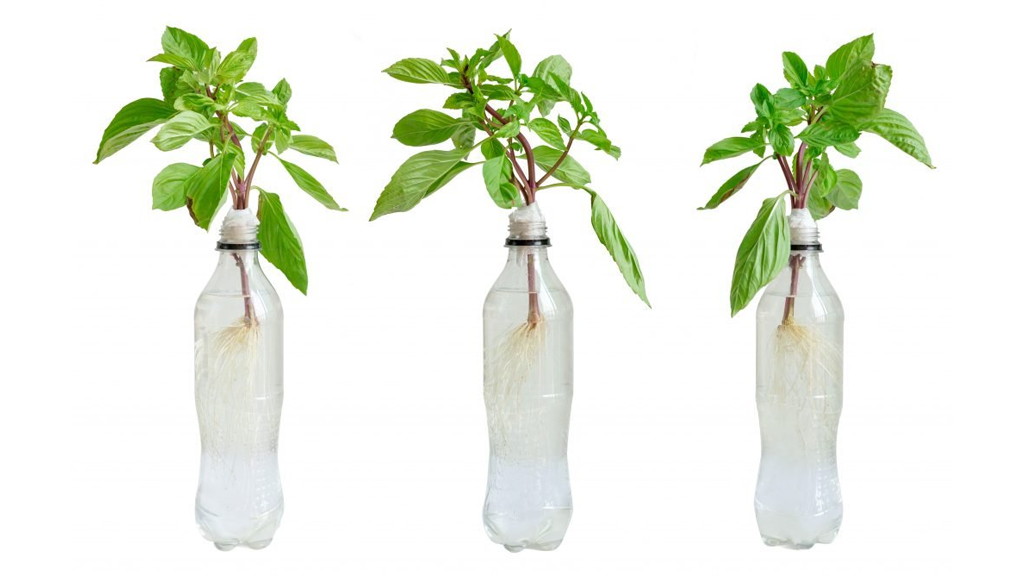
Bottle Kratky: Got a spare plastic bottle? Punch a hole in the cap, pop in a net pot, and voila! An ideal setup for individual plants and limited spaces.
These modifications offer innovation and improvement to the classic Kratky system by providing more hydration and nutrition solutions.
Hybrid Systems with Kratky Elements
Now, let's talk hybrids. Mixing Kratky with other systems like Deep Water Culture (DWC) creates a synergy that could revolutionise your plants' growth.
-
Floating Raft Kratky: Place a polystyrene raft on top of your nutrient solution and you've got a party for multiple plants. The water's always there, but so is the air; a harmonious balance.
-
Bucket Kratky: Scaling up? A large bucket or barrel can become a hydroponic haven with multiple plant sites. It's a Kratky community garden in a bucket!
Hybrid systems can combine the passive benefits of Kratky while introducing an active element that might include water aeration, creating a sort of semi-DWC setup.
Each of these variations comes with trade-offs in terms of cost, maintenance, and suitability for different plants and environments, but they all hold the promise of lush, healthy growth in unique ways. Plus, a range of products and kits available can help you get started with each type of system—just look for a reputable supplier to guide you.
Remember, whether you're a seasoned grower or just starting out, exploring these variations can lead to fantastic results and maybe even some fun along the way. So, which one will you try next in your garden?
Harvesting and Beyond
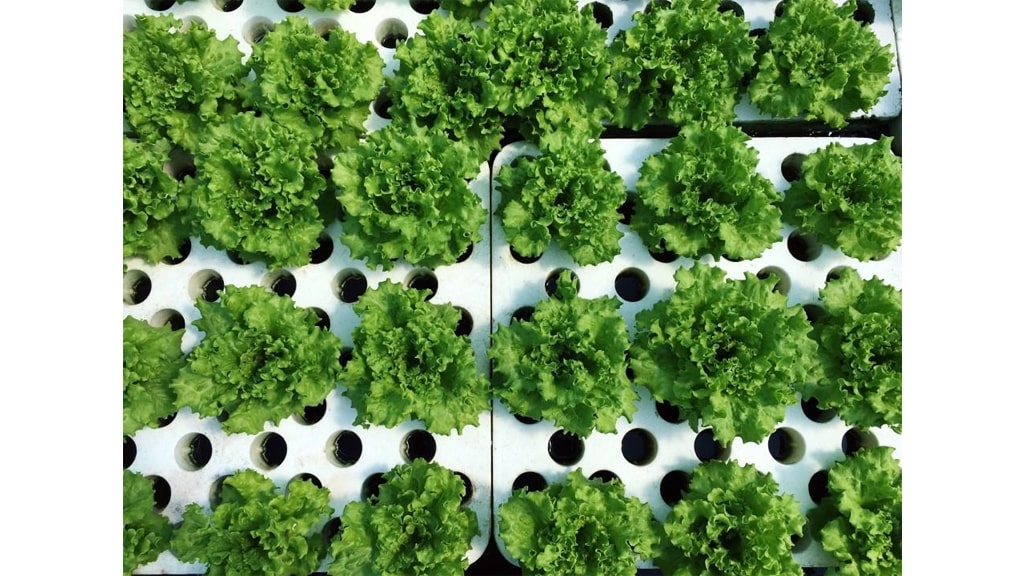
It's time to talk about the fruits of our labour: harvesting from our Kratky hydroponic system. Exciting, isn't it? Let's get into it!
Once our leafy friends reach maturity, it's harvest time! We gently remove the mature leaves or even entire plants. But here’s the fun part: the same plant can often continue to give us more! Many leafy greens like lettuce will keep producing if we harvest them correctly.
Remember to:
- Pick leaves carefully, avoiding damage to the plant.
- Monitor the water level and nutrient solution, as it may need a top-up for continued growth.
Our yields can be impressive with this system; it's all about the right care. Now, after harvesting, what's next? We've got to think about the growth cycle. If it's at an end, then we wave a fond farewell to our plant. But wait, it's not really goodbye. We can now replant! This means dropping in a new seedling and starting the exciting process all over again.
Here's a quick list to keep our system productive:
- Assess the yield: Make a note of what worked well.
- Clean the system: Between cycles, ensure everything is spick and span.
- Prepare for replanting: Get those new seedlings ready.
Isn't it amazing that with just a few simple steps, we can go from harvest to replant in no time? Plus, we're always learning, and each cycle is a chance to improve.
So there we have it, folks! With our hands-on approach and a bit of TLC, our Kratky system becomes the gift that keeps on giving.
Best Practices for a Successful Kratky Garden
Starting on a small scale is key to nailing the Kratky method. It's like we're nurturing a tiny plant of knowledge before it grows into a forest of leafy greens! Now, let's get our hands dirty – or should we say, water-wet? – with some fantastic tips.
Lighting: If we're going for an indoor setup, remember that our plants will need plenty of light, but not all day at the disco! Aim for a healthy amount of artificial light or place them where they’ll catch the sun at just the right angle.
Water Levels: Keep an eye on that water, folks! We don't want to leave our plants high and dry. It's crucial for us to frequently check and maintain the water level to ensure the roots get the hydration they need.
Nutrient Attention: Much like us after a good meal, plants thrive with the proper nutrition! Monitoring for nutrient deficiencies is a must.
- Container Selection: Here’s where we can all be a bit picky! For a solo plant, a swanky mason jar does wonders. But when scaling up, we’ve got to think big – think bins and buckets!
Plant Placement: Outdoorsy plants? Ensure they party in the sunshine but don’t get sunburnt. Indoors? Find a cosy spot with enough light but away from draughts. It’s all about that perfect spot!
Lastly, regular checks for uninvited guests (yes, pests) and a gentle dose of experimentation will lead us to consistent results. Let's not forget, that this is all about making our green pals feel at home – so they can grow up big and strong, just like we want our plants (and not just our biceps) to be!
Conclusion
We've journeyed together through the simplicity and effectiveness of the Kratky hydroponic system. From its roots as a passive hydroponic method to the diverse variations applicable to everyone from novices to experienced gardeners, we've covered a fair amount of ground. Remember, this method doesn't require electricity or complex systems—it's all about letting plants thrive naturally in a nutrient-rich solution. And we've seen that with just a few components, we can build our very own Kratky setup.
Key takeaways to bear in mind:
- Simplicity: A water reservoir, net pots, and a growing medium are all you need.
- Accessibility: Whether you're in a flat with no garden or a seasoned gardener, this system is for anyone.
- Variations: From mason jars for herbs to larger containers for greens, you can scale to your needs.
What's particularly pleasing about the Kratky method is its low-maintenance nature, which is a boon for those of us with busy lives yet a desire to cultivate fresh produce.
Looking ahead, the prospects are blooming. Not only does this method conserve resources but it also opens up a world of possibilities for sustainable home gardening. We encourage you to try it, tweak it and make it your own. And who knows, perhaps you'll find yourself with a green thumb you never knew you had!
Remember, the essence of Kratky hydroponics is its ease and efficiency, providing a straightforward path to fresh, home-grown vegetables and herbs. Let's embrace this method and enjoy the journey of growing, literally and figuratively.


 Store Locator
