My Cart
You have no items in your shopping cart.

FREE Delivery Over £99*
Discreet Packaging

Best Price Guaranteed
Pay In Instalments

Safe & Secure Checkout

Chat to an Expert
 Store Locator
FREE Delivery Over £99*
Discreet Packaging
Best Price Guaranteed
Pay In Instalments
Safe & Secure Checkout
Chat to an Expert
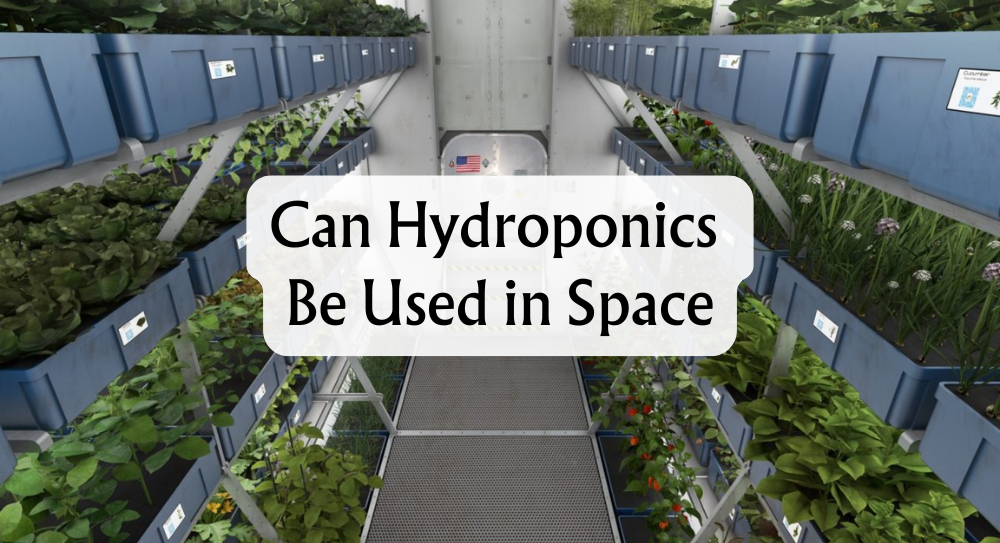
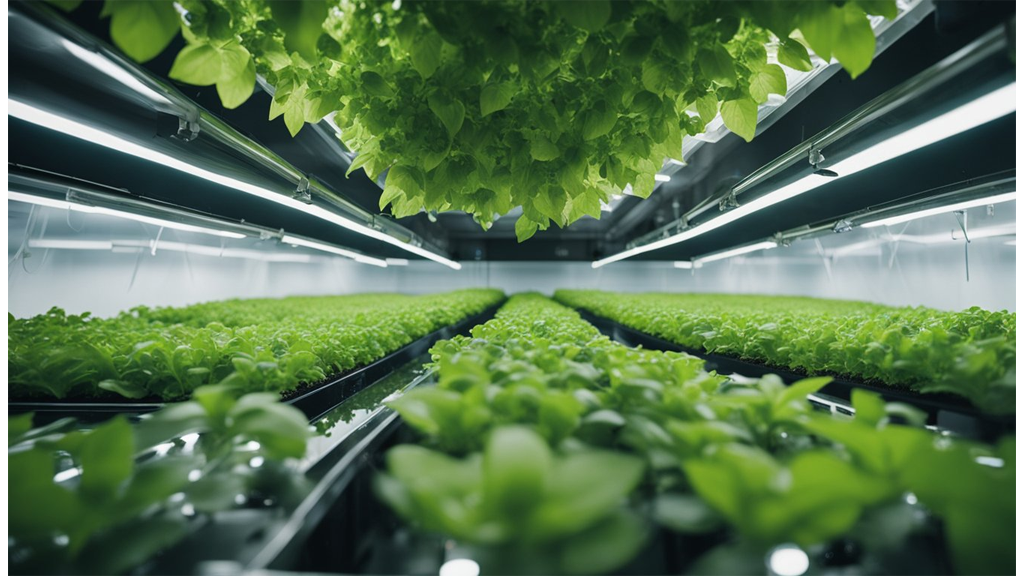
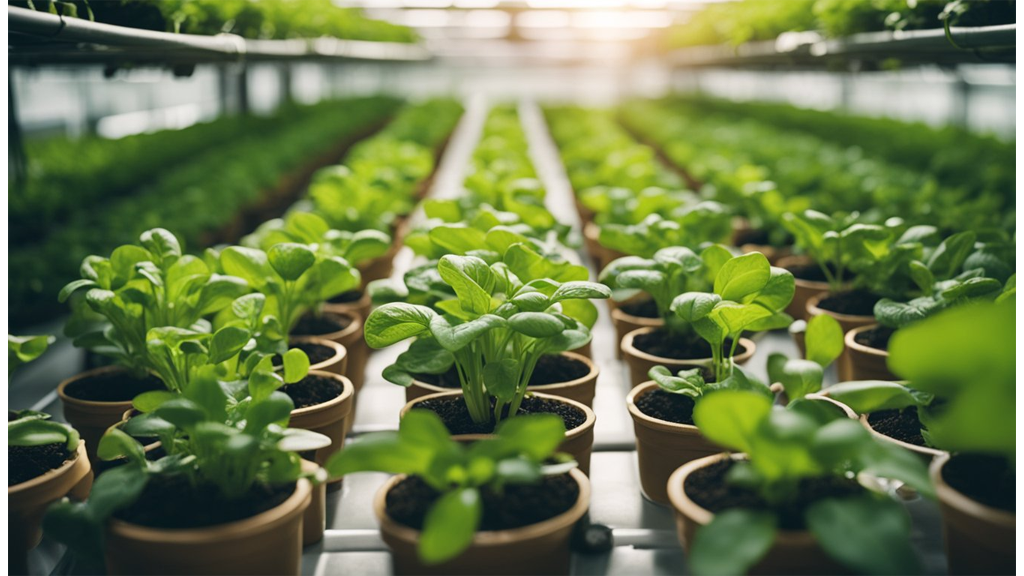
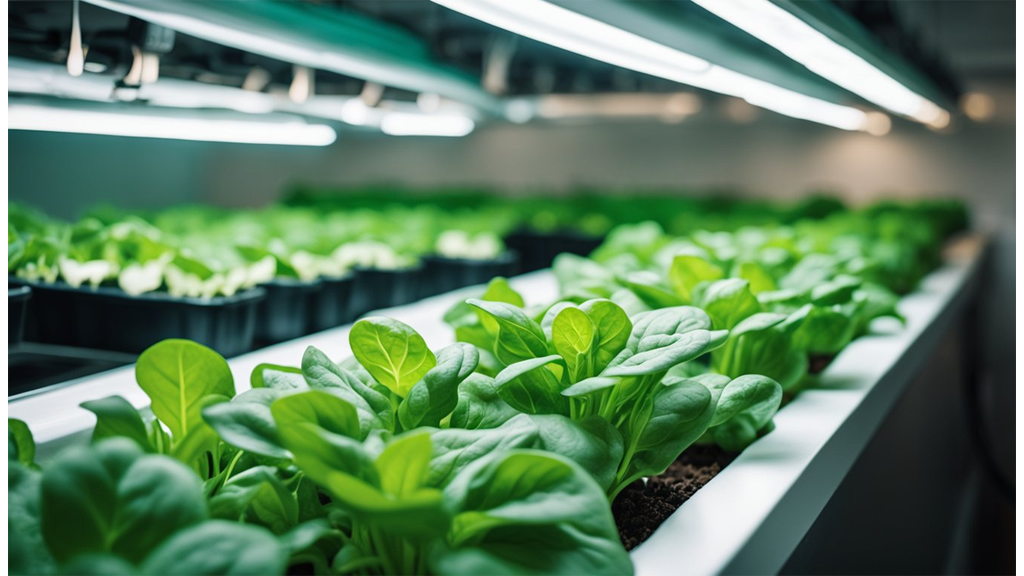
Imagine harvesting crisp, fresh lettuce while orbiting hundreds of kilometres above Earth. This isn’t science fiction—hydroponics has let astronauts on the International Space Station (ISS) enjoy freshly grown vegetables since 2013 using advanced systems like Veggie. Yes, hydroponics can be—and is—used successfully in space to cultivate certain plants without soil.
As gardeners and growers, we may take soil and gravity for granted, but space changes everything. Managing water, nutrients, and light in microgravity presents unique challenges, yet hydroponics has opened new possibilities for space horticulture and future food production beyond our planet.
Yes, we can use hydroponics in space. Hydroponic farming allows us to grow plants without soil by using a nutrient-rich water solution. This method is especially practical for space missions, as space is often very limited and traditional gardening is not possible.
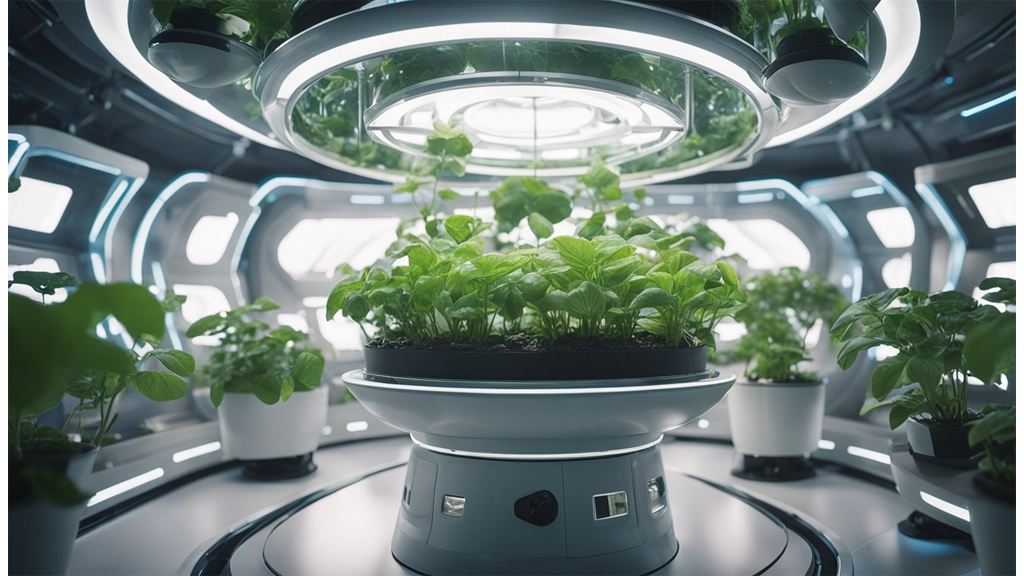
On the International Space Station (ISS), astronauts have already tested hydroponic gardening. In particular, NASA's Veggie system, introduced in 2013, has shown that lettuce and a few other plants can grow successfully under controlled light and water.
Here’s a quick look at why hydroponics works well in space:
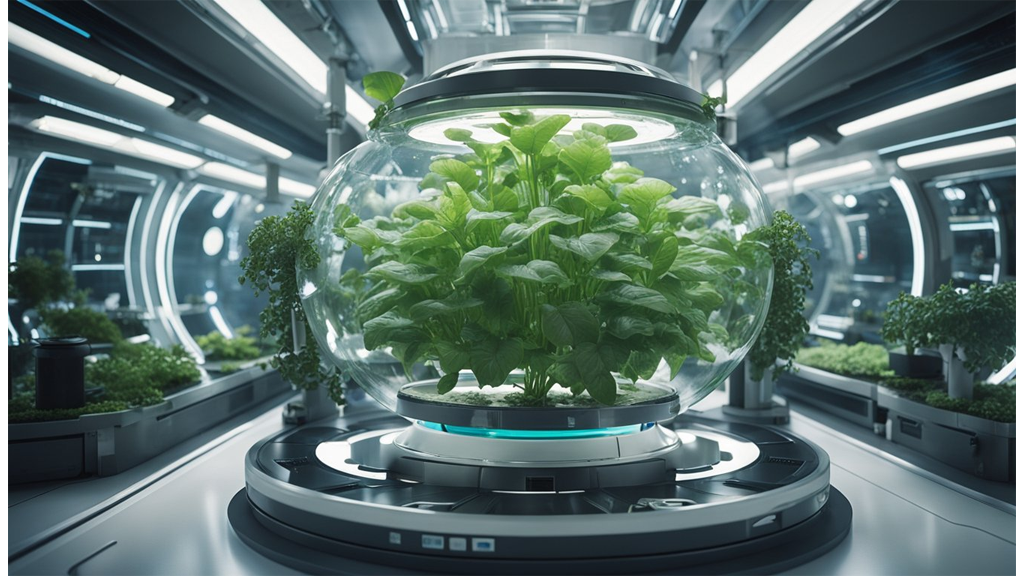
NASA is also working on bioregenerative life-support systems. With these, plants help recycle waste, produce food, generate oxygen, and remove carbon dioxide—all vital on long-duration missions.
A table makes it clear how hydroponics benefits astronauts:
| Feature | Advantage for Space |
|---|---|
| No soil required | Lightweight, cleaner |
| Compact design | Saves space |
| Water efficient | Less resupply needed |
| Fast plant growth | More frequent harvests |
Astronauts on the ISS have already enjoyed fresh greens grown onboard. As we look to future missions, hydroponics could become a core part of how we provide food, recycle air, and sustain life far from our home planet.
When we think about plants in water, watering them in space becomes a real challenge. On Earth, gravity helps water flow down to the roots. In microgravity, water simply floats, making traditional plant care impossible.
That’s where Plant Water Management (PWM) experiments come in. NASA has tested PWM on the International Space Station, using two main approaches: soil and hydroponics. For hydroponics, we’re looking at growing plants directly in water, without soil.
To control water delivery in space, PWM uses capillary fluidics systems. These systems move water along small channels, using surface tension instead of gravity. This ensures water reaches the plant’s roots efficiently, even in zero gravity.
We’ve also seen the use of porous clay substrates, sometimes combined with controlled-release fertilisers. This setup holds moisture close to the roots, providing a steady supply of water and nutrients.
Key Techniques Used in PWM Experiments:
Here’s a quick comparison between traditional watering and PWM hydroponics:
| Feature | Earth (Gravity) | Space (PWM Hydroponics) |
|---|---|---|
| Water Flow | Gravity-driven | Capillary action |
| Substrate | Soil/Compost | Porous clay/water culture |
| Nutrient Delivery | Traditional | Controlled-release systems |
PWM hydroponics have shown that we can hydrate plant roots and deliver nutrients even without gravity. Early ISS experiments proved plants can thrive using these innovative methods, opening new possibilities for future space missions.
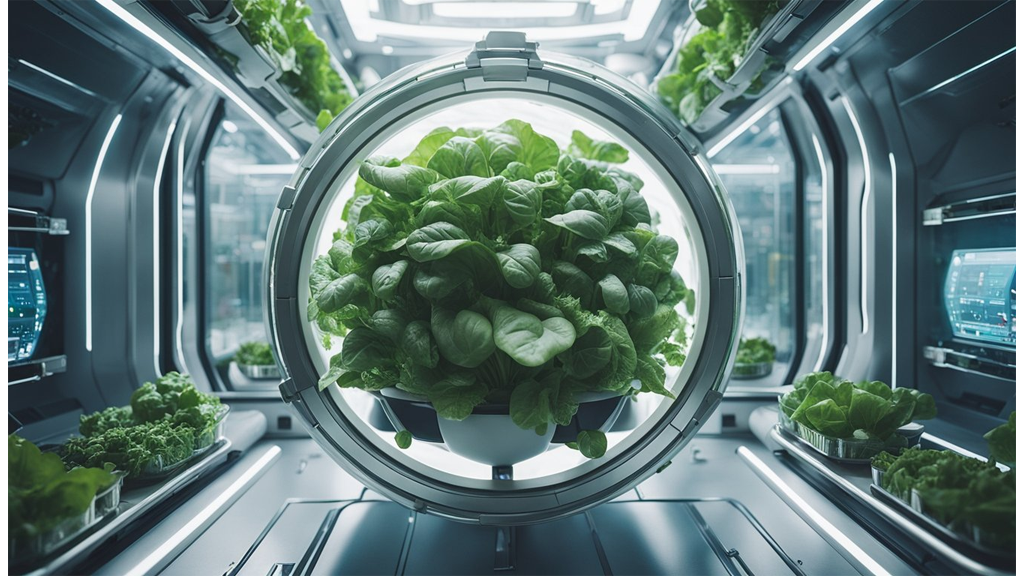
Veggie is NASA’s first fresh-food production system on the International Space Station. We use it to explore how plants react in microgravity and provide astronauts with vital fresh food options like lettuce, beans, and herbs.
Key components of the Veggie system include:
We began by growing red romaine lettuce, which astronauts tasted for the first time in 2015. It was a milestone that showed fresh food can be safely grown and eaten in space.
Here’s a quick look at some crops we’ve successfully grown in Veggie:
| Crop | Status | Notes |
|---|---|---|
| Red Romaine | Grown | First eaten by astronauts |
| Zinnia Flowers | Grown | First flower cultivated in space |
| Lettuce | Grown | Multiple varieties tested |
| Beans | Tested | Ongoing experiments |
| Herbs | Tested | Basil and mustard greens |
We’ve also trialled crops like tomatoes and sweet potatoes in similar space-based hydroponics systems. Potatoes are another promising candidate for future missions due to their nutritional value and versatility.
As we study plant growth, fresh food becomes a real part of our space diet. Veggie is transforming our understanding of hydroponics beyond Earth.
Hydroponic gardening in space involves several unique challenges and adjustments. We must balance water distribution, manage plant growth cycles, guide root development, and ensure clean air for astronauts, whether we're orbiting Earth or preparing to grow food on Mars.
Space Plants Need More Water
In microgravity, water acts differently than on Earth. Instead of trickling down through soil or growth media, it tends to form globules that float or stick to surfaces. This disrupts the way plant roots usually absorb moisture.
To address this, we use hydroponic systems that carefully direct water and nutrients straight to the roots. NASA and other agencies use capillary action and enclosed growth modules to ensure each plant receives enough hydration. Without gravity, every drop must be precisely controlled.
Table: Water Distribution Solutions in Space Hydroponics
| Challenge | Solution |
|---|---|
| Irregular water spread | Capillary root modules |
| Water floating in microgravity | Enclosed irrigation systems |
| Nutrient delivery | Measured, automated hydroponic feeds |
On Mars, these systems could be even more critical, given limited water supplies and the need for reliability in closed habitats.
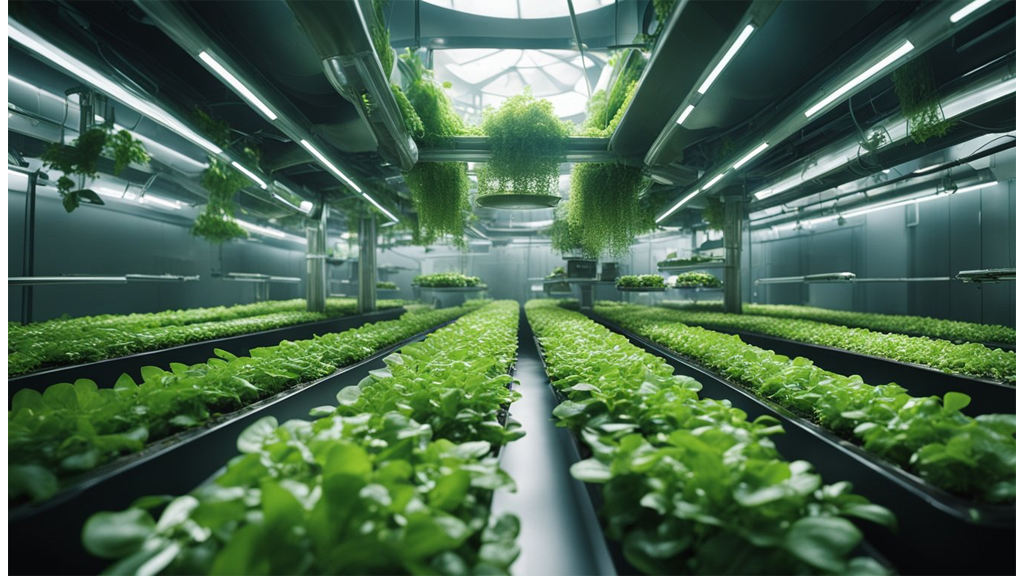
We’ve noticed that plants grown hydroponically in space can have faster growth cycles. In some experiments, leafy greens and microgreens matured more quickly than their Earth-grown counterparts. This is especially promising for long journeys and missions to Mars, where resupply is not feasible.
Rapid plant growth lets us produce fresh food at a quicker rate, supporting crew nutrition and wellbeing. Mathematically, some crops like lettuce were harvested in just a few weeks in space, compared to slightly longer durations on Earth. This speed can be vital for maintaining morale and a steady diet.
Key advantages of faster harvests:
Roots behave unpredictably without the pull of gravity. Instead of growing downward, they can spread randomly, making it challenging for plants to access nutrients efficiently. We solve this by using structured growth mediums, such as porous foam or polymer mats, that channel root development.
These physical guides help roots anchor, absorb nutrients, and grow into shapes that promote stable plant health. This principle was seen not only in space stations but was also highlighted in popular culture, such as in The Martian, where guided root growth was crucial for growing potatoes on Mars.
Key challenges and solutions include:
Plants in hydroponic systems do more than provide food—they also help filter the air. By taking in carbon dioxide and releasing oxygen, our crops act as natural air purifiers. This function was vital aboard the International Space Station, and will be even more so on future lunar bases or while growing food on Mars.
Beyond oxygen production, plants can help remove volatile organic compounds (VOCs) and contribute to stable humidity levels. This is crucial in closed habitats, where air quality must be carefully managed.
Benefits for crew habitats:
In summary, having living plants in our space environment provides both practical and health-related benefits, making hydroponics key to future deep-space missions.
Watering plants in space isn’t as simple as it is on Earth. In microgravity, water doesn’t flow downwards—it floats and forms droplets. This makes traditional watering with a can or hose ineffective.
Key challenges include:
Let’s look at some numbers. Most garden kits on Earth rely on gravity to guide water. In space, though, we need creative solutions like hydroponics and aeroponics. Yet, even these systems run into problems, such as mass, containment, maintenance, and sanitation concerns.
| Challenge | Why it matters in space |
|---|---|
| Unpredictable water flow | Roots may dry or rot |
| Oxygen deprivation | Slower plant growth |
| System maintenance | More crew time needed |
To overcome these hurdles, we’ve seen some clever innovations. For example, omni-gravitational hydroponic systems use design features that work in any gravity. We also use capillary action—taking advantage of water’s natural ability to move through narrow spaces—to guide water to roots.
Specialised materials like felt, foam, or sponges can hold water near the roots. This mimics soil’s properties and helps distribute moisture evenly. Such materials are staples in experimental garden kits aboard space stations.
By focusing on controlled watering, we give our plants the best shot at thriving outside Earth’s gravity. This is an ongoing challenge, but it’s one we continue to tackle with every new experiment and system we test in orbit.
When we think about growing food in space, hydroponic systems stand out for several reasons. They allow us to grow plants without soil, which is ideal in a weightless environment.
One major benefit is resource efficiency. With hydroponics, we can use up to 90% less water compared to traditional agriculture. Water is recirculated in the system, making every drop count aboard a spacecraft or in space greenhouses.
Limited space is a big challenge in orbit, but hydroponic set-ups enable vertical farming. By stacking layers, we maximise available area for food production, turning small modules into high-yield controlled environments.
Hydroponics also supports sustainability. Continuous harvests mean fresh produce year-round, reducing our reliance on supply missions from Earth. This is crucial for longer missions or potential habitats on the Moon or Mars.
Let’s look at some key benefits at a glance:
| Feature | Benefit |
|---|---|
| No soil needed | Suits microgravity and keeps cabins clean |
| Water conservation | Up to 90% less water required |
| Space-saving design | Vertical farming in tight quarters |
| Controlled environments | Optimal conditions for plant growth |
| Steady food production | Fresh vegetables for crews |
Using hydroponic systems, we can create adaptable plant habitats in space. These controlled environments help keep plants healthy, producing bigger yields compared to some soil-based methods.
By making efficient use of space and resources, hydroponics moves us closer to self-sufficient living beyond our planet.
When we study how plants grow in microgravity, we unlock new knowledge about plant biology that isn't possible on Earth. Microgravity changes how roots, stems, and leaves behave, affecting water and nutrient uptake. This gives us clues about plant adaptability and helps us design better systems for space travel.
Learning about plant growth in these unique environments is crucial for space exploration. As we plan for longer missions to the Moon, Mars, and beyond, astronauts will need to grow their own food. Without gravity, water doesn't distribute in soil the same way, so we must rethink traditional cultivation.
Some key areas we consider include:
According to researchers like Gene Giacomelli, hydroponics could offer solutions for producing reliable food in orbit. Hydroponic and aeroponic systems help control the growth environment, making them promising for closed habitats.
Here's a simple table showing the main differences:
| Growth Factor | On Earth | In Microgravity |
|---|---|---|
| Gravity | Present | Absent |
| Water movement | Down by gravity | Floating, needs management |
| Root direction | Grows downward | Grows in all directions |
By understanding these changes, we can not only support future astronauts but also discover methods that improve sustainable agriculture back home.
Hydroponics offers us a practical way to grow plants in space where traditional soil isn’t an option. By using solutions like hydrogels and nutrient-rich water, we can support plant growth even without gravity.
This method helps us overcome unique challenges in space, such as limited space, water management, and the need for efficient resource use. NASA’s experiments show that hydroponic techniques work well, even onboard spacecraft or the International Space Station.
Let’s highlight some key points:
| Hydroponics Benefits | Space Impact |
|---|---|
| Efficient nutrient delivery | Thrives in microgravity |
| Less water needed | Easier water recycling |
| Faster plant growth | Supports long missions |
With ongoing research and new technology, we can expect hydroponics to play a greater role, not only in supporting long-term missions but also in improving food security on Earth.
As we look to the future, hydroponics stands out as a key strategy, paving the way for sustainable space agriculture and innovative solutions here on our planet.
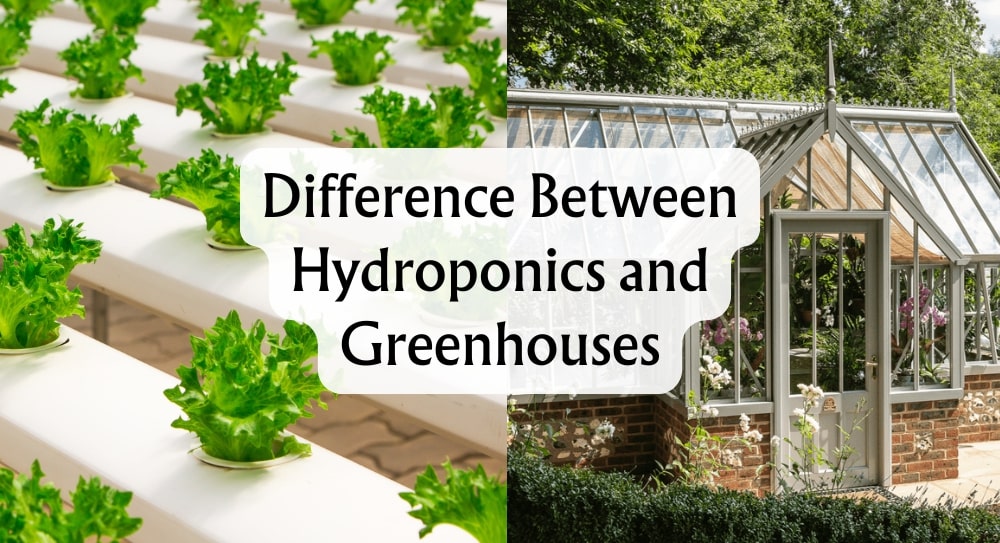
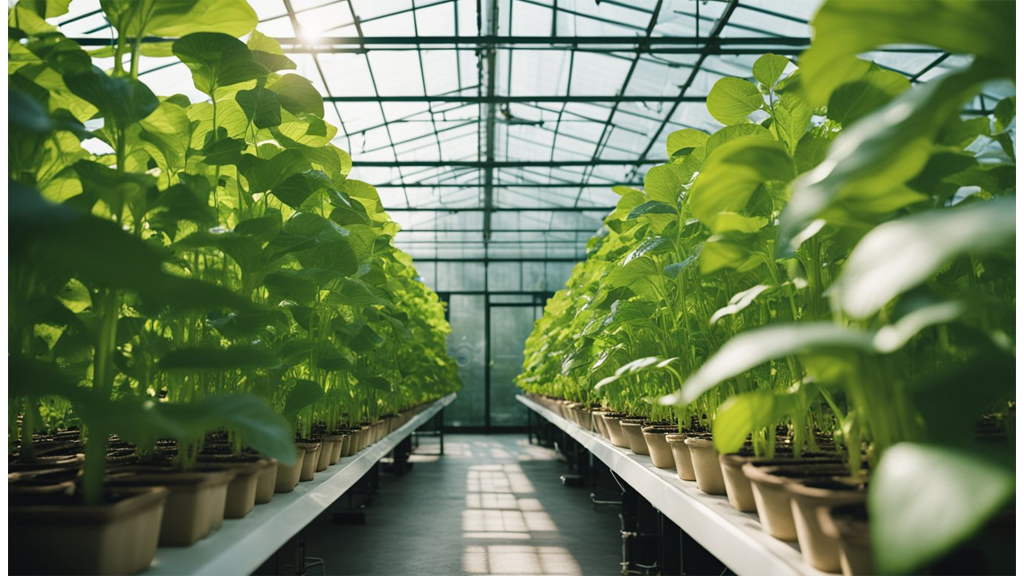
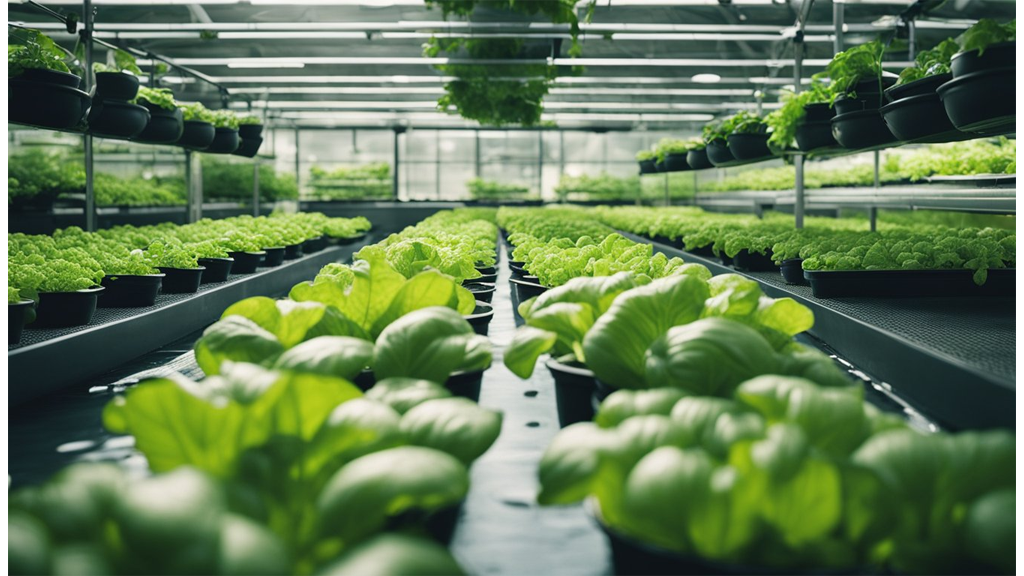
When it comes to growing plants, we often hear about hydroponics and greenhouses as the top choices. Each method offers unique systems for nurturing plants, from soil-free hydroponic setups to traditional greenhouse environments that use soil or containers. The key difference is that hydroponics grows plants in nutrient-rich water without soil, while greenhouses typically use soil and control the climate around the plants.
Knowing the advantages and challenges of each approach helps us choose the right system for our needs, whether we're hobby gardeners or commercial growers. Understanding the contrasts between hydroponics and greenhouse farming lets us make better decisions for our crops, budgets, and goals.
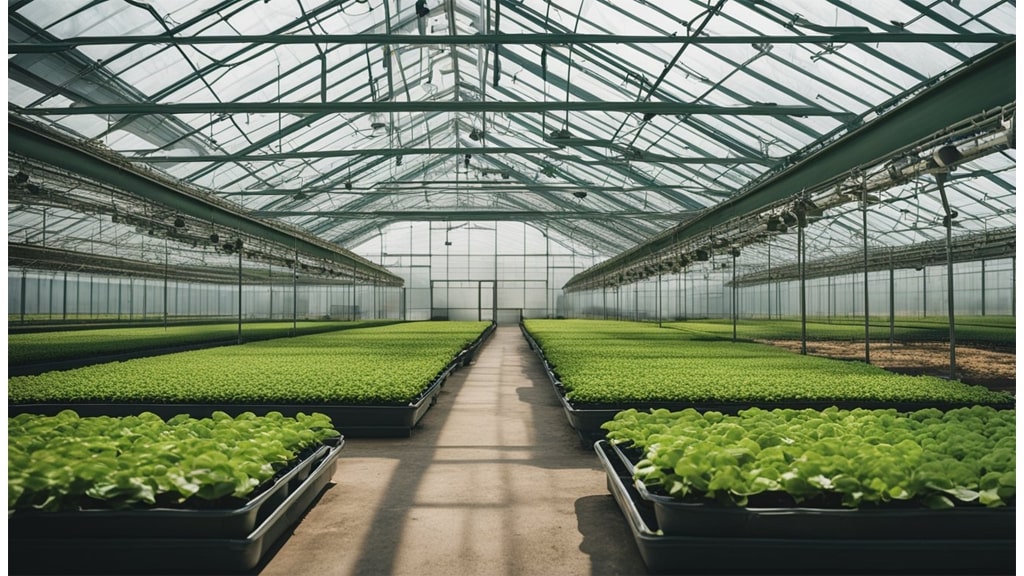
When we talk about greenhouse farming, we mean growing plants in a specially constructed building—usually made of glass or plastic—that allows us to control the growing environment. Instead of relying only on natural weather, we manage aspects like temperature, humidity, and light for our crops.
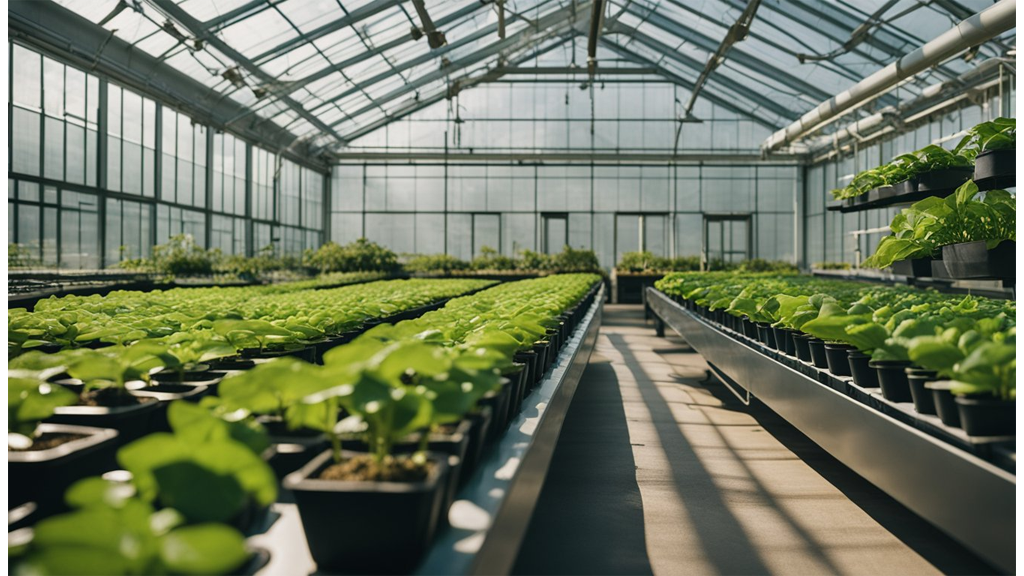
Greenhouse construction is designed to harness natural sunlight while providing protection from extreme weather. Ventilation systems and sometimes heaters or coolers help us maintain optimal plant growth conditions all year round.
Here's a quick overview of what greenhouse cultivation often involves:
We also rotate crops with the seasons to maintain soil health and maximise yields. Regular monitoring helps us adjust water, nutrients, and ventilation to suit the specific needs of each plant.
The types of crops we commonly grow in greenhouses include:
| Crop Type | Examples |
|---|---|
| Fruit-bearing plants | Tomatoes, cucumbers, peppers |
| Leafy greens | Lettuce, spinach |
| Flowers and ornamentals | Roses, orchids, geraniums |
Greenhouse farming is popular because it lets us extend the growing season and protect our crops from pests and bad weather, giving us a reliable and efficient way to produce food and flowers. We find it especially useful for high-value plants that need a little extra care.
When we talk about greenhouse farming, one of the biggest advantages is climate control. Greenhouses allow us to manage temperature, humidity, and even light conditions using a variety of environmental control systems.
Because of this, we can extend growing seasons. We’re not limited by the outside weather, so we can grow crops all year round—even when it’s snowing or raining outside. This is especially valuable for high-value crops like tomatoes, peppers, and flowers that might not thrive in harsher climates.
We also benefit from reliable protection from external factors. Greenhouses act as a barrier against many pests and diseases. They help shield our plants from strong winds, heavy rains, and extreme temperatures.
Here’s a quick look at some key advantages:
| Advantage | Benefit |
|---|---|
| Extended growing seasons | Harvest crops year-round |
| Environmental control | Fine-tune temperature, humidity, and light |
| Protection from external threats | Reduce risk from pests and harsh weather |
| Optimised produce quality | Consistent growth and appearance of crops |
| Supports high-value crops | Grow crops that need specific climate conditions |
We can also use automated climate control systems to adjust conditions throughout the day, making the growing process less labour-intensive and more efficient. This not only improves produce quality but can also boost yields.
With these advantages, greenhouse farming gives us the ability to focus on quality, reliability, and better resource control.
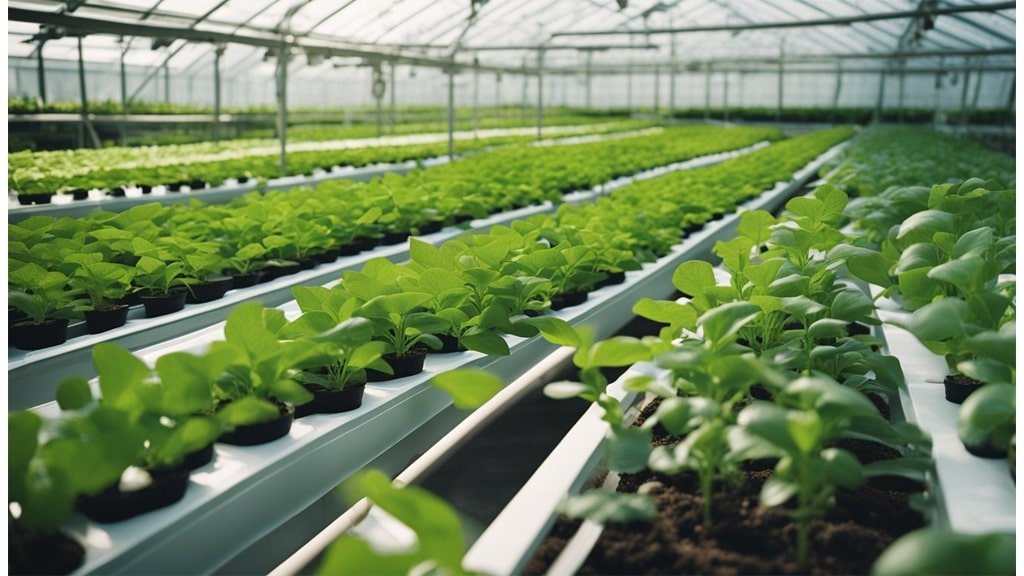
Hydroponic farming is a soilless method where we grow plants using solutions rich in nutrients, rather than traditional soil. Instead of roots digging into the earth, they absorb minerals directly from water.

We can find several types of hydroponic systems. Common ones include:
| System Type | Key Feature |
|---|---|
| DWC | Roots in oxygenated water |
| Ebb and Flow | Cycles of flooding and draining |
| Aeroponics | Roots misted with nutrients |
| NFT | Continuous shallow water flow |
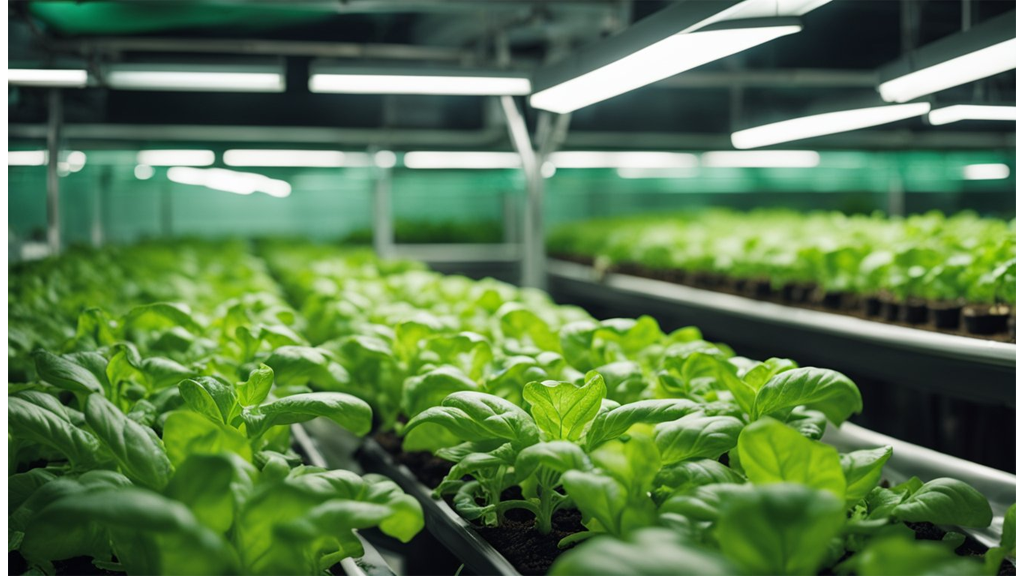
Hydroponic farming works well in vertical farms, indoor spaces, and controlled greenhouses. We use it where space or soil quality is limited.
With this method, we can grow a range of hydroponic crops, such as:
Hydroponic systems play a significant role in growing high-value crops that need precise nutrient management. We focus on plant selection carefully to match the system and crop type. Some farmers even combine hydroponics with aquaculture in aquaponics, where fish help provide nutrients for plants.
Hydroponic farming gives us several unique advantages, especially when compared to traditional soil-based methods.
Efficient Resource Use
We use up to 90% less water than conventional farming. Nutrient solutions are recirculated, so there’s less waste. This makes hydroponic production ideal for areas facing water scarcity.
Faster Growth and Increased Yields
Plants get nutrients like macronutrients and micronutrients delivered directly to their roots. Because of this, they can grow 30–50% faster and often produce higher yields. Our ability to manage nutrient analysis and adjust nutrient management precisely means healthier, more vigorous plants.
Space Optimisation
Hydroponic systems—especially vertical setups—make the most of limited space. We can grow crops in dense arrangements, fitting more plants within smaller greenhouses or indoor environments.
Reduced Pest and Disease Pressure
No soil means no soil-borne diseases or pests. This lowers the need for pesticides and results in cleaner produce. Artificial media such as perlite, vermiculite, expanded clay, coconut coir, rockwool, and oasis allow us to fine-tune water-holding capacity and substrate conditions.
Key Materials and Techniques
| Substrate | Common Uses |
|---|---|
| Rockwool | Seed starting, slab culture |
| Perlite/Vermiculite | Drainage and aeration |
| Coconut Coir | Water retention |
| Expanded Clay | Support for roots |
| Oasis | Propagation |
We often rely on drip irrigation and nutrient recycling to maintain optimal nutrient solutions. Adjusting these variables allows us to customise growing conditions for each crop, further enhancing productivity.
Choosing between hydroponics and greenhouses depends on our priorities, such as cost, space, and ongoing upkeep. Each method offers unique benefits and challenges, especially when it comes to efficiency, sustainability, and crop yields.
The initial investment for hydroponic farming tends to be higher due to the need for specialised systems, such as pumps, grow lights, reservoirs, and monitoring equipment for factors like electrical conductivity (EC) and pH.
Traditional greenhouse farming typically requires land preparation, construction, and soil management, which may have lower upfront costs. However, these savings can be offset by ongoing expenses for soil amendments, pest control, and water.
Operational expenses also differ:
| Expense Area | Greenhouse | Hydroponic |
|---|---|---|
| Initial Setup | Construction, Soil | Specialised Equipment |
| Operational | Soil Inputs, Water | Nutrients, Electricity, Maintenance |
| Lighting | Natural Sunlight | Artificial Lighting (often) |
Hydroponics often has higher electricity costs, especially if we rely on artificial lighting or climate control. In contrast, greenhouses can utilise natural sunlight, though this depends on local sunlight hours.
Hydroponic systems are designed for maximum yield in minimal space. We can stack growing trays vertically, making it possible to produce far more per square foot than with traditional soil beds.
A vertical hydroponic farm can fit the same output in a fraction of the area we’d need for a greenhouse using soil-based beds. Space savings matter most in urban settings or regions with limited agricultural land.
Key factors driving space efficiency in hydroponics:
Greenhouses are better for crops that don’t thrive in water-only systems or where space isn’t a premium concern. Still, hydroponic setups outperform if yield per area is our main goal.
Hydroponic systems require us to monitor nutrient concentrations, pH, and electrical conductivity daily. Pumps, tubing, reservoirs, and grow lights need regular cleaning and occasional replacement, making technical know-how valuable.
For soil-based greenhouses, we focus on soil health, which involves composting, irrigation, nutrient management, and pest control. Environmental factors like temperature, humidity, and ventilation must also be monitored, but often with less precision than hydroponic farms demand.
Hydroponic maintenance is often more time-consuming but ensures consistent crop quality. Greenhouse maintenance can be labour-intensive, especially for larger operations or when dealing with pests and diseases in the soil.
Hydroponics stands out for water efficiency. Water circulates within closed-loop systems, and any unused water is recaptured, filtered, and reused. This can cut water use by up to 90% compared to traditional soil growing.
Greenhouses, while offering better water control than open fields, still lose water through evaporation, runoff, or inefficient irrigation. Soil can retain water, but not as efficiently as hydroponic setups.
In areas facing water scarcity, hydroponics may be the more sustainable option. For greenhouse growers, drip irrigation or rainwater harvesting can lower water use but rarely matches the savings achieved by hydroponics.
Soil is a common source of pests and diseases. Greenhouse crops can be affected by soil-borne fungi, nematodes, and insects that require constant monitoring and treatment.
Hydroponic farms eliminate soil from the equation, reducing risk of soil-borne issues. Since water and nutrients are delivered directly, there’s less chance for certain pests to thrive. However, hydroponic systems can still see algae build-up or root diseases if we aren’t careful with system cleanliness and water quality.
Pest control in greenhouses often needs chemical or integrated pest management, while hydroponic growers focus more on sterilising equipment and maintaining clean systems. Either way, active oversight is a must to avoid crop damage or loss in both settings.
We've seen that hydroponics and greenhouse farming offer different ways to grow plants in controlled environments. Hydroponics uses a water-based nutrient solution without soil, while greenhouses often rely on soil or alternative mediums.
Here's a quick table to highlight the main differences:
| Factor | Hydroponics | Greenhouse Farming |
|---|---|---|
| Growing Medium | No soil, uses water/nutrients | Usually, soil/medium |
| Water Usage | Lower usage | Higher usage |
| Setup Needs | More technological | Can be simpler |
| Space Efficiency | High | Variable |
When choosing the right method, we should think about:
If we have limited water, hydroponics can be a more efficient solution. For larger-scale operations or traditional crops, greenhouses may be a better fit.
Experimenting with both systems can help us better understand plant care and achieve better results. By combining techniques, we may even create a system that fits our unique needs and goals.
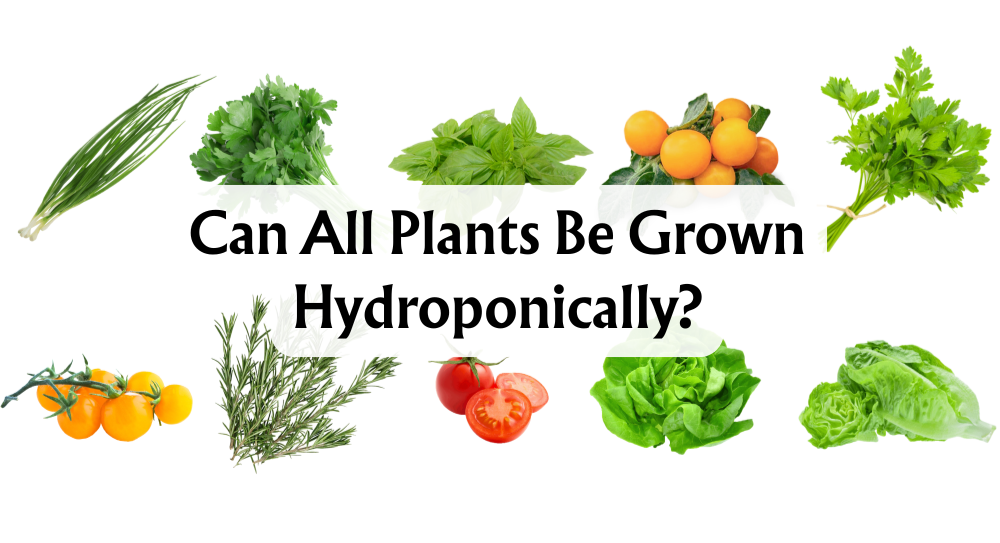
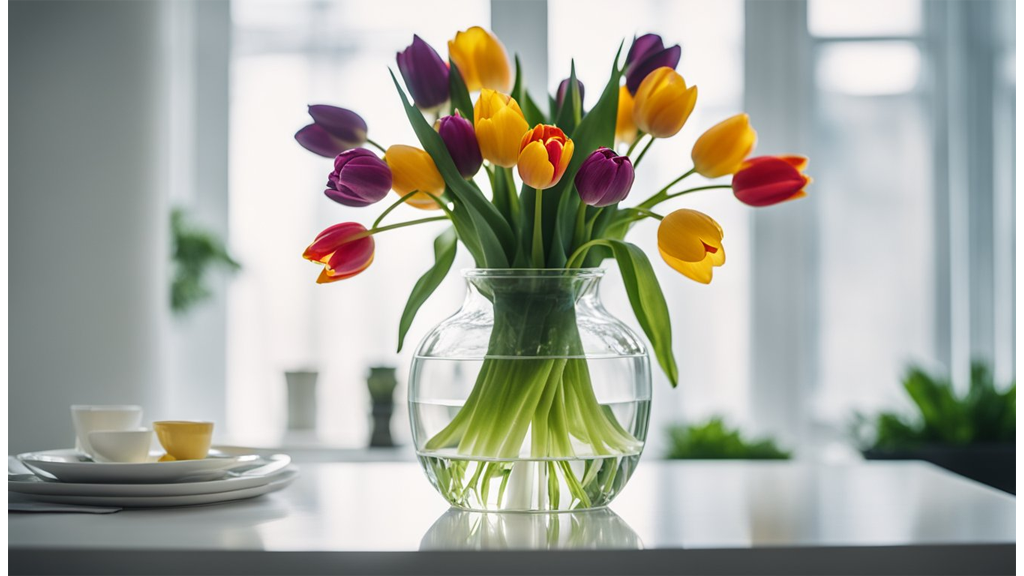
Hydroponic gardening fascinates us with its promise of vibrant growth and year-round productivity. As we explore this innovative method, the question that often arises relates to its scope: Can all plants be grown hydroponically? The straight answer is no; while the majority of plants respond well to hydroponic systems, there are exceptions. Each plant has unique needs, and not all are suited to this soil-less environment.
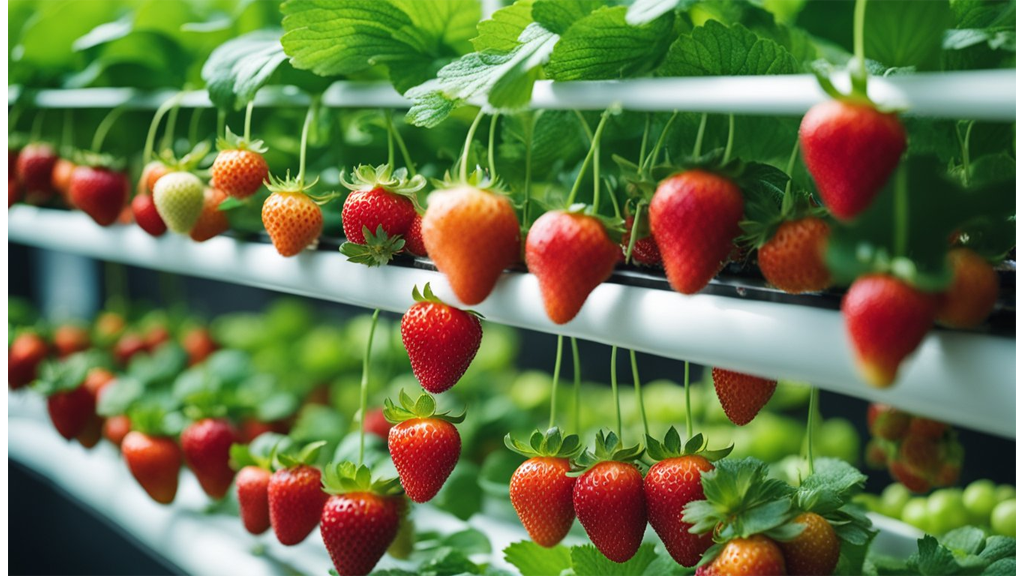
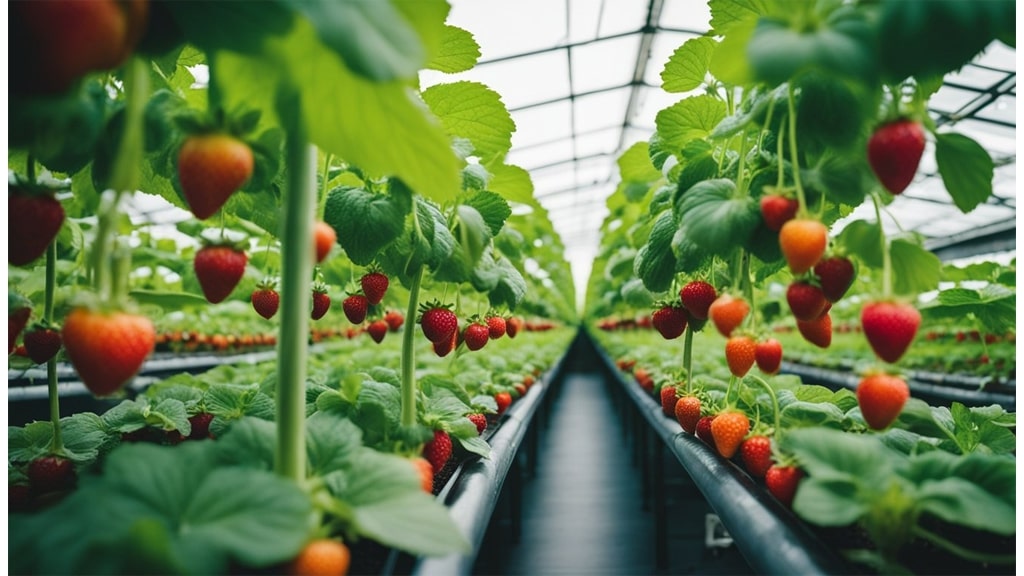
Our journey into hydroponics opens up a world of possibilities for growing an array of vegetables, herbs, and even flowers. Many plants, including popular choices like tomatoes, lettuce, and strawberries, thrive in this controlled environment. The absence of soil presents opportunities for many plants but also challenges for specific varieties that require more robust structures or specific soil conditions.
As we delve deeper, we'll uncover which plants make great candidates for hydroponic systems and which might struggle. It's a fascinating exploration, bridging the gap between traditional gardening and modern technology, and we're excited to guide you through it.
Many vegetables thrive in hydroponic systems, offering us an efficient way to cultivate fresh produce indoors or in constrained spaces. Understanding which vegetables flourish can help us maximise our hydroponic gardens.
Leafy Greens
Leafy greens are ideal for hydroponics due to their rapid growth and high water content. Our go-to choices include:
Fruiting Vegetables
For those interested in fruiting vegetables, a few options are perfect for hydroponics, though they may need extra care:
By selecting the right vegetables, we can ensure a bountiful and varied hydroponic garden. With attention and care, many of our favourite veggies can thrive without soil, providing fresh produce all year-round.
Herbs are perfect for hydroponic systems. They bring fresh flavours to our kitchens all year round, using up very little space.
Basil thrives when grown hydroponically. This herb is a standout choice for indoor gardening enthusiasts due to its rapid growth and fragrant leaves.
Mint is another excellent option for hydroponics. It grows vigorously, and the controlled environment of hydroponics helps contain its spread effectively, which can be a challenge in traditional gardens.
Cilantro is versatile in hydroponic settings. We can propagate it in water for immediate use, but for an extended harvest, cultivating it from seeds in hydroponic systems is highly effective. We have an in-depth blog on hydroponic herb growing for your perusal.
Here’s a brief list of other herbs to consider for hydroponics:
Hydroponic cultivation of herbs not only saves space but also ensures optimal conditions such as nutrient-rich water and controlled environments, making it a sustainable choice for urban gardeners seeking convenience and flavour.
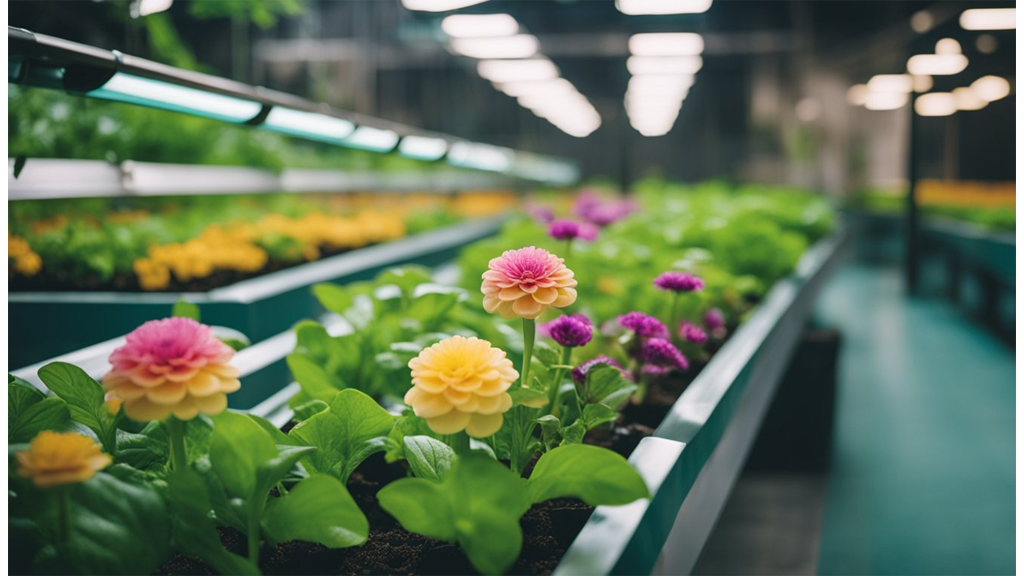
We can absolutely grow flowers hydroponically, and it can be a rewarding experience. Many ornamental plants adapt well to soilless systems, providing us with a fulfilling way to enjoy blooms indoors all year round.
Orchids are a favourite for hydroponic systems because they naturally thrive in similar conditions. These stunning plants often prefer the controlled environment we can provide, mimicking their epiphytic nature.
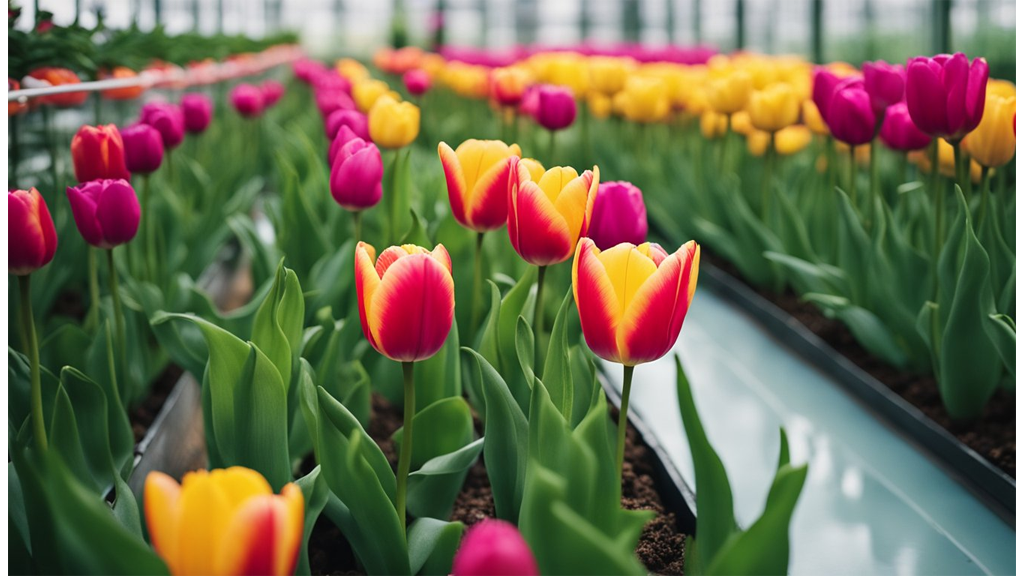
We love Petunias for their vibrant colours and adaptability. They're perfect for hydroponics, especially when paired with proper lighting to boost growth and blooming. Another flower that thrives in hydroponic conditions is the tulip, for which we have an extensive blog on.
Marigolds are another great choice. These cheerful flowers not only bring colour but can also help with pest control within our indoor gardens, adding both beauty and utility.
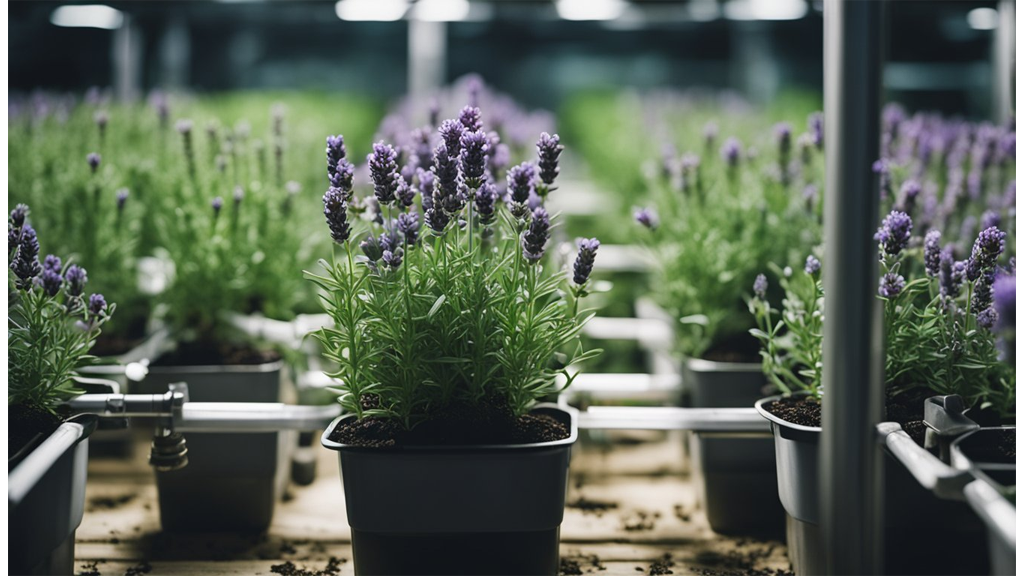
Lavender is another flowering plant that does well in hydroponic growing conditions. For a deep dive on hydroponic lavender, check out our latest blog.
Here's a quick table to summarise:
| Flower Type | Benefit |
|---|---|
| Orchids | Thrive naturally in soilless systems |
| Petunias | Flourish with proper lighting |
| Marigolds | Aids in pest control, adapts well |
Hydroponics allows us to grow a wide range of flowers, bringing the garden right into our home. It's fascinating to witness their growth and development in a controlled environment.
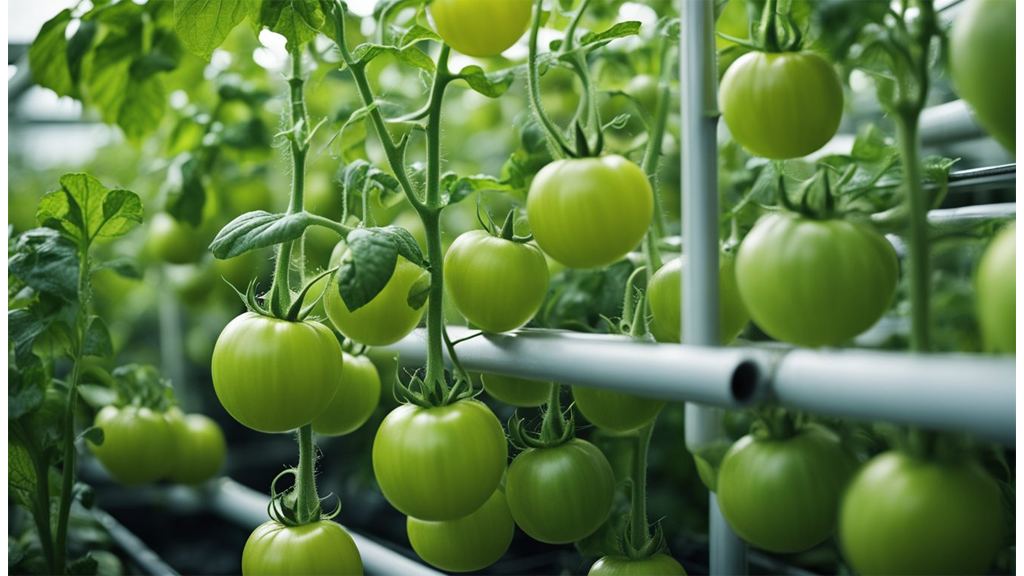
Growing tomatoes hydroponically is entirely feasible and offers great results when approached thoughtfully. It's quite popular among hydroponic enthusiasts due to the prolific yields and controlled growth conditions that this method affords.
Variety Selection:
When choosing tomato varieties, it's wise to opt for determinate or dwarf types. These are well-suited for indoor systems as they have a more compact growth habit that fits limited spaces nicely.
Pollination Needs:
In a hydroponic setup, natural pollinators, like bees, are often absent. We might need to engage in manual pollination to ensure a good fruit set. This can be easily achieved by gently shaking the plants or using a soft brush to transfer pollen.
Support Structures:
Tomato plants, especially as they begin to bear fruit, require support to handle the weight. Providing trellises or stakes is crucial. Doing so helps maintain structure and prevents damage to both the plant and its fruits.
Indoor and Outdoor Cultivation:
Tomatoes can be cultivated in hydroponic systems both indoors and outdoors. Careful nutrient selection is important for achieving vibrant growth and juicy tomatoes.
List of essentials for setting up a hydroponic tomato system:
Engaging in hydroponic tomato farming can be quite rewarding with delicious results. We have a comprehensive blog on hydroponic tomatoes for a deep dive on how they are grown and the best varieties for doing so. As always, paying attention to the details can result in bountiful harvests year-round.
Yes, we can grow spinach in hydroponic systems, and it comes with notable benefits. Spinach is well-suited for hydroponics, taking advantage of several features these systems offer. We have an extensive blog on hydroponic spinach, detailing the pros and cons and the best systems for growing.
Growth Cycle
Spinach has a fast growth cycle, which means we can expect multiple harvests. This characteristic makes it a practical choice for those looking to maximise their yield over time.
Nutrient Requirements
Balanced nutrient solutions are crucial. Spinach thrives with mixes rich in nitrogen. We must ensure these nutrients are available to support robust growth, especially during the early stages.
Temperature Control
Spinach prefers cooler temperatures. Maintaining an optimal environment can enhance the yield and quality of the crop. Temperature regulation is easier in hydroponics, allowing us more control over the growth conditions.
Advantages
Challenges
Growing spinach hydroponically may pose some challenges, as it's more difficult than cultivating other leafy greens like lettuce. Yet, with attention to detail, spinach can flourish beautifully in a hydroponic setup.
Yes, strawberries can indeed thrive in a hydroponic environment. This innovative method of cultivation allows us to enjoy fresh strawberries regardless of the season or outdoor conditions.
System Choice:
For strawberries, the Nutrient Film Technique (NFT) is commonly preferred. This system ensures a continuous flow of nutrient-rich water over the plant roots, providing optimal growth conditions.
Varieties to Consider:
Day-neutral or everbearing varieties, such as 'Albion' and 'Monterey', are ideal due to their consistent fruit production. These types don't rely on specific day lengths to bear fruit, making them perfect for hydroponics.
Pollination Process:
Within an indoor set-up, strawberries rely on manual pollination or the introduction of pollinators to ensure fruit development. This crucial step helps in achieving a bountiful harvest.
By controlling factors like nutrition, light, and temperature, hydroponics offers an efficient way to cultivate strawberries. We have an extensive blog on cultivating hydroponic strawberries for a deeper dive on the matter. This method ensures rapid growth and healthier plants.
While the adaptability of hydroponic systems is impressive, some plants don't suit these setups well. Let's explore a few categories that present challenges.
Root Vegetables: Carrots, potatoes, and onions have deep root systems. Accommodating these in standard hydroponic setups can be difficult due to space and support limitations.
Large Fruit Trees: Growing large trees indoors is impractical, especially when considering their need for extensive space and structural support. The typical hydroponic environment isn't equipped to handle these demands.
Vining Plants: Vines like pole beans and peas stretch extensively. While possible, supporting their growth exceeds the capabilities of conventional hydroponic systems. They require more space and sturdy supports.
It's important to remember that each plant has unique needs. For those less suited to hydroponics, traditional soil methods might be the best option.
We love the world of hydroponics and the possibilities it brings to gardening. While not all plants can flourish in a hydroponic environment, many vegetables, herbs, and flowers do exceptionally well, making it an exciting option to explore.
Some plants, like lettuce, tomatoes, and basil, are famously successful in hydroponic systems. These thrive due to their adaptable root systems and minimal soil requirements.
On the other hand, plants with large root systems or those requiring extensive support, like trees or shrubs, may struggle in a water-based system.
It's essential that we tailor our hydroponic setups to meet specific plant needs. With the right nutrients, light, and environment, we can unlock the full potential of hydroponic gardening. By continuously learning and experimenting, we maximise our success and enjoy healthy, productive crops.

Growing tulips hydroponically has become an interesting and practical way for us to enjoy beautiful blooms indoors, without the mess of soil. We get a cleaner, more controlled environment and the chance to see the full growth process up close. For those of us who appreciate efficient gardening, hydroponic tulips offer striking flowers and a fun growing experience.
Hydroponic tulips typically last about a week during their blooming period, depending on the variety. Unlike traditional cut tulips that fade within a few days, these tulips often stay fresh and colourful longer, giving us more time to enjoy their beauty. Knowing how long they last helps us plan and care for our plants better, so we get the most out of every bloom.
When growing tulips hydroponically, we can choose between different system types. The main methods are substrate hydroponics, which makes use of a growing medium, and water forcing, which relies solely on water for root development.

Substrate Hydroponics (Media-Based)
Substrate hydroponics involves placing the tulip bulbs in a container filled with a growing medium rather than soil. Common media we use include coconut coir, perlite, and sometimes vermiculite. These materials offer stability for the bulbs, help retain moisture, and allow the roots to breathe.
This approach is particularly popular for hydroponic bulb-growing because it eases nutrient management. We can supply nutrients directly to the root zone using a dilute fertiliser solution. The media also help anchor the bulbs, preventing them from toppling over as they grow.
Advantages:
Challenges:
Substrate hydroponics is well-suited to those who want to balance ease of use with healthy, reliable tulip blooming.
Water forcing is a classic hydroponic method especially suited to forcing tulips indoors. It involves placing bulbs so that only their roots touch the water, using containers like glass vases or bulb-forcing jars.
How we set this up:
Key Tip: It's crucial to keep the bulb itself dry to prevent rot—only the roots should be submerged.
Benefits:
Potential drawbacks:
Water forcing is ideal for those who want a straightforward, decorative way to enjoy tulip blooms indoors for several weeks.
Hydroponic tulip cultivation offers us a range of practical advantages that enhance both growing efficiency and flower quality. With precise control over conditions and resources, we can achieve consistent results, save space and water, and enjoy tidier, healthier blooms.
With hydroponics, we have fine control over nutrients, moisture, and temperature, so each tulip receives exactly what it needs to thrive. Unlike soil, where drainage and temperature can vary, our hydroponic systems deliver a uniform environment for growth. This leads to flowers that are more consistent in size, colour, and bloom time.
Commercial growers frequently choose hydroponics to produce high-grade tulips for markets and retailers. By eliminating variables like poor soil drainage or fluctuating soil temperature, we reduce the risk of underdeveloped or irregular flowers. As a result, customers receive tulips that look vibrant and fresh, making them more appealing and reliable.
Hydroponic setups allow us to maximise every bit of growing space, especially in urban or indoor environments. Vertical racks, multi-level trays, and compact systems mean we can grow more bulbs in a smaller footprint.
A typical hydroponic tray can hold about 75 bulbs in the same space where soil might allow only 66 bulbs (based on some grower reports). This efficiency is particularly important for commercial production. By stacking or lining up trays efficiently, we can greatly increase our yield per square metre compared to traditional soil beds.
| Method | Bulbs per Area | Space Needed |
|---|---|---|
| Soil-based | 66 | More |
| Hydroponic | 75 | Less (per tray) |
Hydroponic growing systems recycle and recirculate water, which dramatically cuts down on overall usage. Unlike soil cultivation, where much of the water is lost due to evaporation, runoff, or poor drainage, hydroponics delivers water directly to the roots and reuses it continuously.
Studies show that hydroponic systems can reduce water use by up to 90% compared to traditional soil-based methods. For growers concerned about sustainability, this is a significant saving. Not only does this benefit the environment, but it also reduces our water bills and makes tulip production more viable in regions with limited water resources.
By controlling environmental factors – such as temperature, humidity, and light – we can grow tulips hydroponically throughout the year, independent of outdoor weather conditions. This advantage lets us produce blooms even outside the normal season.
For example, growers have successfully kept hydroponic tulips blooming for an extended period by maintaining temperatures between 15-21°C. Adjustable settings allow us to simulate ideal spring-like conditions, resulting in a longer blooming window and more harvests throughout the year. This flexibility supports both hobbyists and commercial growers who want a steady supply of fresh tulips.
Hydroponic systems keep bulbs and flowers free from soil, which simplifies the entire harvesting process. There’s no dirt to rinse away, and plants are less exposed to soil-borne diseases or pests.
Because we avoid common issues like root rot associated with poor soil drainage, our tulips stay healthier. Harvesting is quicker and less messy, and the bulbs are ready for inspection or distribution with minimal handling. This leads to higher quality blooms and a more hygienic production process, making it especially attractive for those selling directly to customers or florists.
Some tulip varieties adapt better to hydroponic systems thanks to their growth habits and flower longevity. When we pick the right varieties, we get more consistent blooms, stronger stems, and longer-lasting flowers.
Single Late tulips are known for their tall stems and vibrant, cup-shaped blooms. These tulips bloom later in the spring, usually in May, making them a great option for those seeking extended colour in hydroponic displays. Their single blooms stand upright and reach up to 70 cm in height.
In hydroponic systems, Single Late tulips like the ‘Queen of Night’ (deep violet) and ‘Menton’ (soft pink) perform exceptionally well. Their sturdy stems hold up in water, and they bloom for about a week, which is in line with most hydroponic tulip lifespans. We find these cultivars respond well to stable water temperature and consistent light.
Popular Cultivars:
Single Lates are also valued for their ability to flower uniformly, which is key in professional and home hydroponic set-ups.
Double Late tulips are often called “peony tulips” for their lush, layered petals. Their flowers are large and full, making a striking impression. These varieties bloom in late spring and are best known for their showy, long-lasting petals.
Our experience shows that Double Late tulips like ‘Angelique’ and ‘Miranda’ thrive in hydroponic environments due to their strong stems, which support the heavier blooms. Regular fresh water and gentle, indirect sunlight help to maximise their vase life up to 10 days with good care.
To get the best results with Double Late tulips:
Their densely-packed petals mean more impact per stem – perfect for centrepieces or special arrangements.
Darwin Hybrid tulips are a popular choice among those growing tulips hydroponically because of their vigour and reliable flowering. Known for large, egg-shaped blooms and long, strong stems, they typically bloom mid to late spring. They reach heights of 55–70 cm.
Varieties like ‘Apeldoorn’ (red) and ‘Pink Impression’ are favourites in hydroponic setups due to their ability to produce uniform, showy flowers. As perennial plants, Darwin Hybrids sometimes rebloom in subsequent years with proper care, though in commercial hydroponics, we usually grow them as annuals.
A case in point: ‘Apeldoorn’ tulips have shown steady blooming for 7–10 days in hydroponic culture with regular water changes and consistent temperature. Their resilience to disease also makes them a smart, low-maintenance pick.
Double Early tulips deliver lush blooms sooner than most varieties, sometimes as early as March or April. These tulips are shorter, generally 25–40 cm high, but they make up for their size with dense, peony-like flowers.
Well-suited for hydroponic systems, varieties such as ‘Monte Carlo’ (yellow) and ‘Mondial’ (white) are known for compact growth and quick flowering. We recommend giving them sufficient light and steady, cool temperatures for best results.
Care tips:
Their shorter stature makes them ideal for tabletops and windowsills, where space may be limited.
Single Early tulips are among the first tulips to bloom, often opening in early spring. Their simplicity, quick development, and sturdy stems make them a practical choice for hydroponic cultivation.
Cultivars like ‘Apricot Beauty’ and ‘Yokohama’ have performed well in trials, usually producing blooms within 3–6 weeks after planting in hydroponics. These single-flower varieties need less vertical space, so we can fit more bulbs in a single growing tray.
In one hydroponic test, ‘Christmas Dream’ produced consistent blooms in as little as 26 days. The predictable growth patterns and compact nature of Single Early tulips help us achieve dense, colourful displays without complex maintenance.
Best suited for:
When we grow hydroponic tulips, one of the first questions we ask is how long these spring blooms can really last. On average, the actual flowering period of hydroponic tulips is about a week. If we provide ideal care, the blooms may last up to 10 days.

Environmental factors play a big part in the lifespan of tulips. Cooler room temperatures, ideally between 15-21°C (60-70°F), help extend the blooming period. Warmer settings tend to shorten the time our tulips stay fresh.
Here’s a quick look at the usual lifespans:
| Growing Method | Typical Blooming Period |
|---|---|
| Hydroponic Tulips | 7-10 days |
| Cut Tulip Flowers | 5-7 days |
For the best results, we should:
Growing tulips hydroponically gives us an easy way to bring spring blooms indoors, and good maintenance can make a real difference in how long we enjoy their colour. By following a few care tips, we can make the most of each flowering period and keep our tulips looking their best for longer.
Caring for hydroponic tulips starts before we ever see a flower. We need to select healthy, pre-chilled tulip bulbs. This chilling or cooling period, usually six to eight weeks in the fridge, mimics winter and is crucial for flower development.

Setting up our hydroponic system means arranging the bulbs so only their bases touch water. We should add a balanced hydroponic nutrient mix to support root development. Bright, indirect light and a cool storage temperature—ideally between 10-15°C—help the bulbs germinate and prevent leggy growth.
When the tulips begin blooming, we keep an eye on water levels. Water should be fresh and topped up regularly. Checking for aphids or other pests is important, as they can hinder blooming and bulb health.
We may notice some bulbs do better than others. It's normal for the actual blooming period to last about a week, depending on variety. Blooms can fade sooner if the environment is warm or the water quality drops.
After the flowers fade, we have a decision to make. Some bulbs may be reused if they are still healthy. It's important to rinse and dry them, then store them in a cool, dry place away from ripening fruits.
Here's a quick summary table for reference:
| Stage | Key Steps |
|---|---|
| Pre-Bloom | Chill bulbs, set system, control temperature |
| During Bloom | Monitor water, check pests, adjust lighting |
| After Bloom | Dispose or store bulbs, clean equipment |
Cleaning all equipment helps prevent disease and ensures our next batch of tulip bulbs has the best chance for success.
When we talk about hydroponic tulips, their blooming period is fairly brief—typically about a week, depending on the variety. As cut flowers, they stay fresh for a similar period, making them a beautiful but short-term display.
Growing tulips hydroponically comes with unique benefits:
However, it's worth keeping in mind a few considerations:
We encourage everyone to try hydroponic tulip cultivation. Testing different varieties, water conditions, and care methods could yield better results for your space.
If you've harvested hydroponic tulips before or have tips on extending their vase life, we'd love to hear from you. Please share your experiences and advice so we can all keep improving our hydroponic gardens together.

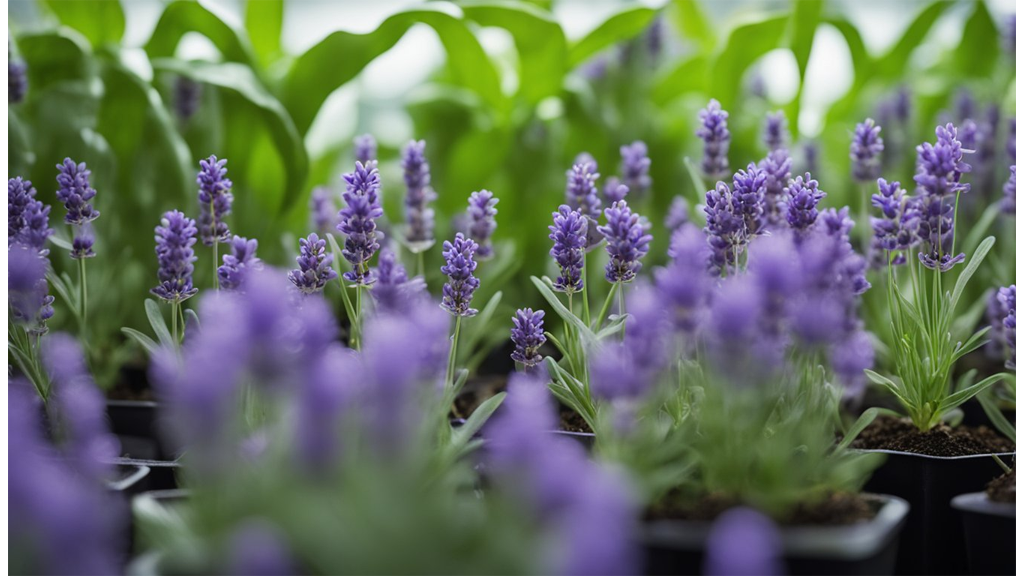
Growing lavender through hydroponics opens up a world of possibilities for herb enthusiasts. By opting to cultivate lavender without soil, we can harness the benefits of controlled environments and faster growth rates. One of the key advantages of growing lavender hydroponically is the ability to fine-tune growing conditions — such as pH, lighting, and nutrient supply — for optimal growth and yield.
Our exploration of hydroponic systems shows how these setups work wonders for lavender cultivation. The gentle ebb and flow of systems like Flood and Drain ensure that the roots get just the right amount of nutrients and oxygen. Imagine watching your lavender thrive indoors with vibrant blooms and aromatic foliage all year round.
For anyone considering starting a hydroponic lavender garden, understanding the ideal conditions and setups is crucial. Whether it's selecting the right hydroponic setup or choosing suitable growing mediums, getting these factors right can make all the difference. With a little guidance and the right approach, we can transform how we experience this fragrant herb.
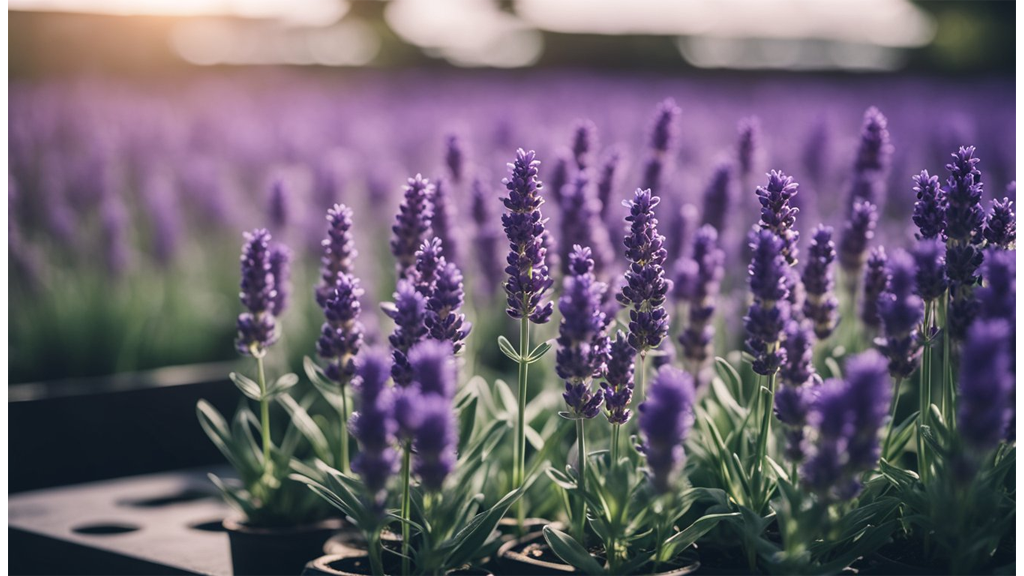
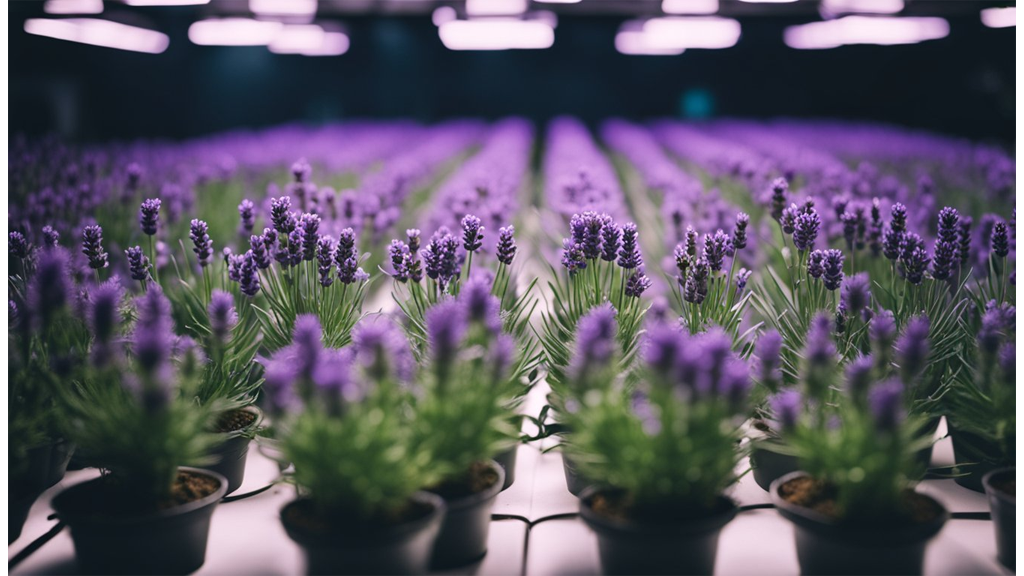
Using hydroponics for growing lavender offers several advantages. One significant benefit is space efficiency. In hydroponic systems, plants can be grown vertically, allowing us to maximise limited space. This is particularly beneficial for those of us with small gardens or urban dwellers with limited outdoor areas.
Hydroponic gardening helps in water conservation. Unlike traditional soil gardening, hydroponics uses a closed water system that recirculates water, reducing water usage by up to 90%. For a crop like lavender, which traditionally requires well-drained soils, this efficient water use is a game-changer.
Pest and disease management becomes less of a hassle in hydroponic systems. Without soil, many soil-borne pests and diseases are eliminated. We often find that lavender grown in these systems thus experiences fewer issues compared to soil-grown lavender.
When we compare hydroponic lavender to its soil-grown counterpart, we see a faster growth rate. Studies show a growth rate increase of about 30% in hydroponics. This translates to quicker harvests and a potentially higher yield, making it appealing for commercial and private growers alike.
Successful hydroponic lavender farms demonstrate the practical benefits. Some farms have reported faster breakeven points due to these accelerated growth rates. This offers exciting possibilities for those interested in commercial hydroponic lavender production.
Growing lavender hydroponically allows us to adapt to changing climates and urban lifestyles rapidly, offering a sustainable and efficient method that aligns with modern gardening demands.
When we're growing lavender hydroponically, we need to focus on its optimum temperature range. Lavender thrives between 60°F and 70°F (about 15°C to 21°C). Maintaining this temperature ensures that the plant remains healthy and grows efficiently.
Light is another critical factor. Lavender prefers full sun, which means we must ensure our hydroponic setup receives ample light. In the absence of natural sunlight, using a grow light can help provide the necessary illumination to support photosynthesis and promote growth.
In terms of watering and humidity needs, lavender isn’t too fussy about humidity levels but prefers a well-oxygenated water supply. It's essential to keep the system aerated and avoid waterlogging, which can harm the roots.
Our lavender plants will need the right nutrient mix to flourish. A balanced nutrient solution containing essential elements like nitrogen, phosphorus, potassium, calcium, and magnesium is crucial.
Lastly, let's not forget carbon dioxide. Adequate air circulation ensures that they receive enough CO2 for photosynthesis. If we're growing indoors, opening windows or using fans can help maintain suitable CO2 levels.
By managing these conditions, we can create a hydroponic environment where our lavender thrives.
Growing lavender hydroponically requires careful attention to several key factors. By optimising pH levels, maintaining ideal humidity, and managing electrical conductivity (EC) levels, we can promote thriving lavender plants.
The pH level of the nutrient solution is crucial for the health of our lavender plants. Lavender thrives best in a slightly alkaline environment, with the ideal pH range being between 6.5 and 7.5. We should regularly monitor the pH using a reliable pH meter.
To adjust pH levels, we can use pH up or pH down solutions. Adding lime increases alkalinity, while vinegar or citric acid can reduce pH. Regular monitoring and slight adjustments help ensure our plants absorb nutrients effectively, promoting lush growth.
Proper humidity levels are essential in a hydroponic setup for lavender. Our lavender plants prefer lower humidity levels, typically between 40% to 50%. Excessive humidity can lead to diseases and reduce growth rates, while low levels can cause dehydration.
To control humidity, we can use dehumidifiers or ventilation systems. Placing a hygrometer in the grow area assists in constant monitoring, ensuring levels remain within the desired range. Effective humidity control contributes to vibrant, disease-free lavender.
Electrical Conductivity (EC) measures the nutrient concentration in our hydroponic system. This ensures our lavender receives adequate minerals like nitrogen, potassium, calcium, magnesium, and phosphorus. Ideal EC levels for lavender range between 1.6 to 2.0 mS/cm.
Using an EC meter, we can adjust our nutrient solution accordingly. High EC levels may indicate excess salts, while low levels could mean nutrient deficiency. Maintaining balanced levels supports nutrient uptake and robust plant development in hydroponic environments.
When setting up a hydroponic system for lavender, Nutrient Film Technique (NFT) is ideal. In this method, a thin film of nutrient solution continuously flows over roots, ensuring they’re always fed whilst exposed to air for oxygen.
Deep Water Culture (DWC) is another great option, where plants are suspended in nutrient-rich water. An air pump supplies oxygen to roots, aiding their growth efficiently.
For those wanting versatility, an Ebb and Flow system works well. This setup involves flooding and draining the growing area, ensuring nutrient delivery and aeration.
For those with limited space, smaller systems like NFT or DWC can be perfect. They are manageable and ideal for home setups.
On the other hand, larger-scale operations might find Ebb and Flow more suitable, thanks to its efficient nutrient cycling.
Essential accessories include a reliable air pump, which is crucial in both NFT and DWC systems. This keeps oxygen levels high in nutrient solutions, promoting root health.
Accurate monitoring is key, so having a pH and EC meter ensures your water conditions are optimal for lavender. Keeping pH levels alkaline, around 6.5-7.5, is crucial for optimal growth.
Here’s a quick tool list for your setup:
With this setup, we can look forward to successful lavender growth in a hydroponic environment.
In hydroponic systems, choosing the right growing medium for lavender is crucial for success. A soilless environment is key, ensuring optimal drainage and moisture retention. Let's explore some options.

Rockwool
Rockwool is a popular choice in hydroponics. Made from spun volcanic rock, it provides excellent water retention and aeration. It's perfect for maintaining moisture without waterlogging the roots. However, it can be slightly alkaline, which could necessitate pH adjustments. It's durable and reusable, making it cost-effective over time.
Clay Pellets
Also known as expanded clay pellets, this medium is known for superb aeration and drainage. Ideal for ebb-and-flow systems or Dutch buckets, they maintain a stable pH. The pellets can be reused, although they require cleaning. They provide a firm anchor for lavender roots but don't hold as much moisture as rockwool.
Coco Coir
Derived from coconut husks, coco coir offers a more organic option. It's sustainable and retains moisture well while providing good aeration. It's less prone to compaction than traditional soil, offering more room for root growth. One downside is that high levels of potassium might lead to nutrient imbalances, so monitoring is necessary.
Here's a quick comparison:
| Medium | Pros | Cons |
|---|---|---|
| Rockwool | Excellent moisture, aeration | Can be alkaline |
| Clay Pellets | Good drainage, reusable | Less moisture retention |
| Coco Coir | Sustainable, good moisture retention | Might need calcium/magnesium supplement |
Selecting the right growing medium impacts the health and growth of our hydroponic lavender plants. Each option has its unique benefits and challenges, so it's important to evaluate based on our hydroponic setup and personal preferences.
In hydroponic lavender cultivation, common problems include the presence of pests and the issue of leggy plants. Tackling these efficiently can significantly enhance the quality and yield of your lavender crops.
Lavender, like many other plants, can attract pests even in hydroponic systems. Common culprits include aphids, spider mites, and whiteflies, which can sap the strength of the plant if not controlled. These pests typically thrive in environments where there is high humidity and limited airflow.
Preventative measures are vital. This involves maintaining optimal air circulation and monitoring humidity levels. Regularly inspecting the plants for signs of infestation is crucial.
For a natural approach, introducing beneficial insects like ladybirds can keep pests in check. Additionally, using neem oil as a natural pesticide can deter unwelcome visitors without harming the plants.
Legginess in lavender often results from inadequate light and poor air circulation. We might notice that plants stretch, striving for light, especially when placed under unsuitable artificial lighting conditions or in a crowded system.
To promote bushier growth, ensuring appropriate light intensity and duration is essential. Using grow lights that mimic sunlight and spacing out plants can drastically reduce legginess. Pruning lavender regularly helps encourage a more compact growth habit.
In our hydroponic setup, robust lighting systems and strategic plant spacing make a substantial difference. By addressing these common problems, we can maintain healthier, more productive lavender plants ready for overwintering and beyond.
When it comes to hydroponic growing versus soil growing, both methods have distinct characteristics that might appeal to different preferences.
Growth rate and yield
Plants in hydroponic systems often show faster growth and potentially higher yields. This is partly due to the efficient delivery of nutrients and water directly to the roots, facilitating quicker growth. In contrast, traditional soil-growing methods might take a bit more time as they rely on the soil's natural nutrient content.
Environmental impact
Let’s focus on environmental implications. Hydroponics uses less water than soil growing due to its recirculating systems. Although it requires infrastructure, less water consumption can be more sustainable. On the other hand, soil growing can support biodiversity when managed properly.
Maintenance and labour
Hydroponic systems require careful monitoring of nutrient solutions and pH levels, which can demand more initial setup and labour. However, once established, they can reduce manual labour due to the automation of watering. Soil growing offers simplicity but may need more physical effort for tasks like weeding and soil tilling.
Taste and aroma
The taste and aroma of crops can be subjective. Some argue that soil-grown lavender has a richer, more complex flavour profile due to the diverse mineral content in the earth. Meanwhile, hydroponically grown plants can deliver consistent results, but certain enthusiasts might find them lacking in nuanced taste profiles.
Each growing method offers its own set of advantages. Our choice would thus depend on specific goals, whether it’s speed, flavour, or environmental considerations.
Growing lavender through hydroponics presents numerous benefits. This method allows us to cultivate lavender efficiently, without the need for soil, and often results in faster growth. Hydroponic systems can provide optimal conditions such as controlled nutrients and water, leading to healthier plants.
Building a hydroponic setup for lavender can seem daunting, but the process is straightforward. Beginners can start with simple setups and expand as they gain confidence. By experimenting with techniques, we can optimise our systems for better yields.
We encourage everyone to explore growing hydroponic lavender. The aromatic properties, aesthetic appeal, and various uses of lavender make it an excellent choice for indoor gardening. Whether for personal use or small-scale commercial production, the benefits are plentiful.
For further learning, we can explore tutorials online or join gardening communities. Engaging with others who share our interest can provide support and new ideas. Attending workshops or reading books about hydroponics can also offer valuable insights.
With a little dedication, we can enjoy the fragrance and beauty of lavender grown right in our homes. Let’s embrace this opportunity to enhance our gardening experience with hydroponics!
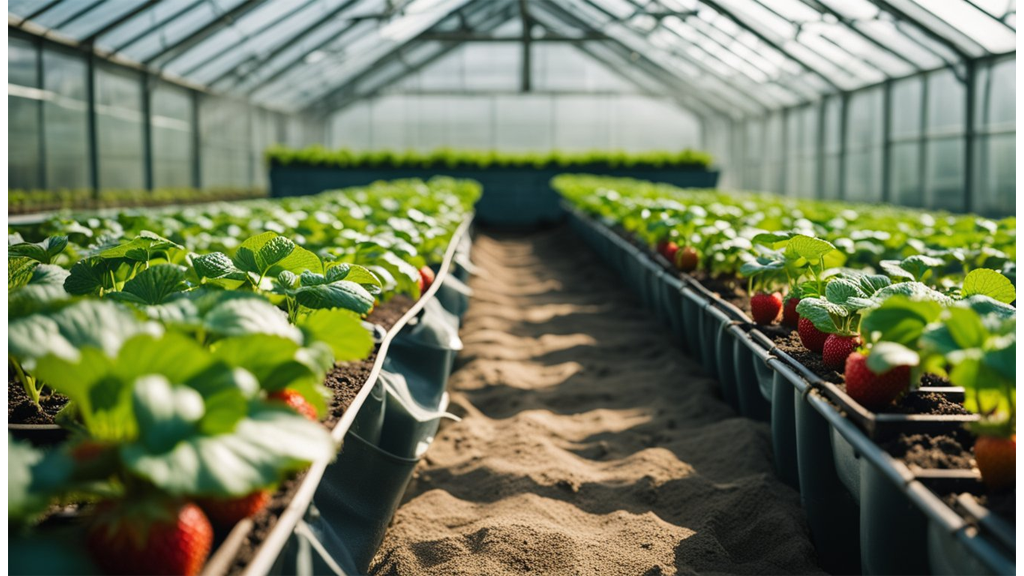
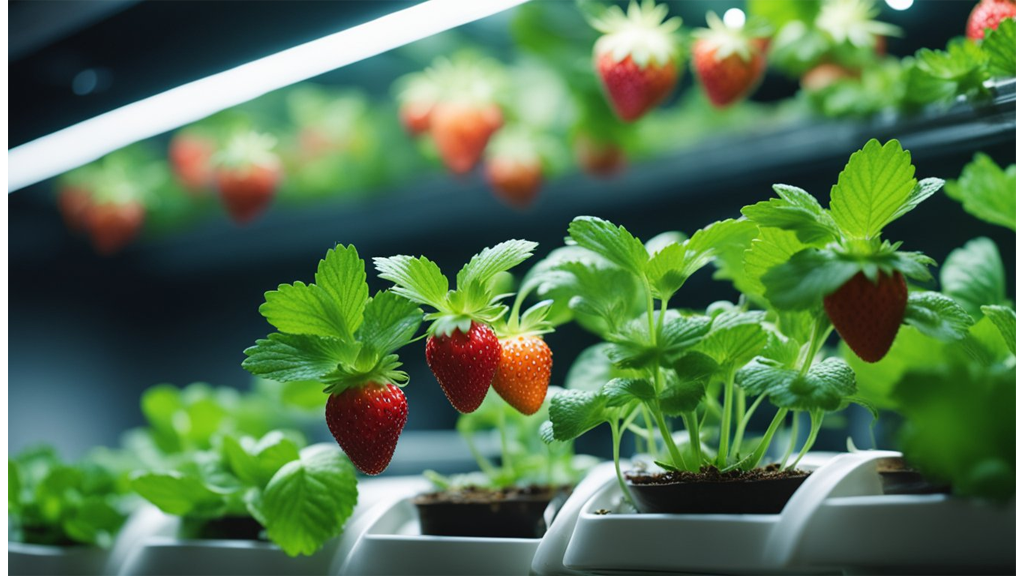
Hydroponic strawberries have become a fascinating new frontier in food production. By growing strawberries without soil, we can fine-tune nutrient delivery, leading to healthier plants and larger harvests. This innovative method allows us to bypass the typical challenges of soil farming, offering a controlled environment indoors where fruit production can thrive.
In our increasingly urbanised world, hydroponics holds the potential to transform how we feed growing cities. With no need for extensive farmland, strawberries can be cultivated in spaces such as rooftops and basements. This not only maximises space but also reduces exposure to soil-borne diseases and pests, contributing to pesticide-free produce.
We are also embracing the opportunity to cultivate larger and tastier strawberries. The ability to control factors like humidity, light, and nutrients ensures the ideal conditions for growth. Join us as we explore the varied hydroponic systems and how they match up against traditional soil-growing methods.
Yes, we can definitely grow strawberries hydroponically.
Hydroponic gardening involves growing plants in nutrient-rich water solutions instead of soil. It provides strawberries with all the necessary nutrients directly to their roots. This method can be adapted for both indoor and outdoor growing.
One of the significant advantages of hydroponic agriculture for strawberries is year-round growth. We can control the environment to maintain optimal conditions regardless of external weather. This means fresh strawberries throughout the year.
Space efficiency is another benefit. Vertical systems allow us to grow strawberries in limited spaces. It's perfect for urban gardening where space is a premium.
Pest problems are notably reduced without soil. Hydroponic farming decreases the need for pesticides, ensuring healthier fruit.
Common challenges include monitoring pH levels and ensuring the water's nutrient content is balanced. Investing in quality sensors and timers can help us overcome these issues. Suitable systems like Nutrient Film Technique (NFT) or Deep Water Culture (DWC) also support robust strawberry growth.
There are successful examples of hydroponic strawberry farms. For instance, some commercial farms implement large-scale hydroponic systems to produce high yields efficiently.
Overall, hydroponic gardening offers a modern approach to growing strawberries, making it accessible and efficient for many of us.
When it comes to growing strawberries hydroponically, choosing the right system is crucial. Our focus is on how different systems suit your needs, factoring in space, budget, and maintenance requirements.
The Nutrient Film Technique (NFT) is a popular choice for hydroponic strawberries. In this system, a thin film of nutrient-rich water flows continuously over the roots. This allows precise control over nutrients and oxygen, crucial for healthy strawberry growth.
Pros of the NFT system include efficient use of water and nutrients, and less growing medium is required. However, the system is sensitive to power outages or pump failures, as roots can quickly dry out. To maximise efficiency, regularly monitor water levels and keep the channels free from blockages. When it comes to growing medium, options like rockwool or perlite can be beneficial as they provide good drainage and aeration. Vertical growing can also be employed with NFT, saving space and enhancing productivity.
Ebb & Flow, also known as flood and drain, involves intermittently flooding the grow bed with nutrient solution, which then drains away. This creates a fluctuating oxygen environment for the roots, promoting robust growth.
Advantages of the Ebb & Flow system include less frequent maintenance since there's no constant water flow, plus it allows various growth media, such as clay pebbles or coir. One downside can be the initial setup cost and a requirement for more space compared to the NFT system. To achieve success with this method, setting precise flood timings and maintaining a regular cleaning schedule of the system is essential to prevent root rot. A real-life example involves commercial farms employing Ebb & Flow to achieve consistent yields, appreciating the balance it offers between low maintenance and effective growth.
When we talk about growing strawberries, two main methods stand out: hydroponic and traditional soil techniques.
Water Usage:
Hydroponic systems significantly optimise water usage. They recycle water, which reduces waste and enhances water quality. In contrast, traditional soil methods may see higher water consumption due to runoff and evaporation.
Growth Rate:
With hydroponics, strawberries often grow faster. Nutrient delivery is more direct, allowing the plants to uptake nutrients efficiently. This can lead to quicker fruiting compared to soil-grown ones.
Diseases and Pests:
Hydroponic systems can limit common soil-borne diseases, including root rot, due to the absence of soil. This gives an edge in pest control since pests and diseases that thrive in soil are less of an issue.
Taste and Nutritional Differences:
Some believe hydroponic strawberries can match or surpass the nutritional content of soil-grown varieties, particularly in Vitamin C content. Taste is subjective, but many find both equally delicious.
Environmental Impact:
Growing hydroponically can be more sustainable. The controlled environment in hydroponics reduces the need for pesticides and supports cleaner production of edible plants. Soil farming might require more natural resources and can impact local ecosystems.
Using these methods, we explore new ways to enjoy this beloved fruit while addressing challenges like water conservation and pest management. Let's continue to innovate and learn from both techniques to find what works best for our environment and taste buds!
Selecting the right strawberry variety for hydroponics can significantly impact plant growth and yield. Quinault, Albion, and Seascape are three varieties known for their adaptability to hydroponic systems. Each offers unique benefits in terms of taste, yield, and resilience.
The Quinault strawberry is a popular choice for hydroponics due to its ability to produce large, flavourful berries. It's an everbearing variety, which means it can yield fruit multiple times a year. This makes Quinault particularly appealing for those looking to maximise their harvests.
When it comes to growing conditions, Quinaults thrive with a consistent nutrient supply and stable temperatures. In hydroponics, the plant roots are efficiently supported, promoting vigorous growth.
The yield is typically generous, with berries offering a sweet taste and often used for fresh consumption or in desserts. With proper care, Quinault strawberries can be a rewarding addition to any hydroponic setup.
Albion strawberries stand out for their robust disease resistance, making them a resilient choice for hydroponic systems. They also exhibit high tolerance to different environmental conditions, allowing for easier cultivation.
The growth rate for Albion is steady, and they tend to produce high yields of firm berries. These strawberries are known for their excellent flavour, often described as sweet with a hint of tartness.
In addition to their taste, Albions are valued for their ability to resist common ailments that can affect strawberry plants, thereby reducing maintenance concerns and ensuring a more reliable yield.
Seascape strawberries are known for their tolerance to varying climates, making them suitable for diverse hydroponic environments. This versatile nature allows them to be grown year-round in controlled hydroponic conditions.
In terms of maintenance, Seascape strawberries benefit from regular nutrient monitoring to ensure they reach their full potential. Their yield is consistent, producing medium to large berries with a strong aroma and balanced sweetness.
When grown hydroponically, Seascape plants maintain healthy roots and demonstrate robust growth, offering both aesthetic appeal and an abundant harvest.
When deciding which strawberry variety to grow hydroponically, we must first consider our needs and the environment we have. Hydroponic systems allow us to grow strawberries year-round, and selecting the right variety can maximise our harvest.
Day-neutral strawberries are an excellent option for hydroponic setups. They adapt well to controlled environments, produce continuous fruit, and require less maintenance. Examples include the Seascape and Tribute varieties.
Here's a quick comparison:
| Variety | Yield | Maintenance | Flavour |
|---|---|---|---|
| Seascape | High | Medium | Sweet, juicy |
| Tribute | Moderate | Low | Subtle, mellow |
It's essential to balance yield, ease of care, and taste. Depending on our priorities, we may prefer a variety that offers a sweeter flavour or one that is easier to manage.
Consider mixing different varieties for extended harvests. By planting multiple types, we can enjoy strawberries with varied flavours and textures all year. This also reduces the risk of having a poor yield from a single source.
Many hydroponic systems use seed pods, which simplify planting and help us manage space efficiently. Using these pods, we can start with precise quantities of each variety.
Let's remember to assess our specific conditions and choose accordingly. Our preferences, alongside environmental factors and cultivation goals, will guide us in selecting the best strawberry varieties for our hydroponic journey.
When growing hydroponic strawberries, providing the right lighting is crucial. We should aim to give these plants 14 to 16 hours of light each day for optimal growth. This can be achieved using LED grow lights, ensuring plants receive consistent illumination.
Maintaining the right temperature and humidity levels is equally important. For strawberries, the ideal temperature ranges from 18°C to 24°C. Keeping humidity between 60% and 70% helps the plants thrive while reducing the risk of fungal diseases.
Selecting the best nutrient solutions enhances strawberry growth. We recommend a balanced mix with appropriate levels of nitrogen, potassium, and phosphorus. It may be beneficial to adjust these nutrients during different growth stages for the best yields.
Managing pests and diseases in a hydroponic environment requires vigilance. Regularly inspecting plants for signs of pests such as aphids or spider mites helps prevent infestations. Incorporating natural predators or using organic pesticides with caution can be helpful in maintaining a healthy growth system.
Keeping these considerations in mind allows us to cultivate a robust and fruitful hydroponic strawberry garden.
We've explored the fascinating world of hydroponic strawberries, highlighting their reliance on water and nutrients instead of soil. This method grants us unprecedented control over the growing conditions, which can lead to tastier and potentially more nutritious strawberries.
For those of us intrigued by modern agriculture, hydroponics offers a promising avenue. Experimenting with this method can be a rewarding endeavour, whether you're aiming for personal satisfaction or efficient crop production.
Here are a few resources to get us started:
Let's embrace the challenge and experience the joy of growing our own hydroponic strawberries. Who knows? We might just revolutionise our garden and enjoy delicious, fresh fruit along the way!

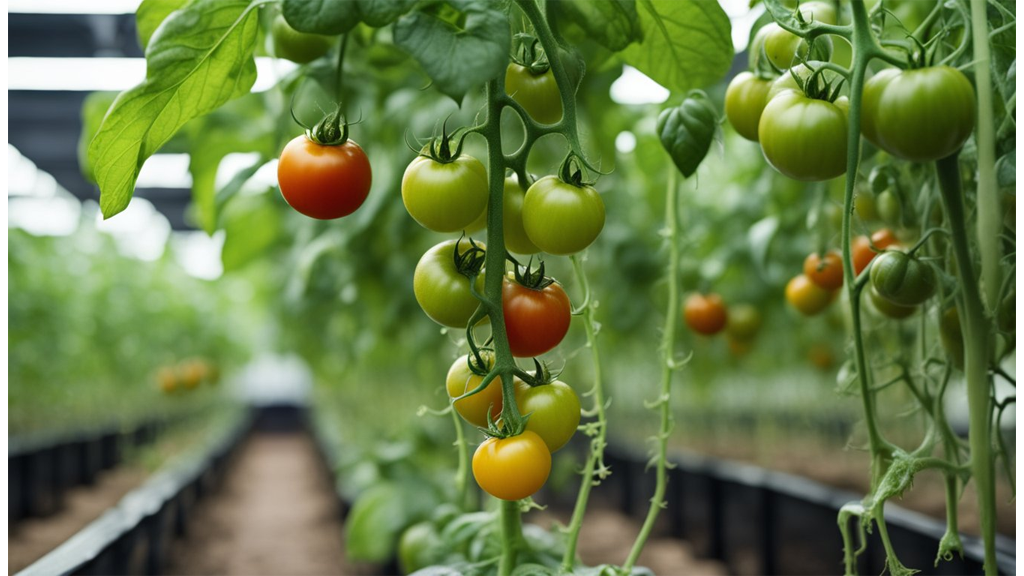
Are hydroponic tomatoes healthy? As we explore this topic, it's clear that tomatoes grown in hydroponic systems can indeed be a nutritious choice. By growing tomatoes hydroponically, we can maximise both their flavour and health benefits. Hydroponics allows for the efficient use of water and nutrients, resulting in high yields and year-round growth. This method also offers the benefit of eliminating soil-borne pests, reducing the need for pesticides and potentially leading to cleaner fruit.
Hydroponic tomatoes have captured our attention not only for their practicality but also for their enhanced nutritional profile. These tomatoes often boast higher levels of vitamin C and other nutrients compared to their conventionally grown counterparts. While conventional and organic tomatoes show similar cadmium levels, hydroponic varieties offer unique advantages in terms of taste and size owing to the controlled growing environment.
As we continue to prioritise health and sustainability, hydroponic tomatoes present an appealing alternative. This innovative approach to agriculture can meet the increasing consumer demand for fresh, high-quality produce while minimising environmental impact. With all these benefits, it's no wonder hydroponic tomatoes are becoming a staple in modern diets.
Why choose hydroponic systems for growing tomatoes? Let’s explore some of the compelling reasons together.
In hydroponics, we can grow tomatoes all year long. This is because the system allows us to control the growing environment, such as light and temperature. This ensures continuous production irrespective of the outside weather.
Hydroponic systems are incredibly water-efficient. These systems recycle water and only use about 10% of the water that traditional soil-based systems need. This makes it a sustainable choice, especially in areas with limited water resources.
We have the ability to precisely manage nutrient intake, providing exactly what the plants need. This controlled nutrient supply can lead to healthier plants that grow faster and produce high-quality yields.
Since hydroponic systems are often indoors, we face fewer problems with pests and soil-borne diseases. Fewer pests mean we can often avoid the need for harsh pesticides, which is better for our health and the environment.
Hydroponic tomatoes are frequently larger and more flavourful when compared to their soil-grown counterparts. The ability to optimise growing conditions gives us an edge in achieving superior taste and texture.
There are numerous successful farms that use hydroponics to grow tomatoes. These farms often report higher yields and increased efficiency. For example, a grower might produce 20% to 30% more tomatoes compared to traditional farming methods. This success underlines the promise of hydroponic systems.
When considering hydroponic systems for tomatoes, we have several options. Let's explore a few popular systems.
Nutrient Film Technique (NFT) is a top choice. In an NFT setup, plants grow in a shallow stream of nutrient-rich water. This system is brilliant for tomatoes as it allows constant nutrient supply and good oxygenation. We must ensure the slope and flow rate are just right.
Pros of NFT include efficient water usage and rapid nutrient absorption. However, power outages could be disruptive, as the roots need continuous access to flow.
Deep Water Culture (DWC) involves suspending roots in nutrient solution while air pumps provide oxygen. It's simple and effective for tomatoes. DWC requires consistent monitoring of pH and nutrient levels.
A key advantage of DWC is the potential for high yield. However, temperature control is essential to prevent root issues.
Ebb and Flow works by flooding the root zone with nutrients before draining. This method suits tomatoes due to periodic irrigation, ensuring roots get both nutrients and air. Maintenance involves regular cleaning and pump checks.
Each system has its merits. Factors like space, budget, and expertise play a role in our choice. Keeping nutrient levels and temperature in check across systems guarantees healthy tomato growth.
Growing hydroponic tomatoes offers significant benefits, including more efficient nutrient absorption and higher yields. With careful management of light, nutrient mixtures, and plant spacing, we can cultivate healthy and abundant tomato plants. Detailed attention to factors like pH and EC values is crucial to avoid diseases and ensure vigorous growth.

Starting tomato seeds in a hydroponic environment requires an approach that ensures strong root development. We often use rockwool cubes as they provide an ideal medium for seed germination. To achieve the best results, we recommend choosing reliable seed varieties like Roma or Cherry. The germination phase usually takes 5-10 days. During this period, maintaining moisture is crucial. Avoid overwatering, which can impede seedling growth.
Tip: It’s essential to place the seeds in a warm environment, ideally between 20-25°C, to facilitate germination. Once germinated, transplant carefully into your chosen hydroponic system to avoid disturbing the delicate roots.
Light plays a pivotal role in successful hydroponic tomato cultivation. LED grow lights are highly recommended due to their efficiency and ability to provide the full spectrum of light. We must provide intense light (at least 14-18 hours per day) during all growth stages. Proper lighting schedules promote healthy photosynthesis and reduce the risk of pests like two-spotted spider mites.
For the best results, keep the lights around 30-45 cm above the plants. This helps in replicating the sun's natural intensity. Adjusting the light distance occasionally can optimise growth without causing leaf burn.
Electrical Conductivity (EC) measures the nutrient solution's ability to conduct electrical currents, reflecting nutrient concentration. An ideal EC range for tomato plants starts at 2.0 in the seedling stage and gradually increases to 2.5-3.5 during fruiting. This ensures the right nutrient levels.
Monitoring the EC level regularly is crucial to avoid nutrient burn or deficiency. Changes in the EC can signal nutrient imbalances or increased water uptake. Regularly adjusting these levels is a proactive approach to addressing these issues.
Maintaining the correct pH balance is crucial for nutrient absorption. Tomato plants thrive at a pH of 5.8-6.5. Staying within this range ensures optimal uptake of essential nutrients like nitrogen, calcium, and magnesium.
Common challenges include pH fluctuations due to water quality or nutrient imbalances. We suggest using a pH meter to monitor and adjust as necessary with pH-up or pH-down solutions. Keeping the pH stable helps prevent issues with pests like cabbage loopers and diseases.
Tomatoes require a balanced nutrient solution with macro and micronutrients throughout various growth stages. Essential elements include nitrogen, phosphorus, potassium, along with trace elements like iron, boron, manganese, copper. During different growth phases, adjust nutrient solutions for optimal efficiency.
In the fruiting stage, increase potassium and phosphorus while maintaining adequate levels of nitrogen and magnesium. This provides the plant with the necessary elements for robust fruit development. Frequent evaluation of the nutrient solution ensures deficiencies are avoided.
Proper spacing is vital for light penetration and air circulation, reducing fungal diseases and whitefly infestations. Individual tomato plants should ideally be planted 30-50 cm apart. This spacing allows room for healthy growth and access to nutrients.
When considering vertical farming or trellising methods, ensure plants are supported to enhance growth and maximise space use. Vertical methods allow efficient use of available room as we stack layers with adequate light and airflow. Regular pruning also keeps the plants manageable and healthy.
When we dive into hydroponic systems, one of the first things to consider is the initial setup cost. Buckets, PVC pipes, lumber, and poly pipes are essential. From our research, prices might look like this, depending on the scale of set-up and suppliers:
| Item | Estimated Cost |
|---|---|
| 10 buckets | £20 |
| Lumber and PVC pipe/fittings | £30-80 |
| Poly pipe and drip spikes | £50-80 |
Once the initial setup is done, ongoing maintenance becomes a concern. Nutrients, electricity for pumps, and water make up most of this. Monthly expenses might be about £40-£70, depending on energy rates and nutrient brands.
Comparing hydroponic with traditional soil-grown methods, we find long-term savings in water and nutrient efficiency. Soil systems might be cheaper initially, but hydroponics often requires less water and fewer nutrients, saving costs as it matures.
With the right approach and consistent care, hydroponic tomatoes can become a worthwhile investment. It's about balancing initial and ongoing costs with yield and market prices.
Growing tomatoes hydroponically comes with a range of benefits. Increased yield and faster growth are often cited as key advantages. Without the limitations of soil, tomato plants can grow vigorously, allowing us to enjoy bountiful harvests. This method results in tomatoes that are available outside the traditional growing seasons, extending our access to fresh produce year-round.
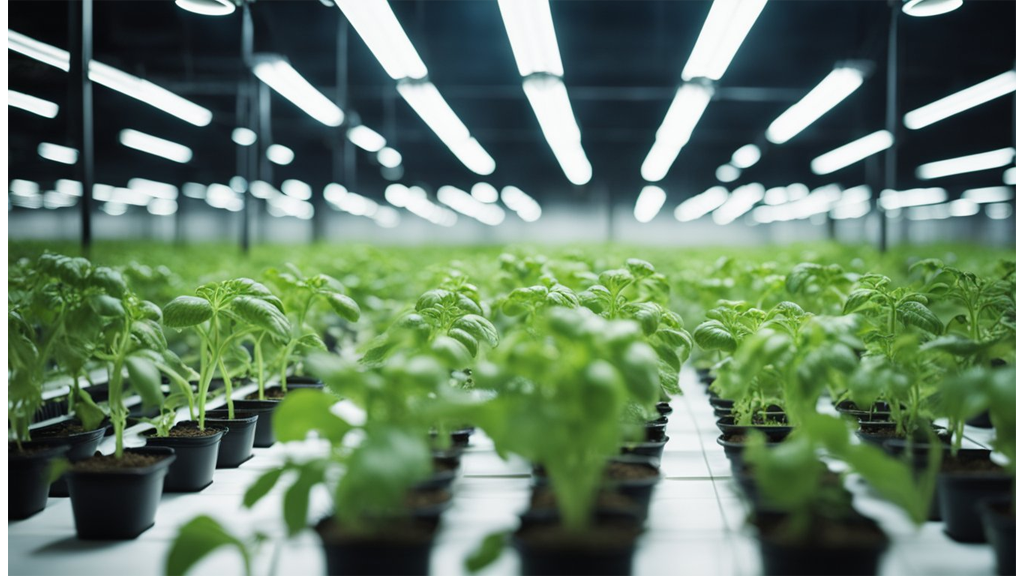
Water and resource efficiency is another strong point. Hydroponic systems recycle water and nutrients, reducing waste significantly. Given the challenges of water scarcity, this feature makes hydroponics an environmentally friendly option. We use less water compared to traditional farming, conserving a crucial resource on our planet.
The reduction in pesticide use cannot be overstated. Growth in a controlled environment allows our tomatoes to be less exposed to pests and diseases. As a result, hydroponics typically requires fewer chemical interventions, leading to healthier produce for us to consume.
Urban and small space gardening benefits greatly from hydroponic systems. Cities and towns where space is limited can still host thriving tomato farms. The ability to grow in urban and small spaces means we can cultivate fresh food in areas previously unsuitable for agriculture. By utilising vertical farming techniques, even the space available in urban areas can produce substantial yields.
In summary, hydroponic systems offer efficiency and sustainability, making them a valuable tool in modern agriculture. By capitalising on these benefits, we can ensure a healthier and more sustainable future for our food supply.
When we talk about hydroponic tomatoes, their nutritional value is a significant point of discussion. These tomatoes are rich in vitamins and minerals, much like their soil-grown counterparts. They are excellent sources of Vitamin C, Vitamin K, potassium, and folate. High in antioxidants, they provide notable health benefits.
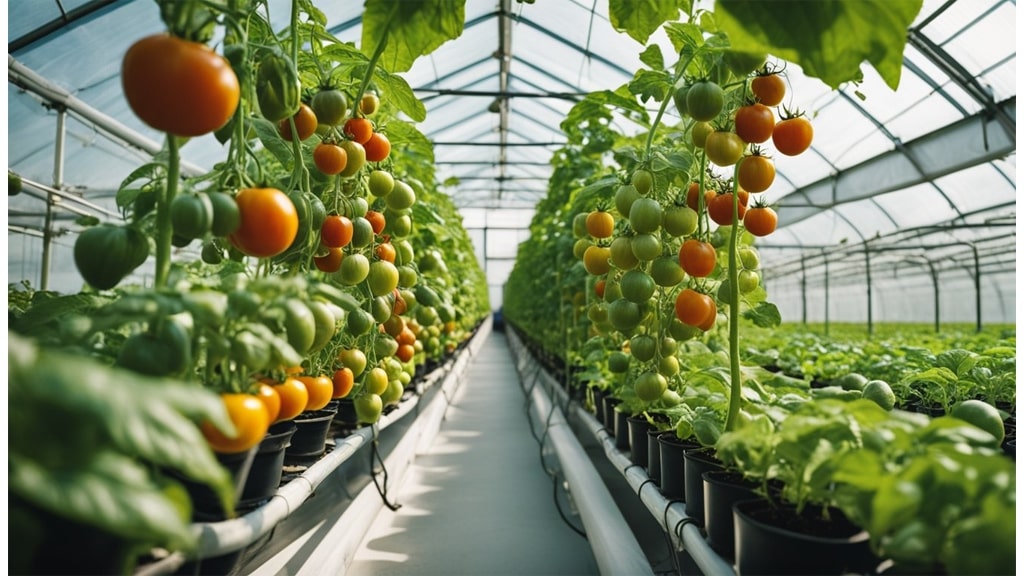
Hydroponically grown tomatoes can have similar nutrient levels to those grown in soil, although this can vary. The nutrient solution used in hydroponics can influence the levels of micronutrients like copper, iron, manganese, and zinc. It's important for hydroponic systems to maintain a well-balanced nutrient solution for optimal results.
Some of us might wonder if growing tomatoes hydroponically affects their taste and texture. Interestingly, studies such as those by Kunsch et al. show that hydroponic tomatoes can have a higher sugar/acid ratio, potentially enhancing taste. This may lead to a sweeter taste, which many of us find appealing. Some even argue the crisp texture is a plus.
In summary, hydroponic tomatoes can be just as nutritious and flavourful as soil-grown tomatoes. With careful management, they not only meet but may exceed conventional expectations in taste and quality. While taste and texture can be subjective, the nutrient-rich profile of these tomatoes is hard to dispute.
Hydroponic tomatoes present a remarkable choice for those seeking nutritious and environmentally friendly produce. These tomatoes are cultivated without soil, leading to fewer pests and diseases. This process also saves water compared to traditional farming methods, helping us to conserve precious resources.
Let’s not forget the nutritional benefits. Hydroponic tomatoes have been known to reduce the risk of chronic diseases, improve immune function, and support a healthier lifestyle. In comparison to conventional options, they show similar, if not superior, nutritional qualities.
For those of us considering starting a hydroponic venture, this method offers a way to engage in sustainable agriculture. It’s ideal for urban environments and limited spaces where soil might not be available. Feeling inspired? Perhaps it's time for us to try our hand at growing our own hydroponic tomatoes.
For more detailed guidance, several resources are available online. Books, online courses, and community forums provide further insights into setting up and maintaining a hydroponic system. These platforms can greatly assist us in understanding the nuances and best practices of hydroponic farming.

Lettuce is the shining star of hydroponic gardening, admired for its ability to thrive in soilless environments. Unlike traditional farming that relies heavily on soil and sunlight, hydroponics allows us to grow lettuce indoors all year round. What makes lettuce particularly ideal for hydroponic systems is its rapid growth rate and adaptability, which result in lush, high-quality yields.
In choosing the best varieties, we often find that leaf lettuce excels due to its resilience and fast maturity. This makes it a preferred option for both commercial growers and hobbyists seeking a steady supply of fresh greens. When it comes to setting up a hydroponic system for lettuce, minimal equipment is needed, which is another reason for its popularity. Essential components include a water reservoir, nutrient solution, and lighting, ensuring that we can achieve a lush harvest with ease.
Understanding the health benefits further enhances the appeal of hydroponic lettuce. These plants are safer because they don’t require pesticides, making them a more natural choice for health-conscious consumers. By embracing hydroponic growing, we can enjoy fresh, crisp lettuce without the concerns associated with traditional soil farming.
Hydroponic lettuce is a fascinating way of growing plants. Instead of using soil, this method utilises water enriched with nutrients to deliver essential minerals directly to the plant roots. This allows us to tailor the growing environment and ensures consistent production.
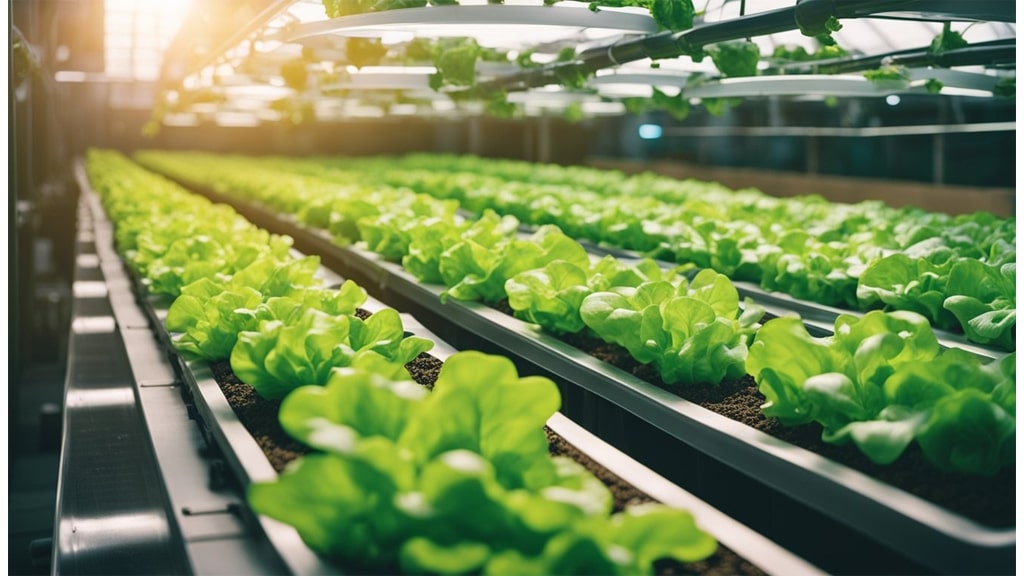
In traditional farming, soil quality can vary, affecting crop growth. With hydroponics, we bypass this variability. We can optimise conditions for each crop, promoting healthier plants and potentially faster growth rates.
Why Choose Hydroponic Lettuce?
Water Efficiency: Hydroponics uses up to 90% less water than conventional agriculture. This makes it a sustainable option, especially in water-scarce regions.
Less Pesticides: Since hydroponics eliminates the need for soil, it reduces the reliance on pesticides and herbicides, making it a safer choice for us and the environment.
Space Maximisation: We can grow more in less space as plants are cultivated vertically or in compact systems. This is ideal for urban areas where space is at a premium.
How Does It Work?
Hydroponic systems use a continuous supply of nutrient-rich water solution, ensuring that lettuce plants receive precisely what they need. We can adjust nutrient levels, light conditions, and water pH easily, which optimises growth.
Using hydroponics, we often find that lettuce grows quicker and can be healthier than those grown in soil. This efficiency suits both large commercial operations and small-scale home setups.
As enthusiasts of leafy greens, we are thrilled by the flexibility and potential of hydroponic lettuce. This innovative method offers possibilities that traditional farming might struggle to match.
To grow hydroponic lettuce successfully, we need a few key components. These include the hydroponic system itself, nutrient solutions, and various supportive equipment like containers, lighting, and adequate ventilation. Here’s a detailed look at what's required.

We have a couple of excellent choices when it comes to hydroponic systems for lettuce cultivation. The Nutrient Film Technique (NFT) involves a shallow stream of nutrient solution that constantly circulates over the plant roots, providing them with nutrients and oxygen. It’s a highly efficient system, perfect for growing lettuce. Another option is the Deep Water Culture (DWC) system where the plant roots are fully submerged in nutrient-rich water. This approach supports rapid growth as roots have constant access to nutrients. Both systems are effective, but the choice depends on space and resource availability.
A crucial component for any hydroponic setup is a well-balanced nutrient solution. It provides plants with essential macro and micronutrients necessary for optimal growth. Using hydroponic-specific nutrient mixes designed for lettuce ensures that plants receive the right proportions of nutrients like nitrogen, phosphorus, and potassium. It's important to follow recommended guidelines for mixing and maintaining these solutions to avoid nutrient deficiencies or toxicities.
Selecting the appropriate growing medium is vital for root support and nutrient uptake. Options like Rockwool, coconut coir, or perlite are popular due to their ability to retain moisture while providing excellent aeration for roots. These media facilitate effective root development and offer a stable foundation for seedlings.
Maintaining the right conditions for nutrient absorption is key. pH and EC meters help us monitor these critical parameters. Lettuce generally thrives at a pH range of 5.5 to 6.5. Regular measurement ensures this optimal range is maintained. Electrical conductivity (EC) meters are used to assess the nutrient concentration, ensuring that plants receive a balanced supply, which is neither too weak nor too concentrated.
Proper containers or trays are essential for holding the nutrient solution and supporting the plants. These need to be stable and large enough to keep the plants well-spaced to promote healthy growth. Ideal containers should facilitate easy drainage and be durable enough to withstand repeated use and cleaning.
Lighting plays a significant role, especially in indoor setups or areas lacking sufficient natural light. LED or fluorescent lights are commonly used to provide the necessary illumination. These lights mimic sunlight and regulate the light cycle, crucial for plant growth and development. They are energy-efficient and can last longer, making them a cost-effective option for our hydroponic gardens.
A good ventilation system contributes to maintaining the right environment for our plants. Using fans, we ensure adequate air circulation which helps prevent mould growth and supports CO₂ availability, vital for photosynthesis. Proper circulation also helps to regulate temperature and humidity, contributing to a balanced growing environment.
The quality of water used is critical to the health of our nutrient solution. It's advisable to use filtered or purified water to avoid potential contaminants that might harm plant growth. Clean water ensures that the nutrient solution mixed is effective and doesn’t introduce any unwanted complications.
By assembling these components, we establish a robust and efficient hydroponic setup for growing lettuce, ensuring a steady supply of fresh produce.
When it comes to growing lettuce hydroponically, selecting the right varieties can significantly enhance your yield and success. Among the popular choices are Butterhead, Romaine, Loose Leaf, and Crisphead (Iceberg) lettuces, each offering distinct benefits for hydroponic setups.
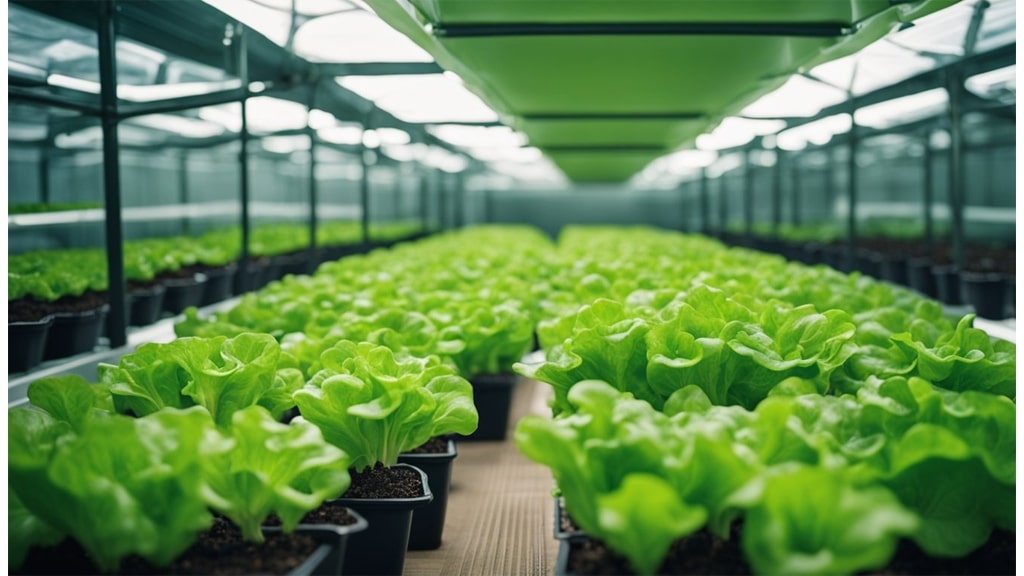
Butterhead lettuce stands out with its soft, tender leaves and mild flavour. Its compact growth is perfect for hydroponic systems with limited space. This makes it easy for us to manage several plants at once, maximising output with efficient use of room.
Additionally, Butterhead's rapid growth cycle allows us to enjoy fresh produce without much delay. Its gentle taste pairs well with various dishes, making it a versatile choice in our culinary adventures.
Romaine lettuce is favoured for its crisp texture and elongated leaves. It is not only nutritious but also adapts well to different hydroponic environments. Its versatility in salads and cooked dishes makes it a staple in our kitchens.
With demands for its crunchiness, Romaine is a great choice as its nutritious content complements our health goals. Enhanced by hydroponic methods, it tends to be more vibrant, offering a fresh taste with each bite.
Loose Leaf lettuce is characterised by an open growth habit, where leaves can be picked individually. This variety allows for continuous harvesting, providing us with a regular supply over time.
Its vibrant colours add visual appeal to dishes, and the ability to harvest progressively means we can enjoy this lettuce fresh daily. Loose Leaf can adapt to variations in our hydroponic setup with minimal fuss.
Crisphead, commonly known as Iceberg lettuce, forms dense, round heads with a satisfyingly crunchy texture. While it requires precise environmental control in hydroponic systems, it meets high market demand due to its refreshing taste and crunch.
Managing Crisphead in our setups involves strict monitoring of conditions, yet the effort pays off with each crisp layer it provides. Its presence in sandwiches and salads makes it a household favourite, offering an inviting crunch to every dish.
As we dive into hydroponic lettuce farming, achieving success hinges on understanding the core components like temperature and light. Ensuring the right conditions are met can significantly boost plant growth and harvest quality.
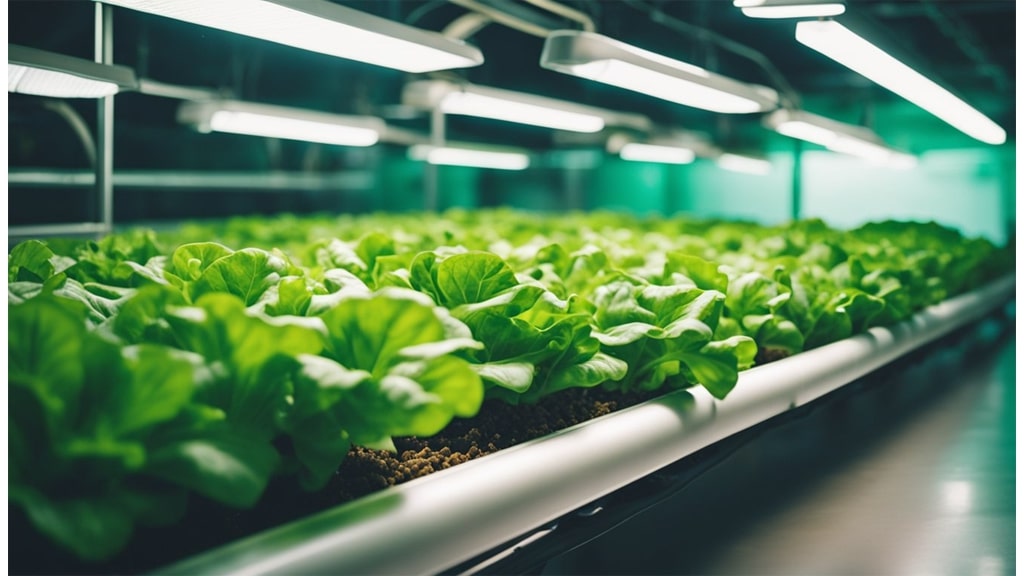
Temperature plays a vital role in growing hydroponic lettuce. We should aim to keep daytime temperatures between 65°F and 75°F (18°C–24°C) to nurture a thriving environment. This range promotes strong growth and prevents common issues like bolting, where lettuce prematurely flowers and becomes bitter. Night-time temperatures should be slightly cooler, offering a natural fluctuation beneficial to lettuce health. Monitoring water temperature is equally crucial, as consistent levels prevent plant stress and disease. Using thermometers in the reservoir can help ensure conditions stay within this ideal range. This simple step can lead to a robust lettuce crop.
Light is a powerhouse for photosynthesis, which is essential for lettuce development. We should provide between 10 and 14 hours of light daily to simulate the sun's natural cycle. Too little light can stunt growth, while too much can cause leaf burn. Using LED or fluorescent lights with adjustable settings can help tailor this light exposure to the optimal duration. Placing lights at a suitable height from plants ensures even distribution and maximum efficiency. Timers can be employed to automate the light schedule, maintaining consistency and reducing manual oversight. By controlling light opportune hours, we are set to achieve healthy and lush lettuce.
When it comes to growing lettuce hydroponically, speed is one of the key advantages. Hydroponic systems create perfect conditions for rapid growth.
Most lettuce varieties are ready for harvest just 4 to 6 weeks after transplanting. Of course, the exact time depends on factors like variety and environment, but this is considerably faster than traditional soil methods.
If you're new to this, consider the type of lettuce, as they might have slightly different timelines. Here's a simple comparison:
| Lettuce Type | Growth Time (Weeks) |
|---|---|
| Leaf Lettuce | 4 to 5 |
| Butterhead Lettuce | 5 to 6 |
| Iceberg Lettuce | 8 to 12 |
Lettuce has a high water content, which helps it grow quickly compared to other plants. Also, in hydroponics, plants get a consistent supply of water, nutrients, and light, which ensures optimal growth conditions.
Our experience shows that with the right setup, lettuce can thrive, and using hydroponics cuts down the waiting time remarkably.
Beyond speed, hydroponics allows us to cultivate lettuce all year round, irrespective of the weather outside. This means fresh lettuce is always just a few weeks away.
Eating hydroponically grown lettuce provides numerous health perks. One of the most significant is reduced exposure to contaminants. The controlled environments in which hydroponics are set up help in reducing soil-borne pathogens and pesticides. This means we get lettuce that's cleaner and potentially safer.
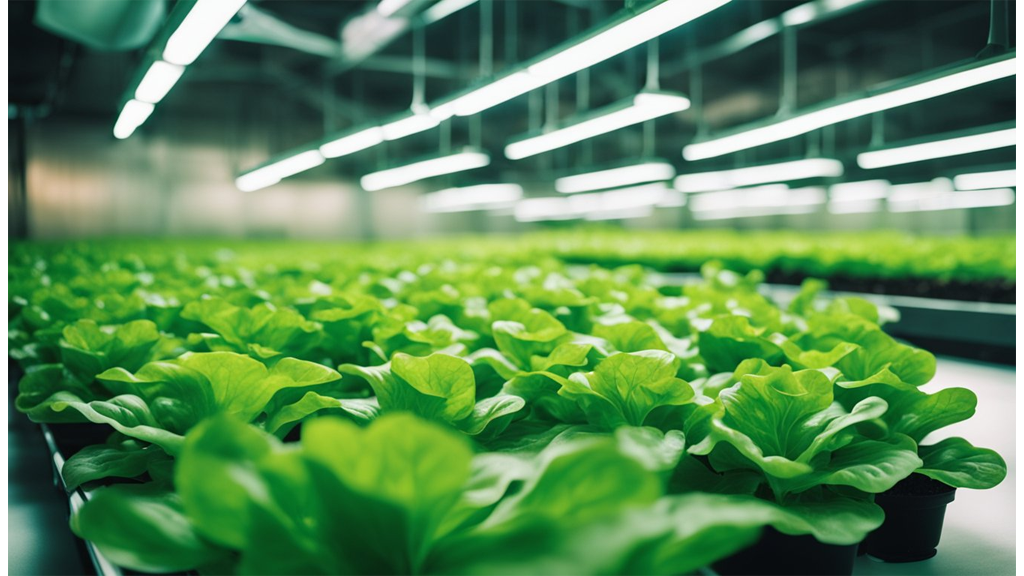
Another benefit is nutrient density. With hydroponics, we can precisely manage the nutrients the plants receive. This control enhances the vitamin and mineral content, making hydroponic lettuce a nutritious choice. In contrast to soil-grown lettuce, the process allows for the fine-tuning of nutrient levels, promoting better growth and health benefits.
Let's talk about freshness. Due to the ability to cultivate year-round, we have constant access to fresh lettuce. This consistent availability supports a healthier diet and potentially boosts food security. We don't have to wait for specific seasons to get fresh produce, which is a huge plus for maintaining a balanced diet.
Overall, incorporating hydroponic lettuce into our diet can be a wise decision. It's an innovative way to enjoy clean, nutrient-rich leaves throughout the year.
As we explore the world of hydroponics, lettuce stands out due to its unique compatibility with these systems. Our ability to control environmental factors with precision means we can provide ideal growth conditions for lettuce year-round. This is a game changer for both small-scale and commercial growers.
A key advantage is lettuce's quick growth cycle, which allows for faster and more frequent, easy-to-grow harvests. Hydroponically grown lettuce typically requires 90% less water compared to traditional methods, making it an environmentally friendly choice.
We also benefit from the absence of soil pests. By avoiding these pests, we do not need pesticides, leading to safer, cleaner produce for consumers. Our control over nutrient delivery ensures each plant receives exactly what it needs for optimal growth.
For those of us aiming to produce consistently high-quality crops, selecting the right lettuce varieties is important. Investing in suitable equipment and practising proper techniques contributes significantly to success in hydroponic cultivation.
With hydroponic lettuce farming, we not only enhance our efficiency but also play a part in sustainable and health-conscious agriculture. Our efforts contribute to a more sustainable future, promoting healthier food production and consumption practices.
In the world of modern agriculture, hydroponics stands out for its innovative approach to growing plants without soil. However, one challenge faced by many gardeners is how to manage hydroponic wastewater effectively. Improper disposal can harm the environment and breach legal regulations. As concern for our planet grows, finding sustainable solutions for wastewater management is more crucial than ever.
Our journey through hydroponics reveals that while these systems offer immense promise in enhancing food security, they also generate waste that needs careful handling. Filtering out minerals and other contaminants is a safe way to purify water before disposal. Some gardeners even use reclaimed water for additional irrigation, turning a waste product into a resource.
By addressing these challenges with practical solutions, we ensure that our hydroponic adventures remain environmentally friendly and compliant with regulations. Whether you're a seasoned hydroponics enthusiast or just starting, understanding how to deal with wastewater efficiently is essential to maintaining a sustainable system.
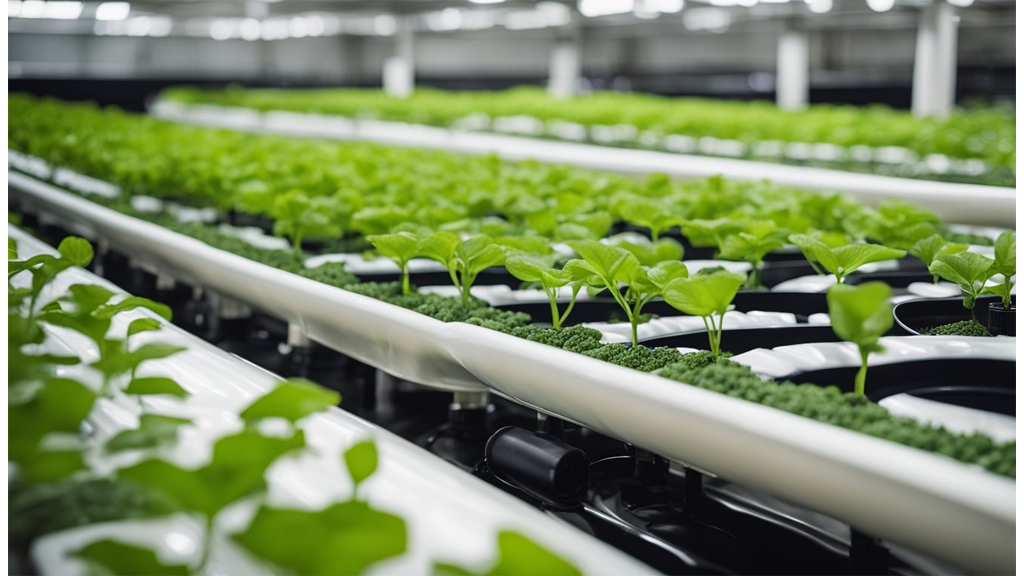
Direct Disposal into Drains or Natural Water Bodies
We should absolutely avoid pouring hydroponic wastewater straight into drains or rivers. This can lead to environmental issues such as eutrophication, where excess nutrients like nitrogen and phosphorus promote algae overgrowth. This depletes oxygen in the water, harming aquatic life and disrupting ecosystems.
Legal consequences can be severe. Improper disposal practices may result in fines and penalties. Authorities enforce strict guidelines to prevent nutrient pollution, making it important for us to be aware of these regulations.
Uncontrolled Soil Application
Applying wastewater directly to soil without any control measures poses risks. Nutrient runoff can occur, potentially contaminating local water sources. This not only affects water quality but can jeopardise nearby plants and animals inhabiting these areas.
Wastewater with high nutrient content can upset the balance of soil nutrients and harm soil health. Over time, this might degrade the soil's ability to support healthy plant growth.
Water Treatment and Treatment Methods
We must consider responsible wastewater treatment methods. Using commercial reverse osmosis or other filtration systems can significantly reduce harmful contaminants. Hydrothermal liquefaction and nitrification are advanced technologies that could offer potential solutions by transforming the wastewater into new forms.
Managing hydroponic wastewater effectively ensures we reduce environmental impact while making the most of available resources. By using methods like reverse osmosis filtration and creative reuse strategies, we can treat and repurpose wastewater efficiently.
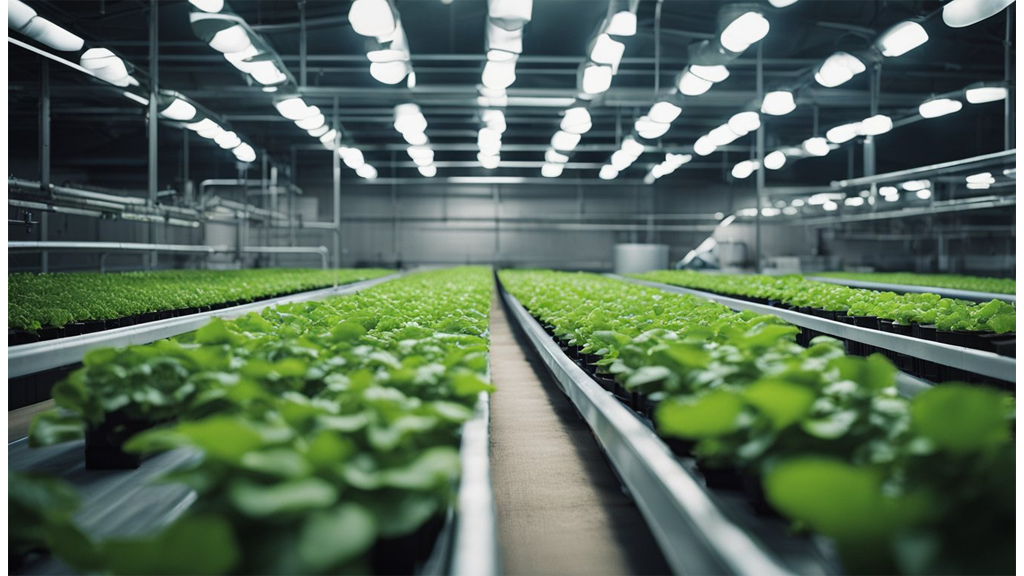
Reusing hydroponic wastewater is a smart way to conserve resources. By diluting wastewater with an equal amount of fresh water, we can decrease nutrient concentration. Applying this diluted solution to potted plants ensures that the nutrients can be used by the plants while limiting potential runoff.
For example, a small-scale grower found success by applying these methods to indoor ornamental plants. This not only saved water but also enhanced plant health. This approach is especially beneficial for plants such as lettuce, boosting growth without the need for fresh nutrients.
Filtering wastewater through reverse osmosis (RO) systems is another effective strategy. These systems remove dissolved salts and impurities, making the water suitable for reuse in hydroponic systems. With RO, we can recycle water, reducing the discharge of nutrient-rich effluents.
While RO systems provide environmental benefits, it's important to consider the investment and maintenance costs. Additionally, managing the brine by-product is essential. RO is a wise choice for resource conservation in our hydroponic systems.
Utilising wastewater as a nutrient source for non-hydroponic plants is both efficient and eco-friendly. By repurposing the wastewater, we can provide essential nutrients to support plant growth.
It's crucial to dilute the solution adequately to match the nutrient needs of specific plants, like Lactuca sativa. Monitoring soil condition helps prevent nutrient overload. This practice can significantly enhance our agricultural efforts by optimising nutrient cycling.
Controlled outdoor disposal is a practical method for managing hydroponic wastewater. Applying diluted wastewater to soil areas ensures nutrients are absorbed without the risk of runoff into water bodies.
Constructed wetlands offer another sustainable option. By using artificial wetlands with plants such as common reed, we can naturally filter wastewater. A community garden's implementation of this system not only improved water quality but also fostered biodiversity.
Additionally, integrating wastewater into compost systems enhances nutrient cycling and enriches soil health. For instance, a small farm successfully incorporated hydroponic wastewater into composting, reducing reliance on chemical fertilizers. These methods exemplify our commitment to sustainable agricultural practices.
When it comes to managing hydroponic wastewater, there are various environmentally responsible methods we can employ. Reclaiming water and nutrients is a viable option to minimise waste. We can recover nutrients from wastewater for reuse, which can contribute to more sustainable growing practices.
Sustainable Practices:
We should embrace sustainable practices not just for our crops, but for ecological health too. These practices help conserve resources and reduce pollution. By following these methods, we contribute positively to the environment and potentially lower operating costs.
Methods to Consider:
Regulatory compliance is crucial in hydroponic operations. We must adhere to regulations that promote eco-friendly practices and contribute to long-term environmental stewardship. By adopting these methods, we can ensure that our practices not only support the health of our crops but also our planet.
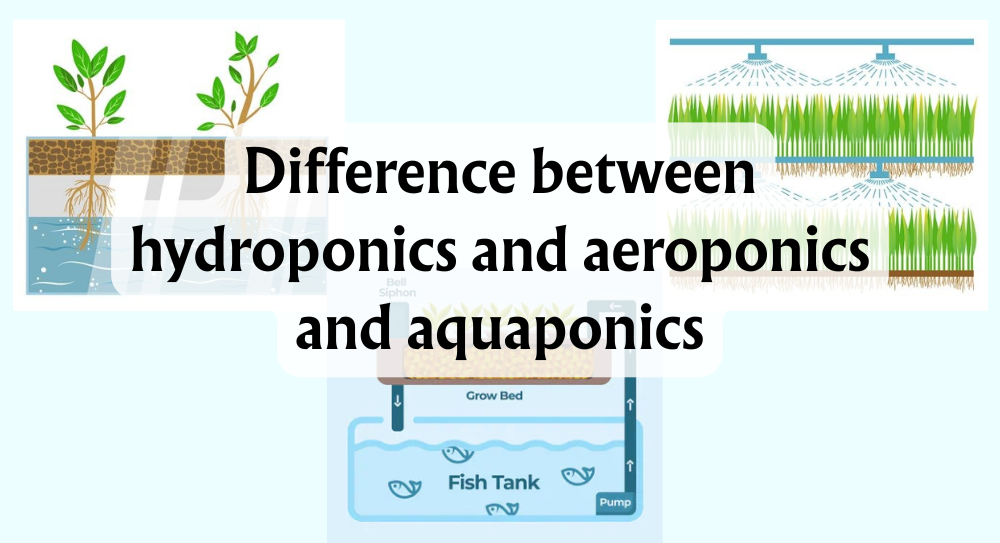
In the fascinating world of modern agriculture, soilless cultivation techniques such as hydroponics, aeroponics, and aquaponics are revolutionising the way we grow plants. These methods provide innovative solutions for gardeners and growers seeking convenient and efficient means to improve plant growth without soil. Understanding how these techniques differ is crucial for anyone interested in optimising their gardening practices or exploring sustainable agriculture.
Hydroponics involves growing plants in a nutrient-rich water solution. It's a user-friendly method that is easily scalable, making it a popular choice for both beginners and experienced growers. On the other hand, aeroponics suspends plants' roots in the air and uses mist to deliver nutrients, which requires more technical expertise but can result in faster plant growth. Aquaponics combines hydroponics with aquaculture, using the natural waste from fish to nourish plants while creating a symbiotic environment.
These techniques not only have unique requirements and benefits but also different applications. For instance, hydroponics offers a straightforward start with fewer technological demands. Aeroponics, while complex, presents efficiency and potential yields that are attractive to commercial growers. With aquaponics, there's the added benefit of integrated fish farming, providing a diverse and sustainable approach. By exploring each method's characteristics, we gain insights into choosing the best approach for our gardening needs.
Hydroponics is a method of growing plants without soil by using a nutrient-rich water solution. This approach allows for efficient water usage and optimised growth conditions.
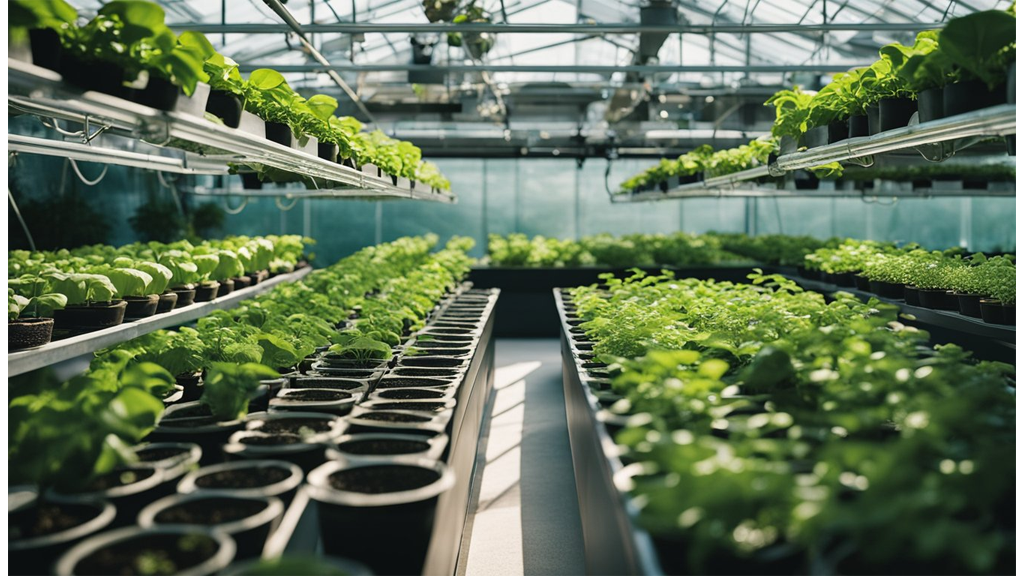
In a hydroponics system, we cultivate plants without the use of soil, instead relying on nutrient-rich water solutions. The mechanism involves submerging plant roots in these solutions or intermittently flooding them with nutrients. Systems such as these enable precise control over the plant’s environment, significantly enhancing growth efficiency. The roots can either be directly submerged, as in water culture techniques, or placed on a growth medium that is periodically saturated with the solution. This direct access to essential nutrients allows for a more optimised growth compared to traditional soil-based methods.
Nutrient solutions are a critical component in hydroponics, containing all the essential macro and micronutrients dissolved in water. These include nitrogen, phosphorus, potassium, and other trace elements. We have several delivery methods to provide these nutrients, each suited to different plant types and scales of operation. The Deep Water Culture (DWC) method involves suspending plant roots in a nutrient solution, allowing constant access to nutrients and oxygen. The Nutrient Film Technique (NFT) circulates a thin film of nutrient solution over the roots, promoting nutrient absorption while also delivering oxygen. Drip systems supply nutrient solutions directly to the plant base through a controlled drip, reducing wastage and ensuring each plant receives adequate nutrients.
Proper light and temperature management is crucial for successful hydroponic growth. Artificial lighting, such as LED and fluorescent lights, can mimic sunlight and ensure plants receive the energy needed for photosynthesis, even indoors. These lights allow us to adjust light intensity and duration based on specific plant needs. Similarly, maintaining optimal temperature is essential. Plants generally thrive in a controlled environment where the temperature is neither too high nor too low, and this is crucial for preventing stress and promoting robust growth. Our ability to control these factors means we can cultivate a variety of plants year-round, regardless of external weather conditions.
Hydroponics offers several advantages. Pros include significantly more efficient water usage compared to traditional agriculture, as the closed-loop systems recycle water. Plants tend to grow faster due to direct nutrient access, and the absence of soil reduces the need for pesticides. Unfortunately, there are cons to consider. The initial setup costs can be high, with expenses related to equipment and system installation. Additionally, hydroponic systems require constant monitoring to maintain nutrient levels and environmental conditions. Another potential downside is the vulnerability to power outages, which can disrupt nutrient and oxygen supply if not managed with backup systems. Despite these challenges, hydroponics remains an innovative and efficient method of agriculture.
Aeroponics is a fascinating method of cultivating plants in which we grow them in an air or mist environment instead of soil. This technique allows the plants’ root zones to receive ample oxygen and nutrients, contributing to rapid growth and efficient resource use.
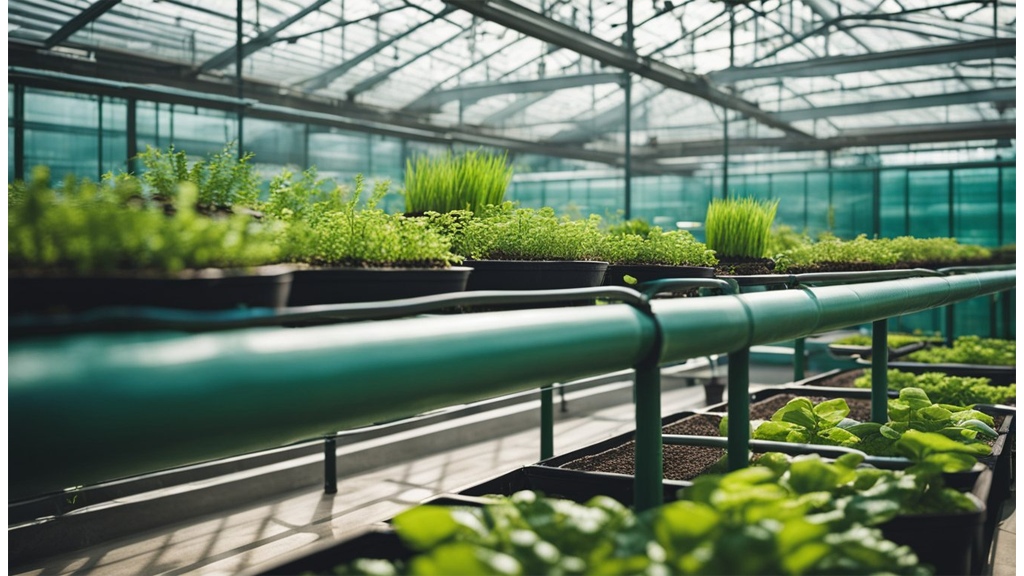
In an aeroponics system, plants are grown with their roots suspended in air, periodically misted with a nutrient-rich solution. This approach maximises root exposure to oxygen while ensuring they receive essential nutrients in a controlled manner. By placing plants in a growing chamber, we create an ideal environment that promotes healthy plant growth without the need for soil. The controlled misting not only provides necessary hydration but also prevents the growth of pathogens that can thrive in soil.
The fine mist delivery system is essential in aeroponics, ensuring each plant's root system is surrounded by a consistent supply of moisture and nutrients. These enclosed systems help prevent contamination and conserve water by recycling the nutrient solution. This exact method allows us to carefully regulate factors such as pH and nutrient concentrations, which can be adjusted to suit specific plant species. As a result, plants can grow with fewer inputs compared to traditional cultivation methods, offering significant sustainability benefits.
Aeroponics lets us offer plants increased oxygen exposure to their root systems, encouraging faster growth and better nutrient absorption. With precise nutrient delivery, we can eliminate waste, thus maximising plant health. The enhanced oxygenation boosts the plant’s metabolism, making it more efficient at processing nutrients. Additionally, with controlled environments, we can quickly identify any nutrient imbalances and adjust accordingly, providing a more reliable growing system.
Pros:
Cons:
Aeroponics presents a revolutionary approach to modern agriculture, providing interventions for sustainable farming amidst growing global challenges.
Aquaponics is a sustainable farming method that combines aquaculture and hydroponics. It leverages a symbiotic system where fish and plants coexist, enhancing each other's growth while maintaining water cleanliness and efficiency.
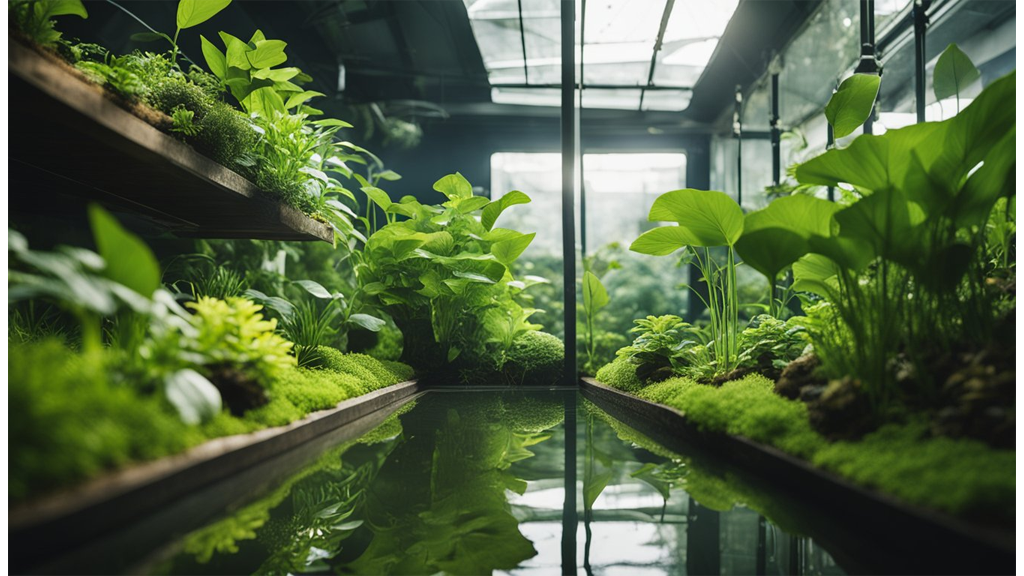
Aquaponics merges the cultivation of aquatic animals with plant growth. In this setup, aquatic animals like fish produce waste that contains nutrients vital for plants. As plants absorb these nutrients, they help to purify the water, which is then returned to the fish tank. This reciprocal relationship creates a natural and chemical-free environment.
The key here is balance. We must ensure that the nutrients produced by the fish match the needs of the plants. This way, both the fish and plants can thrive without additional inputs, making it a self-sustaining system.
Central to an aquaponics system is the nitrogen cycle. Fish waste breaks down into ammonia. From there, beneficial bacteria step in to convert ammonia into nitrites and then into nitrates. Nitrates serve as excellent nutrients for plants.
This cycle not only feeds the plants but also detoxifies the water, preventing harm to the aquatic animals. Therefore, managing the nitrogen cycle efficiently is crucial to maintain harmony within the system.
In aquaponics, fish and plants share a symbiotic bond. Fish provide the necessary nutrients in the form of waste, crucial for plant growth. Conversely, plants act as natural filters, removing toxins such as nitrates from the water.
For this system to remain balanced, the ratio of fish to plants needs careful consideration. A harmonious ratio ensures that fish do not produce excessive waste and plants can effectively use up all available nutrients.
Pros:
Cons:
Aquaponics represents an innovative and sustainable approach to simultaneous fish and plant cultivation.
When comparing hydroponics, aeroponics, and aquaponics, we can identify some distinctive features.
Hydroponics vs. Aeroponics
Hydroponics vs. Aquaponics
Aeroponics vs. Aquaponics
Urban hydroponic farms demonstrate notable successes, particularly in city environments where space is limited. Innovative techniques have allowed crops to thrive amidst skyscrapers.
NASA has explored aeroponic systems for space missions, emphasising efficient plant growth and limited resources. These experiments highlight the system's potential in challenging conditions.
Community aquaponic projects play a key role in sustainable food production across various communities. By blending plant and fish farming, these projects demonstrate the ecological benefits of aquaponics, fostering local food security.
As we wrap up our exploration of hydroponics, aeroponics, and aquaponics, it's essential to highlight their unique characteristics.
Hydroponics involves growing plants in nutrient-rich water. It's relatively easy to set up and scale, making it accessible for beginners.
Aeroponics suspends plant roots in the air and mists them with nutrients. It's a more technically demanding system but offers efficiency in nutrient delivery.
Aquaponics combines hydroponics with aquaculture, using fish waste to nourish the plants. This method creates a symbiotic ecosystem that can be a great solution for sustainable and organic growing.
When deciding on a system, consider the following:
Space Availability: Hydroponics may fit smaller spaces, while aeroponics often requires more room than it might initially seem.
Budget Constraints: Hydroponics may be the cheapest starting point, whereas aeroponics might require more initial investment for equipment.
Desired Crops: Leafy greens do well in all three systems, but aquaponics might be the best for those interested in growing diverse plants alongside fish.
Maintenance Capabilities: Hydroponics and aquaponics generally require regular monitoring, while aeroponics may require more frequent technical adjustments.
Ultimately, our choice will depend on various factors, including our personal preferences. Each system offers unique advantages, so weighing them according to our needs will help us decide which path to take.

In the world of hydroponics, ensuring that plants receive the right nutrients is essential for healthy growth. At the heart of this is understanding Total Dissolved Solids (TDS) in your hydroponic solution. For most hydroponic systems, an optimal TDS level is between 500 and 1000 ppm, although it can vary based on plant type and growth stage. Maintaining the correct TDS level can significantly enhance plant health and productivity, which is why monitoring these levels is crucial.
Water quality plays a pivotal role in hydroponics. The mineral concentration in your water, measured as TDS, directly affects plant nutrient uptake. Balancing this with nutrient solutions helps in achieving the desired ppm level without overloading the plants. This balance ensures young seedlings, which thrive at around 500-600 ppm, transition smoothly to mature plants needing up to 1000 ppm during vigorous growth phases.
Monitoring TDS is vital because fluctuations can indicate issues like nutrient imbalances or equipment malfunctions. As we explore further, you'll discover practical strategies for maintaining optimal levels and improving your hydroponic setup's overall efficiency.
When it comes to hydroponics, maintaining optimal water quality is crucial for plant health and yield. Our focus is on three key parameters: pH levels, Electrical Conductivity (EC), and Total Dissolved Solids (TDS).
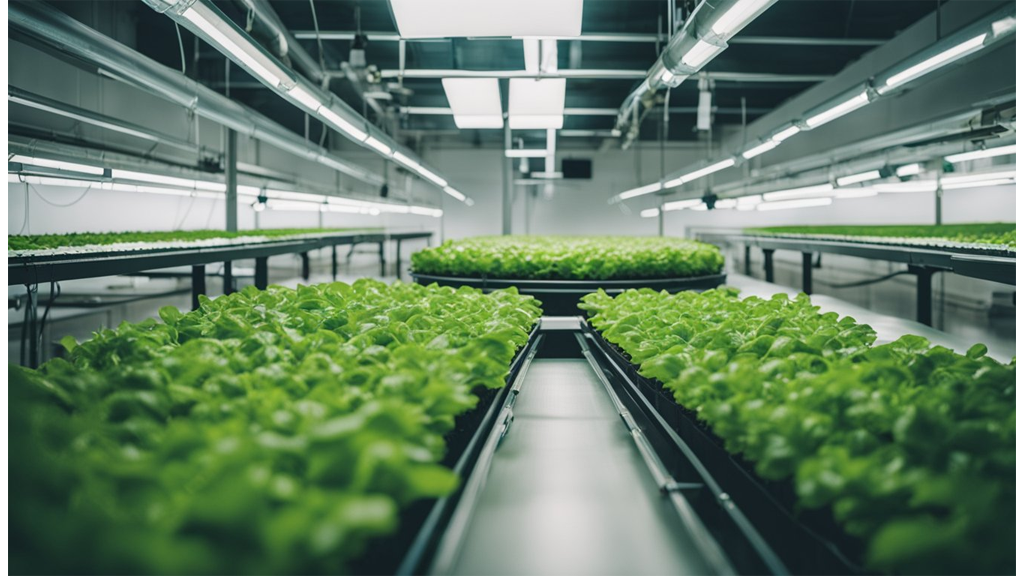
pH Levels
We should aim for a pH range of 5.5 to 6.5 in our hydroponic systems. This range ensures that nutrients remain soluble and accessible to plants. If the pH drifts outside this range, nutrient absorption can become inefficient, impacting plant growth.
Electrical Conductivity (EC)
EC measures the total ionic content in water and is a good indicator of nutrient concentration. Typical hydroponic setups should maintain an EC of about 1.5 to 2.5 mS/cm. Careful monitoring helps us adjust nutrient levels to prevent deficiencies or toxicities.
Total Dissolved Solids (TDS)
TDS indicates the total concentration of dissolved solids in water. For healthy growth, our ideal TDS range varies between 800 to 1,500 ppm, depending on plant types. With tap water often having a TDS of 280 ppm, we need to factor this into our nutrient mix to reach desired levels.
Regular monitoring and adjustments of these parameters help us maintain water quality and achieve thriving plants. Using a reliable TDS meter further ensures precision in our nutrient solutions. Let’s remember, the success of our hydroponic system heavily depends on how well we manage these vital elements.
Understanding the differences between TDS and PPM can help us better manage hydroponic systems. These terms play a significant role in measuring nutrients and ensuring optimal plant growth.
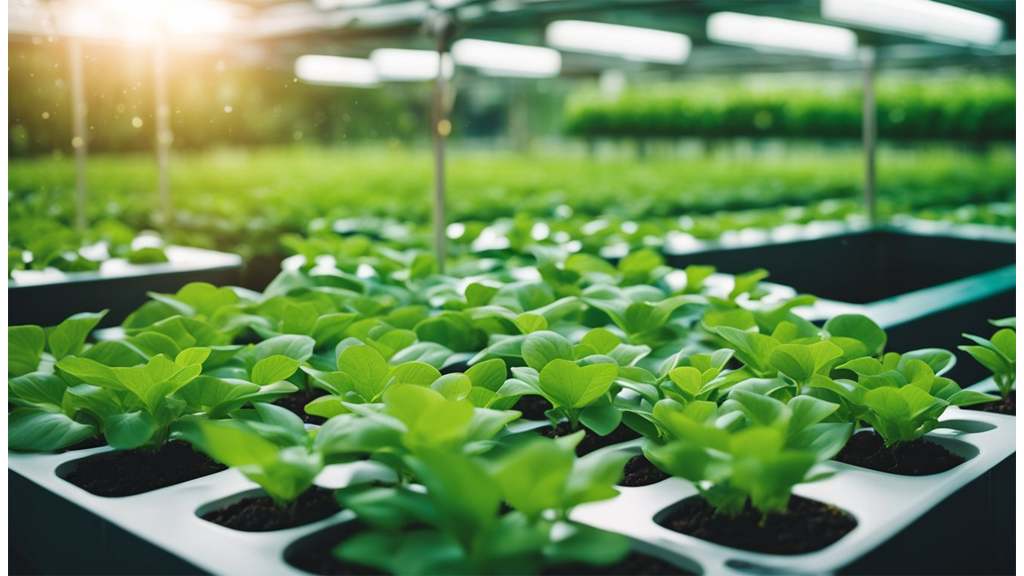
Total Dissolved Solids refers to the total amount of organic and inorganic substances dissolved in water. In hydroponics, TDS gives us an insight into the nutrient concentration available to plants.
By measuring TDS, we can monitor and adjust nutrient solutions accurately. This helps maintain optimal plant growth conditions and prevents nutrient deficiencies or toxicities. The value of TDS is usually represented in parts per million (ppm), giving a clear indication of the concentration in the solution.
Parts Per Million is a unit used to express the concentration of one substance in a million parts of another. It serves as a practical way to quantify dissolved substances in water, including nutrients.
In our hydroponic systems, 1 ppm corresponds to 1 mg/L of water. This standardisation allows us to gauge TDS levels effectively. It's important to note that conversion factors for TDS to PPM might vary depending on the method used. Often, we find that TDS is derived from electrical conductivity (EC) measurements through specific conversion ratios.
When we're growing plants hydroponically, maintaining the right nutrient balance is critical. Monitoring Total Dissolved Solids (TDS) and Parts Per Million (PPM) helps ensure that our plants receive the exact nutrients they need.
With a precise nutrient balance, we can prevent deficiencies or toxicities. This balance is essential for promoting healthy growth and development. A famous case study demonstrates how improper TDS levels adversely affected lettuce yields in a commercial hydroponic setup.
To achieve optimal results, a TDS meter is crucial. Similarly, a pH meter allows us to monitor and adjust the acidity or alkalinity of our nutrient solutions.
By keeping both TDS and PPM in check, we maintain an ideal environment for plants to thrive. This proactive approach safeguards against potential setbacks that could result from incorrect nutrient concentrations.
Monitoring these parameters helps alleviate issues from nutrient imbalances. This is essential because plants grown hydroponically depend solely on the solution provided for their nutritional needs.
By routinely checking these values, we create conditions that enhance plant productivity and quality. Regular monitoring adds consistency to the plant growth process, ensuring that variations in nutrient delivery are swiftly corrected.
As we consistently track these metrics, our ability to optimise plant health improves markedly. This approach has profound effects, leading to better crop yields and happier plants.
Let's talk about what influences TDS and PPM levels in our hydroponic systems. Understanding these elements helps us maintain the right balance and keep our plants thriving.
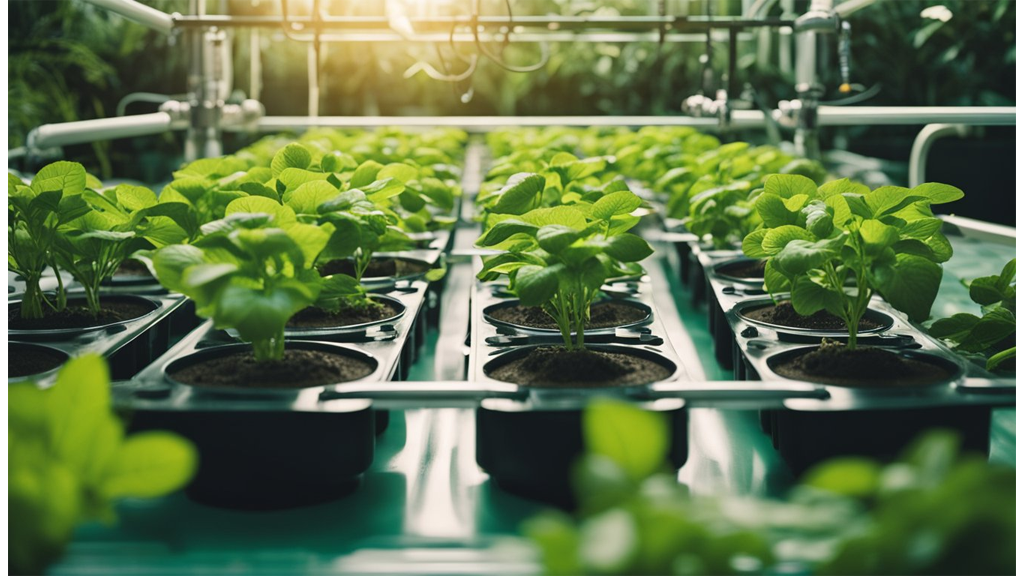
Water Source Quality
Our water source plays a crucial role. Using tap water with high mineral content can increase the initial TDS levels. It's advisable to check the TDS of the water we start with, aiming for less than 250 ppm.
Evaporation Rates
Evaporation can significantly affect nutrient concentration. In open systems, higher evaporation might lead to elevated TDS levels over time. This means the nutrient solution becomes more concentrated, and we should keep an eye on potential changes.
Plant Uptake
Plants take up nutrients, altering the solution composition. As plants grow, they absorb water and nutrients, impacting the TDS and PPM. Keeping track of plant uptake helps us adjust the nutrient solution accordingly.
System Maintenance Practices
Regular system maintenance helps maintain water purity. If we neglect cleaning and maintenance, impurities can build up, affecting TDS levels. Ensuring regular checks and balances keep our system running smoothly.
Temperature
Temperature can also play a part. Higher temperatures might increase evaporation rates and microbial activity, influencing nutrient dynamics. It's beneficial for us to monitor temperature to ensure optimal growth conditions.
When we're discussing the ideal TDS range for hydroponics, it's important to remember that each crop thrives at different levels. Ensuring the correct TDS is crucial for optimal plant health and yield.
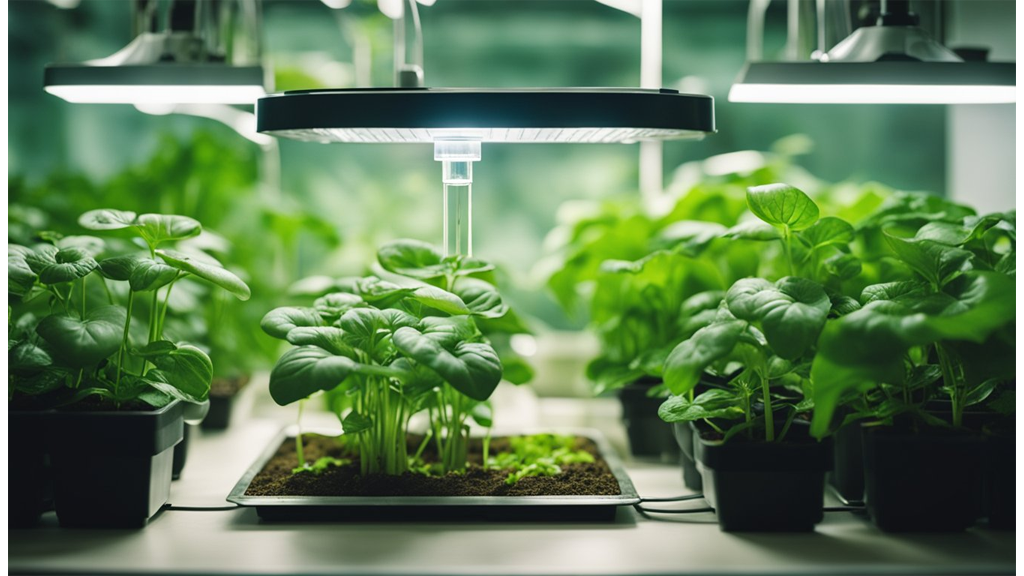
Here's a handy list of recommended TDS ranges for some common hydroponic crops:
It's always best to consult the specific requirements for the crop you're growing to hit those precise TDS targets.
We can't stress enough the importance of regular monitoring using reliable TDS meters. Accurate readings help us keep our nutrient solutions just right.
Steps to adjust TDS levels:
For those new to this, a step-by-step tutorial on calibrating and using a TDS meter can be a game-changer.
Having the wrong TDS levels can have serious consequences for our plants' well-being.
Understanding these impacts, evidenced by case studies like those on pepper plants, can help us maintain optimal TDS levels in our hydroponic systems.
Maintaining optimal Total Dissolved Solids (TDS) levels in hydroponics is crucial for healthy plant growth. The ideal TDS level varies depending on the specific plants we are cultivating, but sticking to a recommended range ensures nutrients are balanced.
Regular monitoring and adjusting of TDS levels help us achieve thriving hydroponic systems. This practice allows us to address potential issues before they affect plant health.
We must use clean, filtered water to prevent unwanted fluctuations in TDS levels. Doing so minimises contamination and ensures consistency in nutrient delivery.
Setting a consistent schedule for monitoring TDS is also essential. This routine allows us to catch and correct problems early, ensuring optimal growth conditions for our plants.
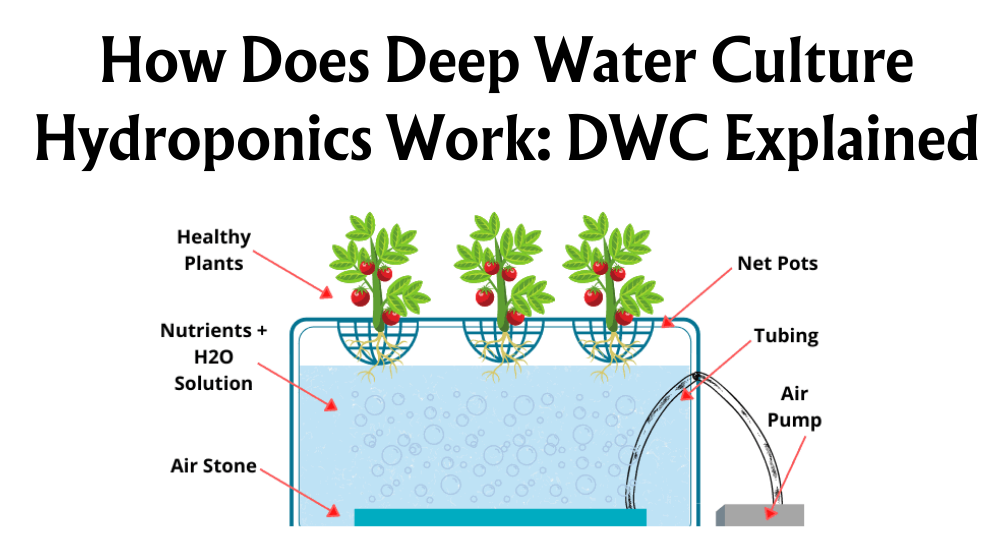


Copyright © 2024 Hyjo Store. All Rights Reserved.
