FREE Delivery Over £99*

Discreet Packaging

Best Price Guaranteed

Pay In Instalments

Safe & Secure Checkout

Chat to an Expert

FREE Delivery Over £99*

  • FREE Delivery Over £99*

  • Discreet Packaging

  • Best Price Guaranteed

  • Pay In Instalments

  • Safe & Secure Checkout

  • Chat to an Expert

Hyjo Team

Tips from a Pro: Winning Compost Tea Recipe with DEM

Tips-from-a-Pro-Winning-Compost-Tea-Recipe-with-DEM

Compost Tea with DEM

One of the very best ways to supplement your soil is a potent compost tea. Below I will share two recipes appropriate for both veg and flower cycles. Every ingredient used is organic and goes a long way to produce the finest smelling and tasting flowers you could possibly hope for.

Required Items:

  • Large Flexi Tank or 20L bucket – you’ll need this to bubble your tea. Choose a size appropriate for your use or set-up.
  • Air Pump – be sure to not purchase a cheap air pump, they don’t last long and soon prove a waste of money. The Hailea 9810 is a good choice if you’re not sure where to begin.
  • Air stones – cheaper gold ball stones may not be so reliable, consider a large flat hailea stone.
  • 1 pair of tights – this will function as a perfect tea bag for the ingredients. Can be bought from any local supermarket for under £5.
  • Product from the DEM Range – take your pick; lush roots, radiant green, brilliant black, fat flowers, etc.
  • Worm castings
  • Bloom Seaweed Nutrients - This product is particularly outstanding
  • Bloom Seafuel Nutrients
  • Bloom Cal Mag Nutrients
  • Alaskan fish mix
  • Guanokalong Powder
  • 1m bamboo cane
  • Reverse Osmosis Water – Using standard tap water can eliminate all living organisms. Considering a reverse osmosis unit is advisable, simply bubbling tap water for 24 hours is not going to do the job.

Compost Tea For The Veg Cycle:

Step 1

Fill Flexi tank with 50L of RO water

Step 2

The air stone needs to be connected to the air pump and placed at the bottom of the tank. Then turn on the pump.

Step 3

2 cups of worm casts should be added to the tights. The tights should then be tied to the cane allowing the tea bag to be suspended in the water. The bottom of the bag should be kept some 15cm off the bottom of the tank. All being well, the cane can be laid across the top of the tank to hold the bag in place.

Step 4

Add the DEM product one or two teaspoons per gallon. Radiant green requires 2 teaspoons. The rest typically demand 1.

Step 5

Add both Bloom Seaweed and Cal-Mag, 50ml each to the water.

Step 6

Finally, 4 caps of Alaskan fish and mix it all up.

Step 7

Let the mix brew for some 48 hours. The ideal temperature range for brewing in the grow room is between 23-27 degrees C. You’ll know when it’s done as there will be a foam head on the top of the mix. Brewing in colder places is inadvisable.

Step 8

Give your plants a drenching of the tea once a week. Ideally, they are to be kept on this tea until the 7th day of flower.  For added goodness, add fat flowers to the tea a week before, approximately 2 teaspoons per gallon. Then feed the compost tea for 3 back-to-back days.

Compost Tea For The Flower Cycle:

This tea is best started come the 7th day of the flower cycle. The same tank/bucket can be used, but be sure to scrub it clean from the previous brew.

Step 1

2 cups of worm casts should be added to 1 leg of the tights.

Step 2

Half a cup of bat dung can be added to the other leg of the tights.

Step 3

Add the DEM product one or two teaspoons per gallon. Fat flowers require 2 teaspoons. The rest typically demand 1.

Step 4

Add both Bloom Seaweed and Cal-Mag, 50ml each to the water.

Step 5

Bubble for 48 hours uncovered.

Step 6

Once a week, drench your plants with the tea. RO water can only be added in between the tea feeding.

Feed up to 14 days to the harvest. Come 2 weeks to harvest, only feed plants with lush roots with 1 teaspoon per gallon. Reverse osmosis water for only one feed. From then on until harvest, RO water only. The soil should be allowed to dry for 2-3 days before harvest.

Final Thoughts

Remember, compost tea is like a super supplement to your plant’s vitality and growth. The recipes provided above are tried and tested concoctions but feel free to experiment and add ingredients of your own. Extra additions like the Organic Bloom Booster are worth a try, it’s about finding what works for you.

It can seem like a lot of products and a fair bit of alchemy going into the compost tea, but give it a try and if you’re unsure, start modestly. Attempt with just one plant in super soil feed. Maybe after one attempt, you’ll never look back!

Growing with super soils and compost teas is one of the very cleanest forms of organic growing. This is a sure-fire way to produce beautiful smelling and tasting flowers and quality is what we’re aiming for in any and every grow.

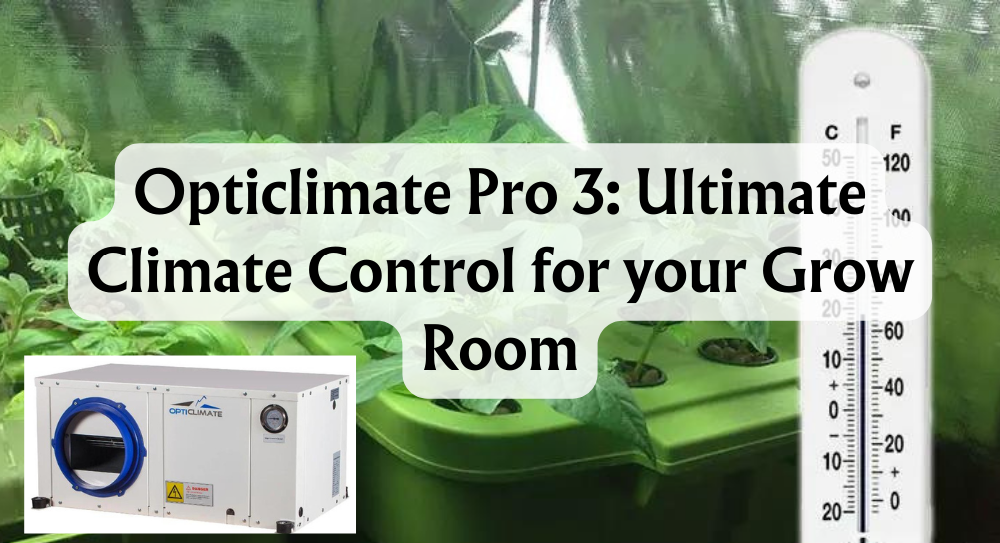
Opticlimate Pro 3: Ultimate Climate Control for your Grow Room

Opticlimate Pro 3 Product Overview

If you're keen to learn about the latest in indoor climate control technology, you've probably come across the name Opticlimate Pro 3. This nifty bit of kit represents the pinnacle of climate control for indoor spaces, especially for those with a green thumb. It's no secret that plants thrive in specific conditions, but achieving them indoors can be a bit of a pickle. That's where the Opticlimate Pro 3 steps in – it's a comprehensive system designed to maintain an ideal growing environment all year round.

So, what exactly does this piece of equipment do? The system is adept at cooling, heating, dehumidifying, and filtering air, ensuring your plants aren't just surviving, but flourishing. Whether you're growing orchids in the attic or cucumbers in the cellar, the faithful Opticlimate Pro 3 brings the best conditions to your doorstep, or should I say, your plant pots. Throughout this article, I'll unravel the details of this innovative system and show you why it's the bee's knees in the world of indoor climate control.

Let's not beat around the bush; you're here to get the nitty-gritty on the Opticlimate Pro 3 and understand why it's considered a giant leap for indoor growers. You'll scoop up heaps of reliable info on what the Opticlimate Pro 3 is, how it contributes to a tip-top indoor environment for your leafy companions, and how you can go about getting one of these bad boys purring away in your grow room. 

Key Takeaways

  • The Opticlimate Pro 3 is a versatile indoor climate control system, ideal for plant cultivation.
  • It facilitates optimal plant growth by performing several functions such as cooling and dehumidifying.
  • This article will detail how the Opticlimate Pro 3 optimises indoor growing conditions.

What Is the Opticlimate Pro 3?

Looking for a device that ticks all the boxes for perfect climate control? Let me introduce you to the Opticlimate Pro 3. It's essentially a water-cooled air conditioner, which doesn't just cool the air but Opticlimate also heats, dehumidifies, filters, and circulates it. It sounds like a jack-of-all-trades in climate management, doesn't it?

Now, the Opticlimate Pro 3 comes in a variety of models and sizes to fit different needs. We're talking about the Opticlimate Pro 3500, Opticlimate Pro 6000, Opticlimate Pro 10000 and Opticlimate Pro 15000. It’s reassuring to know there’s a size for every scenario.

Available Models:

  • Opticlimate Pro 3500
  • Opticlimate Pro 6000
  • Opticlimate Pro 10000
  • Opticlimate Pro 15000

If you’re pondering the differences between the Pro 3 and Pro 4 models, the PRO4 series boasts a special dehumidification function that remains active even without the cooling feature running. 

Pro 3 vs. Pro 4:

  • PRO3: Multi-functional climate control
  • PRO4: Adds independent air dehumidification capability

As for those of you looking to create the ultimate stealth setup, the concept of a closed-loop room comes into play. The Opticlimate Pro 3 makes a bulky extraction system needless, streamlining the ventilation in a way that is quite slick if you ask me.

Let’s not forget about the features! I’m talking Pre-Heat, Slow Cooldown, and Cool at Night functions. As well as an Alarm Log, Smart Remote Controller, and Dual Room just to name a few.

Standout Features:

  • Pre-Heat
  • Slow Cooldown
  • Cool at Night
  • Alarm Log
  • Smart Remote Controller
  • Dual Room Function

Wouldn’t you agree it sounds innovative? Remember, a well-controlled climate can be the key to your indoor environment goals. The Opticlimate Pro 3 might just be the solution you’ve been looking for!

What the Opticlimate Pro 3 Does?

When it comes to indoor growing, I've found that regulating the environmental conditions is crucial. That's where the Opticlimate Pro 3 steps in as a game-changer.

Maintaining Ideal Temperatures

Regulates Temperature: I'll tell you straight off the bat, the Opticlimate Pro 3 is a master at controlling temperatures. It both cools and heats your space, ensuring plants thrive regardless of external weather changes. Imagine never having to worry about a summer heatwave or winter chill hindering your grow room's harmony!

Optimising Humidity Levels

Controls Humidity and Dehumidifying: When it comes to humidity, this unit isn't messing around. By dehumidifying the air, the Opticlimate Pro 3 adeptly reduces the risk of unwelcome mould, rot, and rust. It maintains the moisture levels your green buddies need, making it a bit like their personal weather station.

Filtering Air for Purity

Filtering: Let's talk about purity. The unit circulates filtered air, which means particles and pests that might harm your plants are shown the door. It's like having a bouncer that only lets the good stuff in – clean, pure air to keep your indoor oasis thriving.

Now, have you ever thought about what happens to all that heated water? With this unit, the water can be reused to heat rooms or even your swimming pool! Energy and water savings? Check.

And you know what else is brilliant? It runs quietly. I mean, who wants their peaceful garden ambience ruined by noisy machinery? Plus, safety features such as temperature protection and an SMS alarm outlet give me peace of mind – no bad surprises here.

To sum it up, the Opticlimate Pro 3 looks after the temp, humidity, and air cleanliness like a guardian angel for plants. 

How the Opticlimate Pro 3 Works

Let's get straight into the nitty-gritty of the Opticlimate Pro 3 – a system that prides itself as the solution for indoor climate control. By utilizing a comprehensive approach that includes advanced cooling, efficient heating, and smart dehumidification, this system ensures that the air in your grow room is just as nature intended, but how exactly does it pull off this feat?

Advanced Cooling Technology

The Opticlimate Pro 3 boasts an ingenious water-cooled system. Now, you might be curious how that works, right? Here's the cool part: it uses water as the cooling medium. Imagine it as a high-tech heat exchange with your indoor air. The system draws in warm air, passes it over coils chilled by water, and voila, you get a breath of fresh, cool air. It's like giving your room a refreshing glass of iced water on a scorching day.

Now, to make sure everything runs smoothly, automatic controls and sensors including a humidistat maintain a vigilant watch over the temperatures. A constant supply of cold water flows from a water inlet, absorbing heat from the air before being whisked away. It helps to have a system that knows when to turn the chill on and off without you lifting a finger, doesn't it?

Efficient Heating Mechanisms

Picture those chilly winter mornings when you just can't seem to get warm. The Opticlimate Pro 3 has got your back with its efficient heating mechanisms. Ceramic heating elements are its secret sauce, warming up the air without making it stuffy. It's like having a personal mini-sun that knows just how much warmth you need to keep things toasty.

And with remote management, I can adjust the heating from the comfort of... well, anywhere really! Opticlimate Pro 3 can control the indoor climate perfectly, moreover, it can offer this remotely. 

Smart Dehumidification Process

Humidity can be such a troublemaker for indoor growers, but the Opticlimate Pro 3 handles it with ease. It's got a smart dehumidification process that works wonders. Here's how it does its magic: the system pulls moist air over a condenser to remove excess moisture, kind of like wringing out a damp cloth. This moisture then collects in a drip tray - no mess, no fuss.

But it doesn't stop there. To ensure the air isn't just dry but also clean, the system includes a dust and carbon filter panel. It's like having a diligent air steward clearing out any unwanted particles. And to top it all off, a squirrel cage fan works tirelessly to circulate this pristine air throughout your space. With all of these features in play, you can say goodbye to musty, stale air and hello to freshness.

So, there we have it! The Opticlimate Pro 3 really is a jack-of-all-trades when it comes to managing your indoor climate, with its water-cooled cooling, warm ceramic heating, and a dehumidification process that's as smart as it is effective. Just set it up, and you're good to grow!

Why Choose Opticlimate Pro 3

When you're scouring the market for an indoor climate control solution, the Opticlimate Pro 3 emerges as the leading contender, especially for avid gardeners and horticulturalists. This system stands out for its sophisticated integration of energy efficiency and user convenience, coupled with robust reliability.

Cost-Effective Operation

I've noticed that energy efficiency is a pivotal consideration for indoor growing environments and the Opticlimate Pro 3 addresses this by using as little energy as possible. It adeptly bespeaks a gainful contrast over traditional air-cooled and split air conditioners, which, while effective, can lead to staggering electricity bills due to their higher energy demands.

  • Energy-efficient design leads to lower ongoing costs.
  • Low electric consumption compared to alternative cooling methods.

On the flip side, while fans and portable coolers often have lower initial costs, they fall short in providing comprehensive climate control, making them a less optimal choice in the long term for serious growers seeking precise environmental regulation.

User-Friendly Interface

Who wouldn't favour a plug-and-play system that sidesteps the usual complexities of installation? The Opticlimate Pro 3 is lauded for its easy installation—a stark relief from the elaborate setups characterised by standard HVAC systems. There's no need for specialized air conditioning engineers, and the cooling gas refills are a thing of the past.

  • Simple setup negates the need for professional installation.
  • Maintenance remains uncomplicated, saving both time and hassle.

While other systems may provide manageable interfaces, they frequently require additional equipment like dehumidifiers or humidifiers to fully manage an indoor climate, which can clutter your space and complicate your interactions.

Long-Term Reliability

Let's speak to longevity. The Opticlimate Pro 3 is built with high-quality components, assuring long-term durability. Its multifaceted ability to cool, heat, dehumidify, and filter air consistently makes it a sterling investment when stacked against the more piecemeal solutions, which may necessitate frequent replacements or upgrades.

  • High-quality components for enhanced durability and performance.
  • Optimised for complete climate control, surpassing standalone fans or humidifiers in functionality.

Bear in mind, while upfront costs might seem formidable when compared to simpler systems, the reliability and efficiency of the Opticlimate Pro 3 may well mitigate these concerns through decreased maintenance costs and reduced need for supplemental equipment.

So, if you're aiming for an unfaltering grow room companion, the Opticlimate Pro 3 appears to be the unmatched choice. It's not just about easing the strain on your wallet over time—it's about securing that peace of mind, knowing your indoor oasis is under the watchful, efficient care of top-notch technology.

Opticlimate Pro 3 Step-by-Step

Choosing the right model of Opticlimate Pro 3 for my grow room was straightforward once I considered the room's dimensions and the type and number of lights I used. I also factored in the ambient temperature to find a unit that could efficiently manage the microclimate.

Installation Guide

  • Select the Model: Based on grow room size and equipment.
  • Positioning: Find a suitable spot that can support the unit's weight and connect easily to power and water supplies.

Configuring Settings

Here's how I adjusted the settings to find my plants' sweet spot:

  • Temperature: Set different day and night temperatures.
  • Humidity Level: Maintain optimal levels for each growth stage.
  • Alarm Threshold: Stay informed of any issues.

Remote Monitoring

My life became easier when I started using:

  • Smart Remote Controller: For adjustments on the fly.
  • Internet Access: To control settings remotely.

Optimising Performance

For a thriving grow room, employing these functions made a huge difference:

  • Pre-Heat: Prepares my room for the day.
  • Slow Cooldown: Protects my plants at lights out.
  • Cool at Night: Maintains temperature without stressing my plants, thanks to its night or day settings.
  • Dual Room: Manages two rooms alternately, making the most of my equipment.

Maintenance Tips

  • Filters: Regularly replace the carbon filter to keep the air clean.
  • Water Supply: Check for ample and consistent water flow.
  • Drainage: Ensure the system is free from blockages.

I used to find setting up complex systems quite intimidating, but with the Opticlimate Pro 3, I've maximized my yield and ensured the health of my plants with these simple steps. Not only is my grow room set just right, but maintenance is a breeze, which means more time enjoying the fruits of my labour (literally).

OptiClimate Pro 3 Specifications

Let's dive right into the nitty-gritty of what makes the OptiClimate Pro 3 series tick. I'll break down the specifics, so you understand exactly what you're getting with this system. Ready? Let's get technical!

Technical Details

Here's a rundown of the key technical specifications of the OptiClimate Pro 3:

Specification Detail
Model Variants Pro 3500, Pro 6000, Pro 10000
Cooling Capacity Up to 3.5 kW
Heating Capacity Up to 3.5 kW
Dehumidification Included, with precise control
Power Consumption 740 W (Pro 3500 variant)
Water Consumption 1-3 L/min
Noise Level Optimised for quiet operation
Functions & Features Cooling, heating, dehumidifying, filtering and circulating air

Physical Attributes

Regarding size and weight, here's what you can expect from an OptiClimate Pro 3 unit:

  • Dimensions: The exact size can vary by model, but to give you an idea, one of the models measures 87cm x 63cm x 40.5cm.
  • Weight: They're hefty but manageable - for instance, the Pro 3500 weighs in around 57 kg.

I reckon that's just about the right size to fit snugly into your space and sturdy enough to promise durability.

Operational Capacity

Now, for the operational chops of this machine:

  • Ceramic Heaters: The built-in ceramic heaters ensure that your space can also be warmed efficiently when needed.
  • Cooling Capacity: It has the power to cool an area with a capacity of up to 3.5 kW—adequate for controlling the climate in a variety of indoor spaces.
  • Energy Consumption: With a power consumption of around 740 W for the Pro 3500, this unit balances performance with energy efficiency.

I must say, the OptiClimate Pro 3 controls the environment perfectly while using as little energy as you could hope for.

Conclusion

Reflecting on our exploration of the Opticlimate Pro 3, I'm genuinely impressed with its capabilities. This system isn't just efficient; it's transformative for indoor cultivation environments. With the ability to cool, heat, dehumidify, and filter, the system adapts to various settings, maintaining optimal conditions year-round.

My key takeaways? The Opticlimate Pro 3:

  • Provides total climate control with simultaneous cooling, heating, and dehumidifying.
  • Eliminates the need for an external unit, making it stealthier and space-saving.
  • Ensures consistency in grow room environments, which is invaluable for plants' health and yield.

This isn't a mere purchase; it's an investment. From an economic perspective, the initial outlay might seem significant, but when you consider the sustainability and efficiency gains, the Opticlimate Pro 3 proves its worth.

In the realm of indoor growing, creating a stable environment is crucial. This system hands you the reins to manage temperature and humidity levels effectively. Whether it’s the height of summer or the depth of winter, your grow room environment remains unfazed, helping you avoid common issues like plant stress or disease.

If you’re serious about indoor growing, the Opticlimate Pro 3 offers a total solution for indoor climate control. Not only does it bolster plant health and potential yields, but it also offers peace of mind through its reliability and efficiency. Isn't that what we all seek—a stellar growing season without the drama?

Opticlimate Pro 3 FAQs
What are the key features of the Opticlimate Pro 3 series?
The Opticlimate water-cooled air conditioner unit is designed for grow rooms. It keeps temperature and humidity levels consistent, features 1500w ceramic heaters, and operates efficiently regardless of external weather conditions. Its air purification through a carbon filter is a bonus!
How does the Opticlimate Pro 3's energy efficiency compare to other climate control systems?
When it comes to energy efficiency, the Opticlimate Pro 3 series stands out by utilising a water cooling system which is generally more energy-efficient than traditional air cooling. It's designed to maintain optimal growing conditions without racking up high energy costs.
Can you provide guidance on installing an Opticlimate Pro 3 unit?
Of course! Installation steps include setting up the unit, connecting it electrically, and ensuring proper setup of the alarm port and outdoor unit. The manufacturer provides a comprehensive manual detailing the installation process to guide you through.
What maintenance is required for the Opticlimate Pro 3 to ensure optimal performance?
Regular inspections are essential. You should frequently check all connections for tightness and ensure there are no leaks. Additionally, monitoring error messages and fault analysis through the system's interface helps maintain performance.
How do the Opticlimate Pro 3 models differ in terms of cooling capacity?
There are multiple models within the Pro 3 series, each offering different cooling capacities to suit various room sizes and requirements. Ensuring you have the right model for your space is key to effective climate control.
What should I consider before purchasing an Opticlimate Pro 3 for my space?
Consider the size of your grow area and the corresponding cooling capacity of the Opticlimate Pro 3 unit. You should also think about the installation space requirement and ensure you can meet the maintenance needs for long-term optimal performance.

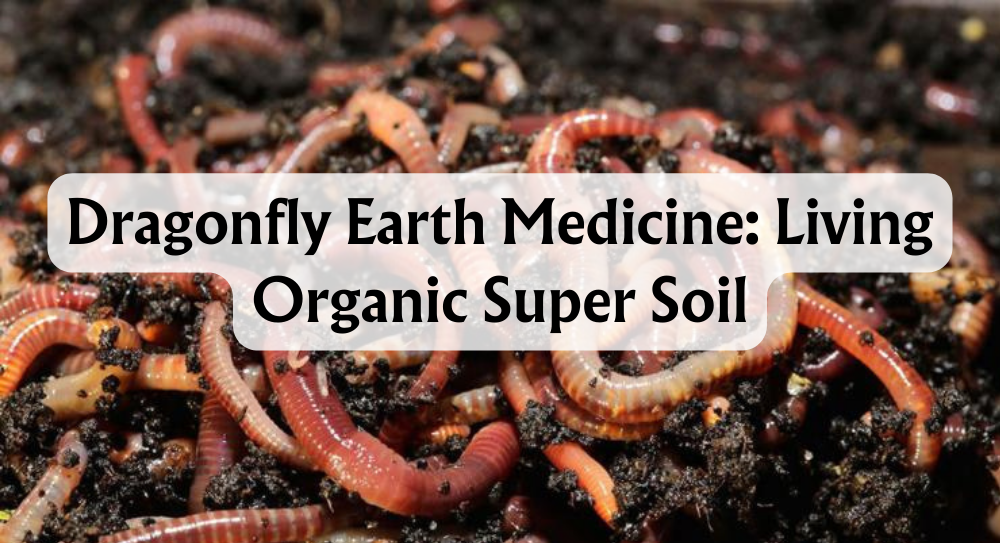
Dragonfly Earth Medicine: Living Organic Super Soil

Dragonfly Earth Medicine: Living Organic Super Soil

Have you found yourself seeking all the benefits of organic soul but you can’t really be fussed with its slow working? Step forward living organic super soils. These absolute marvels provide potent certified 100% organic products that get to work in a matter of weeks as opposed to years. You can achieve incredible yields of beautiful fragrant flowers with these products and it may change the way you grow forever. This blog will cover DEM’s range in particular, give a breakdown of the entire range of products, how to mix the soil and even a test run of these powerful products themselves. 

What Is Living Organic Super Soil?

If you search online for a super soil recipe you will probably find everyone talking about “subcools recipe”. Subcool is a grower and breeder from the United States who owns the TGA seed company and is regarded as the pioneer for super soil. The problem with subcools super soil is that in the UK we can’t get hold of a lot of the ingredients needed to make it. This is where Dragonfly Earth Medicine’s amazing products come in. DEM has done all the hard work for us and created a range of powdered amendments. These can be used to create an amazing super soil and even better the range is 100% pure organic made from plants.

The idea of super soil is to mix the soil before you fill your pots with amendments. This will give your plants everything they need for the full cycle, once your soil is mixed and your pots are filled you just add water… simple.

DEM Range

Lush Roots

  • A Powerful Organic Herbal Endomycorrhizae Inoculant that encourages ultimate nutrient uptake.
  • Expands root mass and brings biodiversity to your garden. I love this stuff it’s my favourite product at the moment.
  • Use it when you transplant clones I like to dip the jiffy in water and then coat the jiffy to get the roots going

Radiant Green

  • Ideal base nutrient.
  • A Complete Organic Herbal and Bacteria Supplement that supports Ultimate Immune Health for your gardens.
  • A Bio stimulant that is good for every feeding during a plant's vegetative stage. The quintessential brew and soil amendment.
  • This is really good stuff and does an amazing job as a base feed.

Fat Flowers

  • A superb Organic blend of Herbs and Bacteria’s that specifically aide in extraordinary yields.
  • Excellent as an everyday nutrient during the flowering and fruiting stages of a garden cycle.
  • Makes a fantastic brew and soil amendment.
  • This stuff works really well to give you amazing flowers.

Brilliant Black

  • Organic Alfalfa blended with micronized humates and beneficial bacteria.
  • A replenishing and restorative soil amendment for all stages of plant growth.

Natural Mistik

  • A wicked organic herbal blend that is used to nourish plants through foliar spraying.
  • Can be used regularly for clean leaves and Essential Vitamin and Mineral Nutrient Uptake.
  • Pro Tip: Use every other day in the veg stage to keep all the leaves clean and very healthy.

Required Items For Soil Mix

  • Guanakalong soil 45L – One of the best soils on the market. Airy and full of goodness
  • Guanakalong bat dung 450g - This stuff will make your flowers taste amazing and it’s 100% organic it gives a depth of flavour that no bottled nutrients can match
  • Worm castings 5L - You can buy plagron worm castings that are really good these help promote root development and helps with nutrient uptake; full of trace elements, enzymes, and bacteria all needed for a healthy living soil
  • Hydro stones washed- added for extra drainage and aeration of the soil
  • DEM range product
  • Live earthworms x 30 optional - I like adding live worms they create tunnels when they move in the soil creating pockets of air for the roots. Also, you feed the worms and in turn the worms feed the plants just like in nature
  • 56L root pouch- In our opinion, a well-utilised root pouch can help plants grow faster and assure the soil will never get too wet
  • Light mix soil plagron
  • Black and white to mix the soil on
  • Straw to cover the top of the pouch-only if using live worms

Step-by-Step Guide

  1. Lay the black and white sheeting on the ground and empty the 45L bag of soil on to it + worm castings + bat dung
  2. Add 1 teaspoon of all the DEM products per 5L of soil for a short veg time up to 3 weeks so that’s 9 of each and mix it into the soil, add 2 teaspoons per 5L of soil for a long veg time up to 6 weeks. All strains feed at different rates so these ratios are guidelines but don’t panic you can’t do any harm to your plants by over-feeding with DEM products.
  3. Add 10L of the washed hydro stones to the soil and mix them in this is to help with drainage
  4. Add the worms to the mix
  5. Fill the root pouch, add a layer of washed hydro stones to the bottom of the pouch. This is to help with drainage you want a 3inch layer at the bottom
  6. Start to fill the pouch with the soil mix. Fill the pouch leaving a 6inch space at the top
  7. Add clone which has been in the veg room for 2 weeks in a 3.8L pouch. Carefully remove the clone from the pouch and sit it on top of the soil mix in the 56L pouch.
  8. Take the light mix and fill in the space around the clone.
  9. Lay the straw evenly over the top of the pouch. This will protect the worms from the light when they come to the surface. Feel free to add fruit scraps to the surface of the pouch (under the straw) every week for the worms to feed on.
  10. Water the plant every other day with RO water with a ph. of between 6 and 7. Optionally, you can also use a compost tea once a week.

Results

I have just finished my first grow using this method, I could go into major details from the grow journal about this and that but I don’t think I need to. In the last 3 years, my focus has been on producing the best organic flowers that I can and I have tried nutrient ranges from bio bizz and bloom to try and achieve this. Bear in mind that even organic bottled nutrients are not 100% organic as they contain synthetic stabilisers to prevent the contents from going off.

DEM is a step above. What you could call “true” or “pure” organics: all the products are made from plant extract. You're feeding your plants with plants…can it get any more organic than that?

The flowers that I have just produced are the best I’ve ever had in all my life. A mentor to me for many years when I started growing and is probably the best grower I’ve met said he has never witnessed flowers that good from an indoor garden. The results of this product are miles and above anything under the ‘bottled nutrients’ label and I find myself wholly committed to this style of growing. If these results are anything to go by, DEM will give you the ability to produce the most amazing crop you will ever taste or smell.

A massive thank you to everyone at DEM for bringing this range to market, hopefully in time people will come to realise the potential of this fantastic range.

D-Papillon 315W CDM/CMH – AKA ‘the plasma killah’

D-Papillon-315W-CDM/CMH–AKA-‘the-plasma-killah’

D-Papillon 315W CDM/CMH – AKA ‘the plasma killah’

I have been reluctant to test this light purely on the basis that I have always done very well with the MH + HPS combo with adjust-a-wings.

But due to hearing nothing but good things about this light from various sources, I decided to give it a test. I will be testing these lights in various setups to see exactly how it perform and more importantly the quality of the flowers they can produce.

What Are CDM/CMH Grow Lights?

CMH is made with an arc tube that is constructed of a ceramic composite instead of quartz. This allows the tube to reach a higher temperature. To achieve the lower temperature in HID lamps made with quartz a combination of gasses must be used that don’t necessarily produce the optimal spectrum for photosynthesis.

The higher operating temperature of the ceramic tube allows for an ideal mixture of gasses. This creates a fuller spectrum of light that increases the growth, overall health and yield of a plant.

CDM/CMH Benefits

Some suppliers claim that one 315w is equivalent to one 1000w HPS in terms of yield this is dependent on other factors in the grow room and the grower's skills.

These lights also have a low heat output because of their low wattage. One watt from a grow light creates about 4 BTUs of heat that needs to be cooled. Let’s say you have 4 x 600w HPS in your grow room that’s 10.000 BTUs from your lights, now trade them for 4 x 315w which is 5.000 BTUs and more yield according to some suppliers. Heat is a massive problem for indoor growers in the summer months so halving your BTUs is a big help and you are doing it without sacrificing quality or yield.

One final advantage CDM/CMH bring to the table is their superior light quality compared to other HID lamps. First, they have a wider spectrum than other HID lamps as a result of the near-perfect, unique combination of salts, halides and gasses used in the arc tube.

This mixture creates a spectrum close to that of the sun and emits a stunning crisp, white light. In fact, the colour rendering index CRI for CDM/CMH lamps is 90-93. To give you some perspective the sun's CRI is 100, HPS lamps range from 20-35 and metal halides range from 60-65 the closer the CRI is to 100 the closer it is to sun light.

In terms of light quality, the CDM/CMH includes ultraviolet and infrared rays in their spectrum, which plants love. The higher amounts of UV rays create stronger woodier stalks, this means the growth and vigour of your plants will be unmatched, especially in the veg stage.

CDM/CMH Drawbacks

There are two main drawbacks to using CDM/CMH lights, 1 is the initial cost of the light, I have been growing for over ten years and have come to understand the value of quality lighting systems, and quality lighting pays dividends at harvest time. I understand that if you have a tight budget for setting up a grow the thought of spending £500 on a light may seem scary but lighting is key for yield so you should never sacrifice this aspect of your grow.

The second drawback (if you can call it that) is that you must wear grow room glasses to protect your eyes if you are spending more than 15 min in a room with 1 of these lights. I recommend that you should always wear grow room glasses at all times in grow rooms even with HPS they cost like £20 and exposure to HID will damage your eyes over time. I spend an average of 8 hours a day in grow rooms so protecting my eyes is a top priority.

The Set Up

A 3-light system with the 315 using the daylight lamp all the way through in the middle. MH for veg and HPS for flowers on either side, this is a 3-light, 3-plant system grown in 60/40 in 32L pots using a run-to-waste dripper system.


400w MH for V HPS for F


315 daylight


400w MH for V HPS for F

First Impressions

When I opened the box the first thing that hit me was the attention to detail and the build quality of the fitting it was far superior to any other fitting I have seen.

The Box Contains

  • 315 fitting
  • Very sturdy hanging brackets
  • Daylight lamp
  • Instructions for setup

Daylight Lamp      

The daylight lamp is optimized in a broad spectrum grow light with an increased share of blue light. The lamp can be used for the growth stage of the plant. 

Veg Cycle

All plants were given a 3-week pre-veg in the same room under CFL lighting to get the roots established all 3 plants will be grown from clones taken from the same mother plant.

I have never seen plants respond so well to a light source from day 1 the plants were super healthy, the light that was coming from the 315 was like nothing I had ever seen, it was crisp and brilliant white compared to the MH on either side. Every light has its own wall-mounted fan that blows air in between the light and the plant canopy, I also like to hang 1 hygrometer per light this is to see if certain parts of a room run hotter than other parts.

What I noticed was that you could put your hand directly under the 315 without any discomfort which meant you could have it closer to the plant, whereas the 600w MH if you put your hand within 10 inches of it your hand started to cook. The temperature difference between the 315 and the 600w MH was around 3-5 degrees C.

Very clever reflector design, you can feel the heat coming out of the sides and raising up around the reflector. Also, very impressed with the even light distribution

Open Reflector Concept

Assimilation lighting is generally known to cause an excess of unusable heat directly below the reflector. This leads to “hot” spots on the top of the plant canopy, which detrimentally affects the growth and development of the plants.

The brand-new Green Power lamps that are used in D-Papillon fittings with electronic ballast produce 34% PAR light, 34% infrared heat radiation and 32% convection heat. The reflectors that are used in the existing D-Papillon fixtures uniformly disperse the PAR light and infrared radiation heat. The convection heat (lighting heat) in contrast to radiation heat, is an indirect form of heat transfer.

The heat that is created on the lamp surface is not displaced directly to the plant, but indirectly, with the grow room air behaving as a carrier. The use of the open reflector concept, a natural air current is created; the heat is spread uniformly throughout the grow space, thus avoiding the development of hotspots on the plant canopy. The accumulation of convection heat is therefore removed and does not fall back into the lamp, and as a result, the lamp keeps cooler, resulting in longer lamp life.

The patented reflectors from Papillon have a yield of around 92% (determined in a laboratory certified by the British Standardisation Institute). The lux values obtained by luminaires with these grow light are as much as 10% greater than by conventional luminaires. These greater values represent an unmatched amount of growth light for the plant. In other words, increased growth for the same energy usage.

The reflector of the D-Papillon forms the light beam in a unique manner. Unlike regular production techniques, the reflector is produced by forcing (deep-drawing) the raw material, followed by the application of the reflector layer through vacuum metallizing or sputtering of aluminium.

Employing an entirely different production process, Papillon has the ability to use a reflector material of a high surface density and a high reflection ability. The reflector is purpose-made to cut down on the heating up of the lamp to the lowest possible extent. As a result, there is a lower drop in the light production of the lamp in the course of its life. In summary, their reflector produces more light (light output of 92% - Light Output Ratio), a broader beam of growth light that penetrates deeper into the plant and a lower lamp luminosity rate thanks to a comparatively low reflector temperature.

After about 14 days of veg the plant under the 315 was looking far superior to the ones on either side of it, it had more side arms, shorter internodes, and darker colour, and the stem seemed to be sturdier (apparently using silica with 315’s gives you a thicker harder stem).

For the next 7 days, all plants were super cropped to create 1m wide bushes and lolly popped to remove all the lower parts of the plant, the plant under the 315 recovered from this a lot faster than the other plants showing no signs of stress, she was just a beast thirsty for light all her leaves perky and pointing upwards.

After 21 days of veg, it’s time to flower, all plants are now 1m wide and roughly 1m from the top of the pot supported by canes and tied with loose twisty ties.

If I was using 3 x 315s in the room I think I could have shaved 3-5 days from my veg time

So far I am loving this light, for 315w it is unbelievably bright you can’t look anywhere near it without grow room glasses on. I have just ordered another light to start setup 2 in another location.

Flower Cycle

The daylight lamp was left in the 315 pappy this is because it was getting overlap of HPS from either side so I didn’t feel the need to swap the lamp to the Argo. Far less stretching under the 315 but still got healthy vigorous growth with close internodes.

Day 14 of flower and the plant under the 315 is covered in flower sites and already starting to flower, she is a wide bushy plant that is super healthy.

Day 28 of flower all plants are looking super healthy but the 1 under the 315 is in a different league she has amazing colour all the flower sites are starting to join up.

Day 42 of flower the smell that is coming off the plant under the 315 is far stronger than the other 2 plants, this is due to a better terpene profile due to less heat being forced on to the canopy and dissolving the resin glands, after looking at the flowers under a microscope you can see all the gland heads in tacked and standing upright-this light is amazing!!! 

Day 60 time to cut the plants down, the terpene profile and essential oil production on the plant grown with the 315 is off the chart it smells like a different strain than the other 2, it is dripping with crystal like it has been dipped in diamonds. All the flowers are nice and tight and perfect in every way.

I am in the process of testing these lights in other setups 1 light, 1 plant setup but swapping the lamp in flower to the Argo lamp, and the other setup is 2x 315 paps on 2m a light rail.

Summary Of The 315w Papillion

I have been blown away by this light fitting it is the best light fitting I have tested and could be the best grow light ever made. If I woke up in the morning and these lights were £1000 I would still buy them! This grow light is a game-changing piece of kit that will push the quality of your crop to the next level!!!!

Over the next few months, I will be looking to upgrade all my lighting systems to the 315w Papillion that’s how impressed I was by this test. My aim is always to produce the highest quality product and using this light gives me an advantage in doing that.

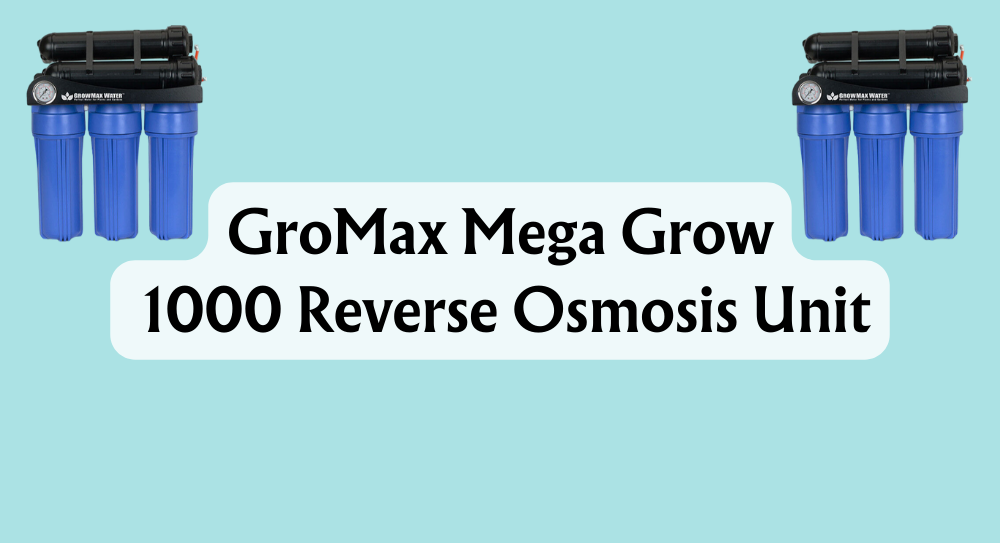
GrowMax Mega Grow 1000 Reverse Osmosis Unit

GrowMax-Mega-Grow-1000-Reverse-Osmosis-Unit

GrowMax Mega Grow 1000 RO

If you're delving into the world of gardening or hydroponic systems, you've likely realised the importance of water quality. This is where the GrowMax Mega Grow 1000 RO system steps in to revolutionise your approach to plant care. As an avid organic grower myself, I've seen firsthand how pure water can impact plant growth and vitality. The Mega Grow 1000 is a reverse osmosis system that's specifically designed to produce up to 1000 litres of pure water per day, catering to the needs of serious gardeners and hydroponic enthusiasts alike.

What sets this system apart is its ability to remove impurities that can hinder plant development. It eliminates up to 95 percent of salts and heavy metals, and up to 99 percent of chlorine and sediments. Such water purity helps to stabilise pH levels and enhances fertiliser performance, ensuring that the nutrients you feed your plants are used to their full potential. Plus, protecting the beneficial microorganisms in the soil is crucial – this system does just that, fostering a healthier growing environment. Improved water quality also means that issues like nutrient lockout are reduced and nutrient uptake is boosted, making every drop count.

In the course of this article, I’ll unpick how the GrowMax Mega Grow 1000 RO works, touch upon its ease of use, and discuss the multitude of benefits it brings to the table. From better water production and creating optimal water conditions to what the package actually includes, I'll ensure you're well-equipped with the knowledge to make an informed decision. Whether you’re a seasoned grower or just starting out, understanding these aspects of water quality can make all the difference in your horticultural pursuits.

Key Takeaways

  • The GrowMax Mega Grow 1000 provides up to 1000 litres of pure water daily for gardening and hydroponic systems.
  • It efficiently removes a vast majority of impurities which can compromise plant health and soil ecology.
  • Throughout this article, I will guide you through its workings, usage, and the advantages it offers to your growing setup.

How Does GrowMax Mega Grow 1000 RO Work?

At its core, reverse osmosis is all about applying pressure to push water through a semi-permeable membrane, saying cheerio to impurities like salts, chlorine, and heavy metals. This means that the only thing making it through is good old H2O.

Now, let's break down this gadget's magic. First, there's a reservoir holding your garden's tap water, brimming with potential (and sadly, contaminants). A pump convinces the water to take a trip to the RO membrane. This membrane is like the bouncer at a club, only letting in the VIP water molecules and turning away the riff-raff contaminants.

All this, though, is monitored by a pressure gauge to ensure everything’s running just peachy and a flow restrictor to keep the water's pace just right, protecting our dear membrane friend. When the water’s all been treated and the reservoir’s had its fill, the shut-off valve steps in for a well-earned break.

Before water even gets to the RO show, it has a pre-game warm-up with the carbon filter and sediment filter. These remove that pesky chlorine that could damage the membrane and sift out any visible sediments so the finer filtration can happen without a hitch.

So, to sum it up, I promise you, this is no prop. The Mega Grow 1000 turns tap water into pure elixir – up to 1000 litres a day! Now, isn't that something to chat about over the garden fence?

How to Use GrowMax Mega Grow 1000 RO?

Setting up your new GrowMax Mega Grow 1000 RO is a doddle! Let me walk you through the steps. First things first, you'll want to connect the inlet tubing, which is the white 3/8" tube, to a water tap or pipework. This usually comes with a garden hose connector, so it should be a cinch to attach.

Once that's secured, let's talk operation. Simply turn on the tap and fire up the pump. Now, here's where patience is a virtue – wait for the reservoir to slowly fill with pure water. Meanwhile, keep an eye on the pressure gauge to ensure everything's running smoothly. If the gauge reads too high or too low, it can be a sign to check for blockages or leaks.

Remember to use filtered water for anything from watering your green darlings to ensuring your humidifier gives them that tropical mist they crave.

Maintenance is key. Keep your system in tip-top shape with these simple steps:

  • Every 3 months:
    • Replace the sediment and carbon filters. They're the heavy lifters that protect your membrane from the gunk and chlorine.
  • Annually (or sooner if needed):
    • Swap out the reverse osmosis membrane, especially if you notice a dip in water quality.

By following these instructions, your plants will be thanking you with that lush green growth we all love to see! Keep this routine, and your green beauties will be living the high life with every drop!

Benefits of GrowMax Mega Grow 1000 RO

Have you ever wondered if your tap water might be affecting your plant's growth? Well, let me share the perks of using the GrowMax Mega Grow 1000 RO, which is pretty much a game-changer for indoor gardeners like me.

First off, pure water is crucial, and this system's got it covered. It strips out salts and all those pesky heavy metals, not to mention nixing chlorine and sediments. The result? Top-notch water quality that makes for happier plants and potentially better yields.

  • Water Quality: Ensures removal of contaminants
    • Salts & heavy metals: Up to 95% reduction
    • Chlorine: 99% gone
    • Sediments: Filters down to 5 microns

Now, the water this kit produces lets you really dial in on your nutrient solution. You can tailor it precisely to your plants' needs, boosting their health and growth. Plus, with no chlorine or other nasties to upset them, the beneficial microorganisms in your soil will be thriving.

  • Nutrient Control: Customisable for plant needs
  • Microbe Protection: Safe for soil life

This fancy bit of kit not only helps prevent nutrient lockout but also supports better nutrient uptake. That means your plants get more of the good stuff they need, and you'll see the difference in their growth.

  • Plant Yield: Enhances fertilizer performance
  • Nutrient Uptake: Avoids lockout, improves absorption

Oh, and let's talk about pH. Stable pH levels can be tricky, but reverse osmosis water from GrowMax helps to stabilize pH, making life a tad easier for gardeners. It's one less thing to worry about, right?

  • pH Stability: Helps to stabilize and prevent fluctuations

Last but not least, considering efficiency, this system can reduce both water and nutrient consumption. It's about giving your plants what they need, without any wastage—good for your wallet and the planet!

  • Efficiency: Cuts down on water and nutrient wastage

In a nutshell, installing a GrowMax Mega Grow 1000 RO could just be one of the best decisions you make for your indoor garden. Better water, better nutrients, happier plants – it's a win all around!

Water Production

When looking into the nitty-gritty of water production with the GrowMax Mega Grow 1000 RO, we're talking about a device that's quite the workhorse! I'll break down just how efficient this system is and how it effortlessly churns out purified water.

Booster Pump

Now, if you're like me and you want to squeeze every last drop of efficiency from your tools, you might be eyeing the booster pump function. It's not just about getting more water; it's about getting it faster. A booster pump can be tacked onto your GrowMax Mega Grow 1000 RO unit to up the ante on water pressure. And more pressure means more water in less time. 

Pressure Regulator

Let's chat about pressure, shall we? Not the kind you feel before a big presentation, but the kind that's vital for optimal operation of your RO system. Without the proper pressure—a sweet spot between 40 PSI (minimum) and 80 PSI (maximum)—your GrowMax might not be living up to its full potential. The pressure regulator is the hero in this scenario, ensuring that you're not lollygagging on either end of the pressure spectrum. For every 4 litres of tap water it dances with, the GrowMax Mega Grow 1000 Reverse Osmosis filter coaxes out 1 litre of pure water. Consider it a bit like a magic act but with hoses and filters instead of rabbits and hats.

Remember, the right pressure and a handy booster pump can be transformative, turning your RO system into a veritable fountain of water production. Plus, with the right accessories, the GrowMax Mega Grow 1000 Reverse Osmosis system isn't just effective, it’s a breeze to use. Now, isn't that something to tell your plants about?

Water Conditions

Have you ever wondered what's really in your tap water when you're watering your plants? If you're like me and prefer your greens to be as healthy as possible, water quality can't be overlooked. When it comes to hydroponics, the water conditions are pretty darn crucial, and that's where the GrowMax Mega Grow 1000 Reverse Osmosis unit comes into play. Let’s dive into the ins and outs of what this system does for your water:

Removing the Undesirables: This system is a true heavyweight champ at eliminating the bad stuff you don’t want:

  • Salts and Heavy Metals: It strips away up to a staggering 95% of salts and heavy metals, including the likes of sodium, calcium, and pesky metals such as iron, lead, and copper.
  • Chlorine and Sediments: Your water supply is likely riddled with chlorine, but not to worry, the Mega Grow 1000 RO can reduce chlorine levels by up to 99%! It also takes care of sediments like sand, rust, and dust, which are definitely not on my guest list.

Tweaking the Technicals:

  • EC Levels: Ever heard of EC — electrical conductivity? It's a fancy way of measuring all the stuff dissolved in water. With this system, the EC drops down to less than 0.1 mS/cm, which is like giving your plants a pure spring water spa day, every day.
  • TDS Levels: Then there’s TDS — total dissolved solids. You'll want this number as tiny as possible for the likes of soil and your prized plants to thrive. After passing through the RO system, the TDS is less than 10 ppm. Talk about high-quality H2O!

What all this means is that water treated with the GrowMax Mega Grow 1000 RO system is practically a clean slate, ready to be tailored to the specific needs of your hydroponic setup or garden soil. With such pristine water, your plants can absorb nutrients effectively without the interference of chloramines, nitrates or other chemical contaminants and micro-organisms that might lurk in untreated tap water.

Now, adjusting pH levels becomes a breeze, as you're not dealing with the unpredictable nature of tap water. Your plants will thank you, and you'll probably notice them looking a bit more chipper. Plus, there's a peace of mind that comes with knowing your plants are getting the next best thing to natural rainwater. Isn't that a breath of fresh air?

What Does GrowMax Mega Grow 1000 RO Include?

Hey there, have you ever wondered what's inside the box of a GrowMax Mega Grow 1000 RO system? Let's break it down and see if it's got everything you need to give your plants the luxury spa treatment they deserve!

Inside the package, you'll find the heart of the system – the reverse osmosis (RO) membrane. This is the maestro conducting the whole purification symphony, ensuring your water is as pure as it can get for your greens.

  • Sediment Filter: Say goodbye to any pesky particles floating in your water. This filter catches them before they can clog up your system.
  • Carbon Filter: Like a superhero, it swoops in to remove chlorine and protect the sensitive RO membrane from any chemical damage.

The GrowMax Mega Grow 1000 doesn't skimp on the extras either:

  • Booster Pump Kit: No more worries about low water pressure. This little booster gives your system a nudge to keep things flowing smoothly.
  • Fittings: You've got all the nuts and bolts—literally—to dovetail this setup into your existing system with no fuss.
  • Float Valve: It prevents any accidental mini-floods by telling your system to take a break when your reservoir is full.
  • Pressure Gauge: Keep an eye on your system's pressure easily; it's like having a window into your RO system's soul.

And the cherry on top? The GrowMax Mega Grow 1000 can churn out a lot of H2O! Trust me, your plants will be chuffed with such pristine water. Not to forget, a stable pH level is just the icing on the cake for optimal nutrient uptake.

So, there you have it. This kit is the full monty to get your garden grooving to the tune of pure water.

GowMax MegaGrow 1000 Reverse Osmosis Unit
What are the key features of the GrowMax Water Filtration system designed for gardening?
I've found that the GrowMax Water systems are tailor-made for green thumbs! The Mega Grow 1000, in particular, stands out with its ability to reduce up to 99% of contaminants, ensuring your plants get the purest water. It's built for max flow, making it a real boon for hydroponics or garden watering.
How do users typically rate the performance of the Mega Grow 1000 RO system?
From what I've seen, users rave about the Mega Grow 1000 for its effectiveness with nutrients and fertilizers. It seems to be a game changer in gardens, supporting plant health and growth with high-quality filtered water.
Could you guide me on where to find the best deals on the GrowMax Mega Grow 1000 RO?
To snag the best deals, check out specialist hydroponics shops or online gardening stores. They often offer competitive prices, and you might just stumble upon a discount or a sale, which is always a nice bonus!
Are there any straightforward instructions available for installing the Mega Grow 1000 RO system?
Yes indeed! It is designed with ease in mind and it is pretty simple to install the system. If I hit a snag, I look for the user guide or instructional videos online – they're clear as day and pretty helpful.
What's the maximum capacity of contaminants the MAXQUARIUM 000 PPM can handle?
Ah, it seems like there's been a mix-up. I'm all about the Mega Grow 1000 RO here, but just for clarity, the MAXQUARIUM 000 PPM is typically designed to manage contaminants up to 1000 TDS with the right setup.
What maintenance routines are recommended to keep the Mega Grow 1000 RO in optimal condition?
Maintenance is key and quite simple. I'd recommend replacing filters as per the manufacturer's advice. Also, keeping an eye on the system's performance ensures it runs smoothly. Regular check-ups don't hurt either.

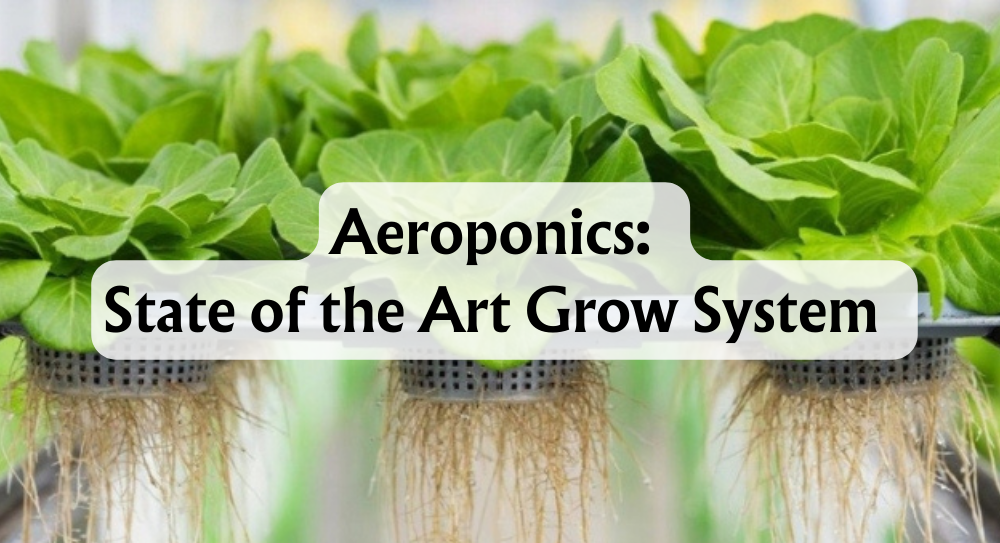
Aeroponics: State of the Art Grow System

Aeroponics-State-of-the-Art-Grow-System

Aeroponic Systems

Aeroponics is a plant-cultivation technique that might sound like science fiction, but trust me, it's very much a reality. It's a bit like hydroponics, but instead of using water as a growing medium, it sprays the plant roots with a nutrient-rich mist. It's clever because the plants are literally hanging in the air and the grow systems do all the hard work of delivering nutrients and oxygen directly to the roots.

This soil-less gardening technology offers stacks of perks for plants: they can grow faster, and you can often squeeze in more plants per square metre, which means higher yields. Brilliant, isn't it? But it's not all a walk in the park. Setting up an aeroponic system can be a tad more expensive and a bit tricky to get your head around. And if the technology has a hiccup, it's a race against time to fix it before the plants throw in the towel.

As a gardener with a keen interest in technology, I find aeroponics fascinating. In this article, I'm inviting you into my world to get the lowdown on how aeroponics systems are set up and maintained, the different types you can dabble with, and what greenery you can expect to flourish. Along with the upsides, I'll be upfront about the potential setbacks, and we'll look at real-life examples of where aeroponics is making a splash.

Key Takeaways

  • Aeroponics is a soil-less technique of growing plants using nutrient mist.
  • The system offers benefits such as efficient resource use and higher plant yields.
  • Understanding aeroponics involves technological setup and potential challenges.

What Does Aeroponics Mean?

Have you ever wondered if plants can thrive suspended in air, without any soil hugging their roots? That's where aeroponics comes into play. It's a fascinating method that cultivates plants in an air or mist environment. Let me tell you, this technique sidesteps the need for soil or any other aggregate medium altogether.

Now, I think the name aeroponics has a rather neat backstory – it's a blend of two Greek words: aer (air) and ponos (work). Essentially, it's all about the plants getting their hustle on with the help of air! Quite a befitting term, as these aerial environments work tirelessly to support plant life.

Advantages:

  • Roots are exposed to oxygen and nutrients – it's like an all-you-can-breath-and-eat buffet for plants.
  • It's a water-wise system, making it light on resources but heavy on efficiency, which is brilliant for our planet.
  • Plants grow faster and healthier without the constraints of soil.

Disadvantages:

  • The setup can be quite intricate and not so friendly on the wallet.
  • Absolutely reliant on electricity and some pretty nifty tech.
  • Have you ever seen a clogged nozzle or a bit of contamination throw a spanner in the works? Well, in aeroponics, it can be a real issue.

So there you have it! While the system is a marvel of modern plant science, it's not without its challenges. But imagine the beauty and efficiency of plants suspended in the air... pretty cool, right?

What Is an Aeroponic System?

Have you ever wondered how we can grow plants without any soil under their roots? I'm here to share about an incredible method called aeroponics, a soilless growing innovation that's part of the wider hydroponics family. Here's a simple guide to understanding this cutting-edge cultivation technique.

Essential Components of an Aeroponic System

  • Reservoir: This tank is where the nutrient-rich solution of water sits. It’s the lifeblood of the whole system.
  • Pump: Thinks of it as the heart that keeps the blood flowing, only it sends the nutrient solution to where it's needed.
  • Misting Devices: These little sprayers are like cloud-makers, turning the liquid into a fine mist to feed the roots.
  • Enclosure: A protective space stops any light-loving algae from gate-crashing the party and keeps out unwanted pests.
  • Support Structure: It’s like a stage for the plants, where the roots are suspended in the air, waiting for their nutrient mist.

How Does It Operate, You Ask?

  1. The plants are held aloft by the support, roots basking in the open.
  2. Nutrient solution travels from the reservoir to the roots, thanks to our friend the pump.
  3. Sprayers create a nutrient-rich mist, ensuring the roots get a balanced diet.
  4. After the feast, the leftover solution is collected and escorted back to the reservoir.

What Makes It So Special? This technique is a closed-loop system. That means the solution is reused rather than discarded, conserving water and nutrients. The on-off cycling of the mist also helps to get oxygen to the roots, making plants healthier and possibly more productive.

Irrigation? Hardly. It's all automated! The roots get a regular misting according to schedule, and I don’t have to lift a finger to water them. 

Aeroponics is more than a soil substitute; it’s an innovation that might just change how we view gardening altogether.

How Does the Aeroponic System Work?

Ever wondered how plants can thrive suspended in air, without the comfort of soil? Aeroponics is the answer, a high-tech sibling to hydroponics. I'm here to shed some light on this fascinating approach to growing plants.

In an aeroponic system, the roots of the plants are misted with a nutrient solution. Unlike traditional planting, where roots seek out nutrients through the soil, aeroponics brings nutrients to the plants. Tiny devices called misters spray a fine mist containing water and essential nutrients directly into the roots. But what's truly remarkable? These roots dangle freely in the air, absorbing moisture and food through a process called osmosis.

Now, don't forget about oxygenation. The exposed roots receive oxygen from the surrounding air, necessary for respiration. It's a breath of fresh air for the roots, literally! And since there's no soil, the risks of diseases transmitted by soil-borne pathogens are significantly slashed.

But it isn't just a spray-and-forget kind of setup. The system's success depends on the droplet size and frequency of the mist—too large or too infrequent, and the roots might dry out. Similarly, the nutrient solution's concentration and pH levels are crucial. If they're off-kilter, the plants could suffer.

What about external factors? Well, temperature and humidity play their own roles. If the air is too hot or too cold, or if the humidity oscillates between too high or low, it can affect plant growth. And let's not underestimate good old gravity. It helps drain the excess solution away, preventing water-logging of the roots.

And of course, plants still need light to perform photosynthesis, using water, nutrients, and oxygen to churn out energy. The right balance of light and airflow keeps the whole system ticking over smoothly.

The mechanics of aeroponics might sound space-age, but it's firmly rooted (excuse the pun) in the laws of nature, bringing us wholesome results with a futuristic twist.

Types of Aeroponic Systems

Aeroponic systems are diverse and cater to different scales and complexities of gardening. Whether you're a hobbyist or a commercial farmer, understanding the type of system that suits your needs can make all the difference. Here's an overview of the varying methods you can employ in your aeroponic adventures.

Low-Pressure Aeroponics (LPA)

LPA is the entry point for many into the world of aeroponics. It's a budget-friendly choice that utilises low-pressure pumps and misting nozzles to deliver larger droplets of nutrient solution to the plants. It’s a system I’d recommend for novice gardeners or those who wish to start small.

  • Advantages:

    • Low cost: Easy on the pocket
    • Simple to set up: Almost plug-and-play
    • Low energy use: Economical on electricity
    • Best for: Seedlings, clones, and herbs
  • Disadvantages:

    • Water use: Could be more efficient
    • Aeration and drainage: Needs improvement
    • Plant size: Not for the heavyweights

High-Pressure Aeroponics (HPA)

Moving on to the HPA, it’s a sophisticated ordeal, employing high-pressure pumps to create a fine mist that envelops the roots in a nutrient-dense fog. If you're geared up for a large-scale operation or are keen on packing in maximum efficiency, this is where you aim your sights.

  • Advantages:

    • Precision nutrient delivery: Laser-focused feeding
    • Root oxygen exposure: Maximised for plant health
    • Crop yield and quality: Exceptionally high
  • Disadvantages:

    • Complexity: Might need a bit of a learning curve
    • Energy consumption: Higher utility bills
    • System vulnerability: Keep an eye out for power or pump issues

Ultrasonic Fogger Aeroponics

Ever fancied a bit of avant-garde gardening? Ultrasonic fogger aeroponics might just pique your interest. It uses high-tech ultrasonic technology to create an incredibly fine mist, ensuring that the roots receive optimal levels of nutrients and oxygen. It’s a system befitting research environments and cutting-edge applications.

  • Advantages:

    • Resource-efficient: A little goes a long way
    • Root optimisation: First-class aeration and hydration
    • Growth speed: Quick plant development
  • Disadvantages:

    • Reliability: Still in the experimental stage
    • Nutrient control: Demands precision
    • Maintenance: Watch out for clogs and unwanted microbes

From personal experience, every aeroponic system has its unique set of quirks. Your choice depends largely on your commitment level and how invested you are to growing plants in a soil-free environment. Remember, the more intricate the system, the greater the potential for both high yields and complicated troubleshooting. 

What Can You Grow With Aeroponics?

Let's chat about the exciting range of plants you can cultivate in an aeroponic system.

Vegetables, oh the variety! You can grow leafy ones like lettuce, spinach, and kale—the perfect start for a fresh salad. Heavier veggies such as cucumbers, tomatoes, and peppers also do brilliantly, though they'll need a bit more support as they mature. I've even seen eggplants flourishing in the misty embrace of aeroponics.

Thinking of adding flavour to your dishes? Herbs are your best friends here. From aromatic basil to zesty mint, hearty parsley, and even oregano, they thrive in an aeroponic system, needing only your loving care and a bit of space.

And who could forget the luscious strawberries? These sweet, red delights along with blueberries and raspberries, are more than happy to grow mid-air, rewarding you with fresh fruit that might just taste like a little piece of summer.

Have a go at root crops like carrots and radishes too. They have slightly different requirements, but with careful system adjustment, you’ll be pulling them out of your aeroponic setup instead of the ground.

Remember though, the key to a successful aeroponic garden lies in understanding the needs of your plants—how much do they weigh when fully grown? What about their thirst for water and nutrients and their need for warmth and light? Also, consider how they all get along together because compatibility can be a real game-changer in a limited space.

So grab your tools, and let's get aeroponic!

Pros and Cons of Aeroponics

In this section, we'll explore the various advantages and disadvantages that come with using aeroponics for growing plants. It's a method that has revolutionised the way we think about agriculture, but it's not without its challenges.

Pros

I must say, one of the most striking pros of aeroponics is the faster plant growth. The roots have direct access to oxygen and nutrients, which pumps up their growth rate and can result in higher yields compared to traditional soil methods. Plus, because plants are suspended in the air with their roots exposed, there's a significantly reduced consumption of water and nutrients—nothing is wasted, which is pretty nifty!

It gets even better. With aeroponics, I have so much control over the environmental factors that affect my plants, from the nutrient concentration to the temperature. This control isn't just a power trip; it allows for bespoke conditions that are perfect for each plant. And without the need for soil, I'm not fussing over soil-borne pests and diseases. There's less chance of my plants getting sick, which is a relief.

And let's not forget about efficiency. Space is a precious commodity, and aeroponics uses it wisely. I can grow more in a smaller area since I don't need rows of soil, heck, I can even make my own little vertical farms if I want. Genius

Cons

However, it's not all sunshine and roses. The initial sting is in the wallet – the cost of setting up an aeroponic system is certainly higher than just getting some dirt and seeds. Plus, there's always something new to learn, which means I've had to arm myself with a fair bit of technical know-how.

Then there's the energy consumption to think about, these systems require electricity. The technology such as pumps and misters need a constant supply of electricity. If there’s a power outage, I could be saying a sorrowful goodbye to my plants.

Another thing that keeps me on my toes is the** risk of bacterial and fungal infections**. Yes, I said that aeroponics is less prone to diseases, but when an issue does arise, it can spread quickly through the mist, making it a potential nightmare.

So, while my aeroponic system is a water-efficient, space-saving grow-op with fewer foes and faster growth, it does demand more from me both mentally and financially. Plus, I'm always at the mercy of technology, and we all know how that can let us down at the most inopportune moments. Keep these points in mind if you're considering giving aeroponics a go.

Conclusion

In examining aeroponics, we've ventured into a future-forward approach to farming. As someone intrigued by this marriage of technology and agriculture, I've observed that aeroponic systems offer a soilless alternative to traditional farming methods. For you gardeners out there eager to dip your green thumbs into something new, this could be a revolutionary way to grow your produce.

Remarkably, aeroponics is not only water-efficient, using 98% less water than other methods, but also minimises labour costs and boosts plant growth and yields. It's a method that suspends roots in air, misting them with a nutritious solution. Compared with hydroponics, where roots soak in a nutrient solution, aeroponics stands out with its minimal use of liquid and potentially greater safety due to the reduced risk of waterborne diseases.

For those of you pondering your next step in gardening, here are some tips:

  • Start small: Experiment with a simple aeroponic kit to get familiar with the process.
  • Monitor carefully: Keep track of the nutrient balance and misting frequency to maintain healthy plants.
  • Go high-tech: Consider automating your system with timers and sensors to streamline your gardening.

By embracing aeroponic farming, we're not merely looking at a fad but at a sustainable solution to food scarcity and the woes of resource depletion. Grander ambitions aside, if you're simply ready for one of the best systems for taking your growing game up a notch, look no further.  Together, let's grow towards a more sustainable tomorrow.

Aeroponics FAQs
What plant species can be successfully grown using aeroponic systems?
Leafy greens like lettuce absolutely thrive in aeroponic systems - they love the constant mist of nutrients and grow quite rapidly because of it. Herbs, microgreens, strawberries, and even root vegetables also adapt well to aeroponic technology.
Could you list the six types of hydroponic systems including aeroponics?
Certainly! The six main types of hydroponic systems are: Deep Water Culture (DWC) Nutrient Film Technique (NFT) Wicking Ebb and Flow (Flood and Drain) Drip System (also known as trickle) And of course, Aeroponics These systems range from simple to complex, each with unique advantages for different kinds of plants.
What are the main differences between aeroponic and hydroponic growing methods?
The biggest difference lies in how plants receive their nutrients. Aeroponic systems use a mist to deliver a nutrient solution directly to the exposed roots, while traditional hydroponics involves submerging roots in a nutrient solution.
What items are typically included in an aeroponics starter kit?
An aeroponics starter kit usually comes with a reservoir, misting nozzles, a pump, a timer, mesh pots, and sometimes seedling starters. It's the whole package to get you started on your soil-less growing journey.
What are the key advantages of using aeroponics for plant cultivation?
Aeroponics offers unrestricted access to oxygen for plant roots, efficient water usage, quicker plant growth, and typically a higher yield. Not to mention, it's a soil-free solution, which means fewer pests and diseases.
How is aeroponics being applied in commercial growing operations?
Commercial growers are using aeroponics to produce food in massive quantities. It's a space-efficient method that allows for high-density planting and year-round harvesting, which is perfect for meeting the demands of a growing population.

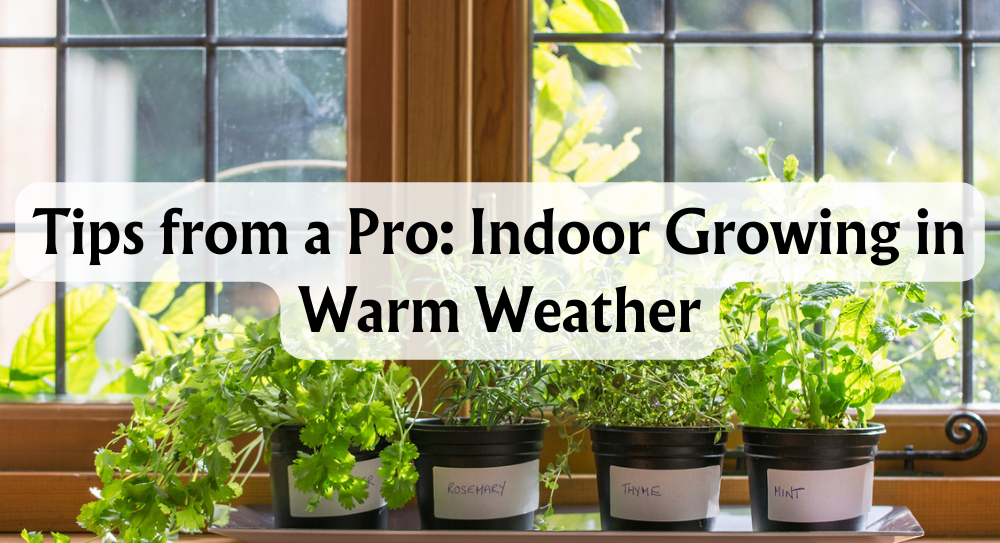
Tips from a Pro: Indoor Growing in Warm Weather

Tips from A Pro: Indoor Growing In Warm Weather

For those of us growing indoors with our finely tuned grow room environments, the arrival of summer’s high temperatures can be a little worrying. Below are some simple pointers to make sure you protect your plants health and still produce an outstanding crop.

Headroom: The More, The Better

While this is a purely circumstantial recommendation, it can be a lifesaver where possible. Put simply, a room with more space is a lot easier to keep cool. Headroom goes a long way to enable air movement and provide better temperature control. 6ft or more headroom is what we’d suggest, though we fully respect this may not be possible.

Air Movement: Keep It Up

If you’re not already a keeper of one, get hold of an oscillating fan. It’s a simple and cost-effective way to ensure the air movement in the grow room is maintained. Assuring a good position of the fan is vital. You want to position it below the plant, as opposed to above the leaf canopy. This will avoid any potential wind burn that can take some time for a plant to recover.

Nutrient Solution: Keep It Cool

Particularly when using a hydro system, the nutrient solution must be kept at a lower temperature. Depending on the resources available to you, there is more than one way to skin this cat.

1) Get hold of a chiller. They are not necessarily the cheapest items, but their ability to connect to the system itself and suitability for the warmer months is undeniable. A chiller will keep the solution at a consistent, cool temperature assuring that the oxygen available is at optimum levels.

2) The budget option is far from a step down in terms of effectiveness. Particularly in NFT systems, simply placing an ice pack or two in the reservoir can lower the overall temperature of the solution. Moreover, this will only cost you a couple of quid to work in your system.   

It’s important to remember, when it comes to hydro systems that the temperature of the nutrient solution is consequential. If it manages to heat up beyond 21 degrees C, the oxygen levels are going to dissipate and the growth rate of the plants will be negatively affected.

Lighting: Positioning Is Everything

If the overall temperatures are higher than the rest of the year, your lighting and specifically, its positioning needs careful attention. In the summer, keeping your lights about 10-20cm higher than you would normally is advisable. This won’t lose much light but it will provide a cooler temperature for your plants. Rust marks are a sure sign that the grow lights are too close to the plants, feel free to take the lights up a little before this appears.

Fans: Invest For The Best

We don’t specifically advise buying the highest end most expensive fans on the market, there are more worthwhile alternatives. A perfect addition to the fans you have for the warmer summer months is a temperature-controlled fan speed regulator. This is ideal for making the fans work as hard as possible when required. This small addition to your fans can ensure that as much cool air as possible is available in the warmest periods. A fan with its speed temperature controlled is going to regulate the temperature for you till it reaches the desired level.

Intake Fan: Outside To Inside

It’s probably struck you that the surrounding rooms to your grow room may well be significantly cooler. Don’t be afraid to get hold of an intake fan and draw the air from the cooler room to the grow room. This can have the effect of bringing cooler air which can dilute the grow room temperature, bringing it down overall.

Finally, Growing In The Warmth

Once your temperature levels are creeping upwards of 25 degrees C, there’s no doubt you're nervous about your grow room. There are numerous suggestions and additions you can make to improve the temperature stability as it naturally rises in the middle of the year. OptiClimate units, circulation fans and LED grow lights are some just to name a few, all depending on your space and budget options. You can be sure that the steps above are some tried and tested ways to lessen temperatures as they rise in summer. Follow our tips, keep your grow cool and enjoy your best summer yields yet.

Tips from a Pro: Maximising your Light Source

Maximising Your Light Source: Tips From A Pro

Every grower at some point has asked the question “How close do I keep the light to my plant?”. While it is true the closer you can get it the bigger the yield will be, there is one very important consideration, the heat. Any mounted light that is simply too close to the plant can cause the flowers and the leaves to dry significantly, at worst, to the point of burning.

The Importance Of Temperature

The arena of temperature we most need to keep an eye on is between the top of the plant and the lamp. Now many of us will have wall fans installed targeting such areas, some of us may even be hanging hydrometers from lights to monitor temperatures and keep an eye out for hotspots. Generally speaking, this space between the light and the plant should be no hotter than 2 degrees warmer than the surrounding room.

Best Distance For Hanging Lights

The ideal distance to hang the light is 300mm or 0.3m from the top of the plant. However, this is entirely conditional on the temperature. This can only be done if the temperature is within the range you desire. For more customisation and variability to your setup, Digital dimmable ballasts are a good investment. It is pretty standard to be able to dim between 250 400 600 and 660w.

How To Measure Light Intensity

The equation used to measure light intensity is the “inverse square law”. Once you get this down, you can work out how to get the most from a light source. Inverse Square law goes something like this:

I = 1/D2

Light intensity (I) = 1 divided by the distance from the lamp squared (D2).

So let’s give the equation a try with a distance of 0.3m.


Example 1

I = 1 / 0.3x0.3

0.3 x 0.3 = 0.09

1 / 0.09 = 111 so the light intensity is 111 = 100% this equation proves that with a distance of 300mm from light to plant 100% is being absorbed by the plant.

Let’s do it again this time with a distance of 600mm or 0.6m.


Example 2

I = 1 / 0.6x0.6

0.6 x 0.6 = 0.36

1 / 0.36 = 2.7 this gives us a light intensity of 27% so by doubling the distance between the light and the plant we have lost 73% of the light intensity.


Finally, Remember…

Just because you grow with a 600w lamp doesn’t mean that 600w is being transferred to the plant. If due to excess heat, you are mounting the light 600mm from the top of the plant then you are only transferring around 200w. This is why dimmable ballasts are useful as you can choose to dim down to 400w, meaning, you can mount the light closer to the plant allowing for better light intensity absorption.

It wasn’t long ago I explained the inverse square law to a friend of mine who’d been growing as much as I had. At the time, he was using 1000w HPS lighting for flowering, hanging them 1m above the plant. A bet was made that I could produce a greater yield with 2x 400w HPS lights. He seemed pretty amused at the idea till I later won the bet. As I could mount both the 400w lamps closer to the plant, it could transfer more light and increase the yield.

pH Levels Explained: Vital Info for Soil, Nutrient and Plant Growth

ph-levels-explained-vital-info-for-soil-nutrient-and-plant-growth

pH Levels Explained

When we talk about gardening or hydroponics, we often emphasise nutrients, light and water quality, but there's another key player that deserves our attention – pH. As someone who has spent years wading through the intricacies of horticulture with the Hyjo team, I can attest to how the pH level can make or break your plant's health. Simply put, pH is a measure of the acidity or alkalinity of a solution, indicated by a numeric scale that runs from 0 to 14. Pure water sits smack in the middle at 7, representing neutrality. Anything below 7 is acidic, while numbers above tilt towards alkaline or basic.

Understanding this seemingly tiny detail is crucial because each plant thrives in a certain pH range. It can affect everything from soil chemistry to nutrient availability. For instance, a high hydrogen ion concentration in acidic soils can hinder plants from accessing nitrogen, phosphorus, and potassium. Conversely, alkaline soils can limit the uptake of iron, manganese, and copper. Armed with a trusty pH meter, gardeners can gauge their growing medium's status and make necessary adjustments to optimise growth.

I'll walk you through what exactly impacts the shifting sands of your growing medium's pH and unpack how to manoeuvre through varying soil types - be it neutral, acidic, or alkaline. So whether you're wrestling with the pH range for coco media or navigating the waters of recirculating deep water culture systems, by the end of this, you'll be well-versed in tweaking your soil pH like a seasoned pro. 

Key Takeaways

  • pH measures the acidity or alkalinity of a solution on a scale from 0 to 14.
  • Proper pH levels are crucial for nutrient availability and overall plant health.
  • Understanding and adjusting soil pH is key to successful gardening and hydroponics.

What Is pH?

Have you ever wondered why some substances are sour to the taste like lemon juice, while others like baking soda have a completely different profile? Well, the answer often lies in a little thing we call pH. But what exactly is it?

pH stands for 'power of hydrogen' and is, quite simply, a measure of the hydrogen ion concentration in aqueous solutions. I think of pH as a covert agent working behind the scenes; its value can tell you if a solution is acidic, neutral, or alkaline. The term was first introduced by a Danish biochemist named Søren Peter Lauritz Sørensen.

The nitty-gritty of pH is more mathematical—it's the negative logarithm to the base 10 of the hydrogen ion concentration. This might sound a bit daunting, but it's a pretty straightforward concept. Solutions with more hydrogen ions are acidic, and those with fewer are alkaline.

Let's talk numbers. pH is measured on a logarithmic scale from 0 to 14. A pH of 7 is considered neutral—that's where pure water sits. Anything below 7 is acidic, like lemon juice (around pH 2) and vinegar (roughly pH 3). Above 7, you've got your alkaline substances; for instance, baking soda has a pH about 9, while bleach is way up there with a pH around 13.

This simple little scale isn't the worst place to start:

pH Value Common Substance Classification
Around 2 Lemon Juice Acidic
Roughly 3 Vinegar Acidic
Exactly 7 Pure Water Neutral
About 9 Baking Soda Alkaline
Around 13 Bleach Alkaline

pH doesn't just sit in the lab; it ventures out into the real world, affecting how nutrients are available in soil and influencing microorganisms and plant health. Something as simple as rainfall or the presence of organic matter can nudge the pH of natural soils in one direction or another.

So the next time you're tending to your garden or just enjoying a glass of something fizzy, remember that pH has a role in it all, even if it's just behind the scenes.

What Changes Growing Medium pH?

When I think about the vitality of plants, I often remember that the medium they grow in is much like a home to them. It's where they sip water and nutrients. But did you know this home, the growing medium, is subject to pH changes? Let's look at what causes these shifts, so we can keep our leafy friends chirpy!

Water Alkalinity

Alkalinity, not to be confused with pH, refers to water's capability to neutralise acidic substances. When the water you use is alkaline, it comes with calcium and magnesium ions in tow. These heroes can push the growing medium’s pH up. That’s why checking water quality with pH meters can save the day by letting us know if our water is more of a hero or a villain!

Fertiliser

Now, onto fertilisers, these can be a bit of a Jekyll and Hyde situation. Depending on what you use, they can release either acidic or basic ions. If the fertiliser's the acidic sort, it’ll lower the pH of the growing medium, swinging things towards a major stress for the plant. But if it's a basic chap, it lifts the pH, possibly making the environment too cushy for some plants. That's why knowing the right mix and amount is as important as the ingredients in my legendary Victoria sponge cake.

Crop

Lastly, crops are not just idle bystanders. They play an active role, too. Some are quite the personalities, taking up ions and causing a bit of a pH jumble. For example, as they pull up nutrients, they might leave hydrogen ions behind, which lowers the pH. It turns out that certain crops are more demanding than others, setting the tone for the growing medium's pH.

So, there we have it. We've talked water, fertiliser, and crops – all key players in the pH drama of a growing medium. Keep a close eye on these factors, and you won't be caught off guard when the pH starts to sway. Remember, a happy home means a happy plant, and a happy plant means a happier you! ????

pH Range for Coco Media

Have you ever wondered why plants in coco coir flourish? Well, let's take a peek into the world of soil pH and agronomy to understand this phenomenon. As a gardener myself, I operate within 5.7 to 6.4 ph range for optimum plant growth. 

Coco coir, commonly used in horticulture, offers a unique environment for plant roots. Its natural pH range is about 5.8 to 6.5, which is slightly acidic and perfect for a diverse range of plants. If you're like me, obsessed with your plants' health, then paying attention to this aspect is crucial for nurturing a vibrant garden.

  • What's the big deal with pH?
    Essentially, pH influences the soil's biome. The range I mentioned is prime real estate for beneficial microbial activity, which aids in nutrient uptake for your plants.

  • Buffering Capacity
    Coco coir has a remarkable ability to buffer, meaning it can maintain a stable pH, even when I make minor errors in feeding. This buffering capacity ensures my plants are less likely to suffer from sudden pH fluctuations.

Isn't it great when your growing medium works with you, rather than against you? To maintain this perfect pH balance, you might sometimes need to adjust the pH level by adding buffers. I regularly check the pH of my coco coir to ensure it stays within the ideal range for optimal plant health.

Given this specific medium's propensity to lean towards acidic conditions, every once in a while, I might have to nudge it back to the ideal range with a little pH up or down. But more often than not, if I keep my irrigation water balanced, my coco media does the heavy lifting, offering my plants a hospitable environment to grow to their fullest potential. Now that’s what I call a powerful partnership between gardener and ground!

pH Range for RDCW Systems

Have you ever wondered about the secret sauce to thriving plants in a Recirculating Deep Water Culture (RDWC) system? I'll let you in on a little secret: it's all about the pH! Let's chat about why the pH range is critical for success in RDWC systems and how it links with other aspects, like water treatment and materials used for pipes, like copper.

In my experience running RDWC setups, keeping the water's pH between 5.8 and 6.2 has been the sweet spot for healthy plants. What's so magical about this range? Well, it keeps the nutrient solution in the perfect zone for optimal plant uptake.

Why this range? Plants are a bit fussy and like their environment just right. If the pH strays from our range, nutrients can either become unavailable (they effectively go into hiding) or too available (it's like a nutrient party, and everyone's invited), which causes an imbalance.

Quick Tip: A touch acidic is just perfect, mimicking the natural conditions many plants love.

Here's a nifty way to remember:

  • 5.5 is too low — nutrient lockout will show!
  • 6.5 is too high — nutrient toxicity might apply!
  • 5.8 - 6.2 is just right — plants will grow strong and bright!

When it comes to water treatment, keeping pH under control helps to guarantee the longevity of my system. It prevents the buildup of minerals that can harm my plants or clog up the works. What's more, if you're using copper pipes, it's crucial to monitor the pH and maintain it within this range to prevent corrosion. The last thing we need is copper levels rising and putting the whole crop at risk!

Now, don't just set it and forget it. Regular checks and balances are key. I tend to test my water daily, just to be on the safe side. After all, prevention is better than cure, especially in the delicate ecosystem of RDWC. Grab yourself a trustworthy pH meter – your plants will thank you!

Alkaline Soils

Have you ever wondered why some plants in your garden thrive whilst others struggle, no matter what you do? The answer could lie beneath your feet, in the pH of the soil. So, what exactly are alkaline soils? Well, they're the ones that boast a pH above 7.0, indicating a soil that's more limestone chalk than lemon juice in character. These soils are rich in calcium and magnesium, and they often come with a few quirks that I'll talk you through.

What's the deal with these soils, then? On the plus side, they hang onto nutrients like a squirrel with a prized nut - less leaching, which is good news for plants. You won't find heavy metals causing a fuss either; they're far less toxic in these conditions. But here’s a ‘but’: essential nutrients such as iron and manganese become the shy types, less soluble and, thus, less available to plants. This can lead some plants to experience chlorosis, a fancy term for a sad, yellowing condition due to inadequate chlorophyll.

Now, not all plants are wallflowers at the alkaline soil party - some are the life and soul! Take lilac, honeysuckle, clematis, and lavender; they cope with the high pH by throwing their own adaptations into the mix, allowing them to flourish where others might flounder.

And if you're dealing with alkaline soils in your garden, don't fret. I’ve got some tips to help you manage:

  • Choose Wisely: Pick plants that naturally like it on the higher side of the pH scale.
  • Add Organic Matter: This can help improve nutrient availability and overall soil structure.
  • Fertilise Smart: Utilise acid-forming fertilisers to nudge that pH down a bit.
  • Avoid Lime and Wood Ash: They’re like fuel to the alkaline fire, so steer clear if you're trying to reduce alkalinity.

Overall, it's about working with what you've got and creating a haven for plants that can handle a bit of alkaline swagger in their step. Isn't it fascinating how a little scale from zero to fourteen can have such a big impact on our green-fingered pursuits?

Neutral Soils

Ever wondered what makes a soil 'just right' for a broad range of plants? Let's talk about neutral soils. Neutral soils have a pH that hovers around the 7.0 mark, which means they offer a sweet spot where plenty of nutrients are readily available to plants.

Why does this matter, you ask? Well, in this balanced environment, nutrient availability is at its best—think of it as a buffet where all the essential elements are up for grabs. Microbial activity is bustling, breaking down organic matter and boosting soil structure, which is vital for good drainage and aeration.

But let's not get carried away; even neutral soils have their quirks. They are very democratic, allowing a diverse array of plant species to thrive. This means gardeners like us have an easier time growing beauties like roses, sunflowers, tomatoes, and beans without having to fuss over adjusting the pH too much.

However, neutrality also comes with the risk of nutrient leaching—if it's easy come, it's easy go. Plus, with such an open invitation, plants might face more competition for those nutrients.

Maintaining this balance doesn't have to be a chore. I make it a point to:

  • Test the soil pH regularly with a simple kit—I can't fix what I don't know.
  • Add organic matter because it's like giving the soil a multivitamin.
  • Choose balanced fertilizers to avoid swinging the pH pendulum too far one way or the other.
  • Steer clear of extreme pH adjustments—it's all about harmony.

In the end, it's all about keeping it steady and avoiding major swings. That way, my garden remains a happy place for a whole range of plants to call home.

Acid Soils

Ever seen a garden radiant with rhododendrons or bouncy blueberries? What you've witnessed is the spectacular results of acid soils at work. So, what exactly are these soils? Acid soils are those with a pH lower than 7.0. I like to think of pH as the personality of the soil; below 7, and it's on the acidic side. Let's get into what this means for our green-thumbed pursuits.

Characteristics of Acid Soils:

  • Low in Calcium and Magnesium: You'll find that these soils are often lacking in calcium and magnesium. It's a bit like a diet without dairy – some plants really struggle without these nutrients!
  • High Iron and Manganese Availability: Iron and manganese have a field day in acid soils. They're more soluble, so plants can guzzle them up much easier.
  • Challenging Structure: The structure might be poor, a bit like a crumbling cookie. Not the best environment for roots to thrive.

Pros and Cons for Plant Growth:

Here's the interesting bit – acid soils are something of a double-edged sword. They enhance the solubility of a few essential elements, which is brilliant! Plus, they tend to reduce disease incidence; fewer sick days for plants, yay! However, there's a catch. Acid soils can be a bit too much of a good thing – they bring toxicity into the equation, reduce microbial activity (think of microbes as the soil's workforce), and limit your plant choices quite drastically.

Plants That Love Acidic Conditions:

  • Rhododendrons
  • Camellias
  • Heathers
  • Blueberries

These botanical beauties have adapted to roll with the low pH punch. They've got survival down to a fine art, capable of thriving where others might wither.

Managing Acid Soils – My Tips for You:

  1. Choose Suitable Plants: Stick with plant pals that enjoy an acidic hangout.
  2. Lime or Dolomite Application: It's like an antacid for soil. It can help neutralise the excess acidity.
  3. Alkaline-forming Fertilisers: These are like bringing balance to a seesaw. They help to even things out.
  4. Avoid Sulfur and Peat Moss: They're the culprits when it comes to acidifying soil even further.

So, if you're blessed with this unique soil type, don't fret! I personally find acid soils fascinating, and with the right approach, you can curate a stunning garden that's both a haven for acidity-loving plants and a testament to your green-fingered skills.

Changing Your Soil pH

Ever wondered why your plants aren't thriving, even though you're giving them all the TLC they could ask for? The answer could lie just beneath your feet—in your soil pH. It's a bit like a dinner party for plants; the right pH sets the table, while the wrong one can disrupt the feast.

Testing soil pH is like a sneak peek at your garden's potential. Use a pH meter or test kit—super easy to find at your local garden centre, trust me. Knowing the current pH helps you avoid a gardening faux pas by ensuring you don't disturb the soil's acid-base balance needlessly.

If you're scratching your head wondering if you should tinker with the pH, consider these pointers. The golden rule? Only mess with the soil's pH if it's stopping your plants from grabbing their nutrients. The type of soil amendment—like lime to up the pH or sulphur to bring it down—depends on your starting point and where you want to end up. Think about dosh and effort too; plus, nobody fancies harming the environment with excess acid rain or alkalosis/acidosis situations!

Here's a rough guide to get your soil pH just right:

  • To raise pH: A sprinkle of lime can work wonders. Picture this: tossing 5 kg of lime over a 100 m² garden could lift your pH by 0.5!
  • To lower pH: A dash of elemental sulphur might be your new best friend.

You wouldn't pour salt without tasting your food first, would you? The same goes for soil amendments—small doses and a bit of patience do the trick. Keep an eagle eye on the pH over time, you don't want to tip your soil into a drama of over-liming or -sulfuring.

It may feel like a chemistry class but adjusting soil pH is really just gardening with a sprinkle of science. Now, go and get that pH 'just right' and watch your garden party bloom!

Conclusion

I've touched on several facets of pH in our daily lives, underlining its critical role. From the way plants absorb nutrients to the digestive process in our stomachs, it’s clear that the optimal pH level is key to health and functionality. Particularly for garden enthusiasts, understanding soil pH can be the difference between a thriving garden and a failing one.

Here's what I want you to remember:

  • Soil pH is vital for plant growth. A balanced pH can improve nutrient availability and enhance microbial activity.
  • Digestive system: Our stomachs rely on an acidic environment to break down food and ward off pathogens.

Practical steps for you:

  1. Test your soil's pH: This is a simple yet impactful way to ensure your plants receive the best care.
  2. Adjust pH accordingly: If your soil is too acidic or alkaline, it might be time to consider amendments like lime or sulfur.

I encourage you, especially if you love gardening, to roll up your sleeves and test your soil's pH. It's a small step that could lead to healthier, more vibrant plants. Who wouldn't feel a burst of pride looking at a lush, green garden that bears the fruits of their labour? Remember, your garden's success begins with understanding the foundation it’s built on—literally.

pH Levels Explained FAQs
What roles does pH play in maintaining human health?
Maintaining a balanced pH level in the human body is crucial. For instance, our blood needs to stay at a slightly alkaline pH of about 7.4. If it tips out of this narrow range, it can disrupt bodily functions, leading to various health issues.
How does pH affect chemical processes within the field of chemistry?
pH is a fundamental factor in chemical reactions. It can influence reaction rates, the solubility of compounds, and the colour changes in indicators. A chemist tweaking the pH can significantly alter the course of a reaction or the properties of the substances produced.
In what ways is pH critical to the quality and preservation of food?
You’d be surprised how much pH can affect food! It's key for controlling bacterial growth, with high acidity often used to preserve food. Moreover, pH affects the flavour, texture, and overall quality of the products we love to munch on.
Can you explain the significance of pH levels in soil for plant growth?
The pH level of soil plays a vital role in plant nutrition by controlling the availability of nutrients. Most plants prefer a pH range of 6 to 7.5. Veering too far from this sweet spot can impede a plant's ability to absorb the goodness it needs from the soil.
Why is monitoring and controlling pH levels vital in pharmaceutical products?
When it comes to pharmaceuticals, pH is particularly important because it can influence the stability, solubility, and absorption of medications in the body. That's why a tonne of research goes into ensuring that the correct pH is just right for these products.
How does pH influence our daily lives beyond our own biology?
Outside our biology, pH is so important for a host of daily activities. From the perfect balance required to maintain clear and non-corrosive water in our pipes to the effectiveness of cleaning products and even the health of aquatic life in our oceans, pH is everywhere, making sure things tick along nicely.

Taking Root Cuttings: Advice from a Pro

taking-root-cuttings-advice-from-a-pro

Taking Root Cuttings: Advice from a Pro

Below is a step-by-step, insightful guide to taking root cuttings. It comes from a veteran no-till grower who takes around 200 cuttings a week. This method has been described as fail-safe and is appropriate for both small and large-scale growing environments. The method covers the first 10 days till the cuttings have rooted.

Required Items

  • Large high dome propagator
  • Jiffy 7 peat pellets
  • Scalpels
  • Clonex
  • Spray bottle
  • Round pot saucer-200-300mm
  • Ph Pen and solutions
  • 1L measuring jug
  • Surgical spirit and cotton balls
  • 200w blue CFL

Cuttings need to be taken from a healthy mother plant. This is essential to the success of the cuttings.

Day 1

The measuring jug needs filling with water heated to 25 degrees and a ph. of 5.5. This can then be poured into the round pot saucer, picked for its ideal depth.

10 x jiffy pellets should be added next, over 30 seconds they will expand soaking up the water. The open side of the jiffy pellets should be facing up.

Once full expanded, remove the jiffy pellets one by one, squeeze out excess water and place on to the propagator tray.

Next, all 10 jiffy pellets should be removed and skewered all the way to the bottom of the jiffy. A metal kebab skewer is suitable for the task. After that cuttings can be taken.

Where to cut

IMPORTANT: USE A CLEAN BLADE

Be sure before you take a single cut that any implement, be it scalpels or scissors are wiped down with surgical spirit. Taking the cutting will leave an open wound on the plant and could easily infect it. Consider using a different blade for each mother plant and avoid reusing blades to stave off cross-contamination.

Use clean sharp scissors to take the cutting from the mother plant. The ideal location to take from is the ‘the crown’ if taking small amounts of cuttings. If taking a larger number of cuttings from various sources of the plant, start from the top and work your way down.

Cut the branch of the mother plant at a 45-degree angle. You want at least 3 nodes on the cutting. Cut the lower leaves flush to the stem leaving the leaves at the top (crown). If your cutting has any large fan leaves then these should be trimmed. This will stop the cutting from wilting and you can also fit more cuttings into the propagator.

Scratch And Dip

Once 10 cuttings are at your disposal, the preparation of scratching and dipping them can begin. Take a cutting and make a clean 45-degree angle cut at the base of a stem with a scalpel. Scratching the bottom 20mm with the scalpel’s edge will stimulate hormone production. Dip the bottom of the scratched cutting into Clonex. Once well coated place into the jiffy, ensuring it is placed firmly. Close up the top off the jiffy by pressing it closed.

As soon as all the cuttings have received this treatment, they require spraying with room temperature water. Ideally, the water would be between ph 5.5 and 5.8. Do not forget to also spray the inside of the propagator dome. Cuttings thrive in humidity and it is one of the strongest stimulants for their growth.

The dome should then be placed over the cuttings, under fluorescent light with the vents closed. Place the light 500mm above the propagator. The light cycle for the cuttings should mimic the mother plants, i.e. 18hrs for the mother plant, 18hrs for cuttings etc. Consistency is the key.

Day 2 and 3

For best results, 3 times a day, remove the dome and spay its insides and the cuttings with water.

Day 4

Once again, spray the inside of the dome and the cuttings but open the vents. Enabling the moisture to escape from the propagator will dry the jiffy’s forcing the roots to search out for moisture.

Day 5

At this point, jiffy’s should be dry to the touch. Add 250mm of water at a ph. of 5.5 into the tray. Be sure to not add water to the top of the cuttings, we want the roots to search for it which will grow and strengthen them in the process. The cuttings should never be allowed to sit in excess water. If come 2 hours there is any excess, remove with paper towels or a syringe.

Day 6

This is the day to bring back the humidity. Close the vents on the propagator, spray the cuttings and the dome twice on this day.

Day 7

Around half of the cuttings should be showing roots coming through. Spraying the dome and cuttings should be done twice a day still, with the vents remaining closed.

Day 8 and 9

The business end of the process: come Day 8 all your cuttings should be showing roots. Add 250mm of water at a ph. of 5.8 and a half strength formulex. Vents should be kept closed and sprayed with water once across these two days. The roots will double in size across the next 12 hours.

Day 10

Take off the dome. This allows the cuttings to acclimatize to a normal environment. This will begin the process of ‘hardening’ the cuttings. If the cuttings appear to be wilting to begin with this is perfectly routine, do not be alarmed. Your cuttings are now ready to be transplanted when you please.

Mother Plant Care Guide: Cultivating Robust Plants

mother-plant-care-guide

Mother Plant Care Guide

Have you ever wondered how gardeners and growers manage to produce multiple plants with desirable traits, all consistent in quality and performance? Enter the mother plant, a central figure in the propagation world, offering a dependable source of high-quality clones. Essentially, a mother plant serves as the genetic blueprint for new plants, or clones, that are genetically identical to her. I'll guide you through the intriguing process of mother plant propagation, from selecting the right candidate to nurturing and taking cuttings.

Understanding the imperatives of mother plant care is crucial for any grower aiming to sustain a garden's legacy. Whether you're a hobbyist or a commercial cultivator, the techniques I'll share are designed to help you keep your mother plants healthy and productive. Plus, you'll learn how to harvest cuttings effectively, ensuring these offspring live up to their genetic potential. This article isn't just about instruction; it's about delving into the life cycle of these vital plants, examining their genetics, phenotype, and the intricate growth cycles they go through.

Key Takeaways

  • A mother plant is foundational for cloning identical offspring with consistent attributes.
  • Proper selection, care, and cutting techniques are essential to keep a mother plant healthy.
  • The article offers a comprehensive guide on nurturing and leveraging mother plants.

What Is A Mother Plant?

Imagine I've found the perfect plant in my garden - lush, healthy, and just the kind of specimen I want to replicate. I'd designate it as my mother plant. Why? Because this is my superstar plant from which I can create clones—little carbon copies that share the exact genetic makeup. It's like hitting the jackpot in plant genetics!

The Magic Of Cloning

For us gardeners, cloning isn't a sci-fi concept; it's pure garden magic. When I take a cutting from the mother plant—usually a strong stem with a few leaves—and coax it into rooting, that young clone will grow with the same characteristics: if Mum's got sweet-tasting fruit, so will her offspring. This method means I can have a whole garden of my favourite variety without shelling out extra dough or waiting ages for seeds to sprout.

Generations Of Green

What kinds of plants can step up as a mother plant? Honestly, nearly any! From herbs to flowers, and even fruits or vegetables. The key to growing mother plants is keeping them in a vegetative state, where they're focused on leafy growth rather than blossoming into the next stage of their life cycle. This ensures a steady supply of cuttings.

Here are some brief facts about mother plants:

  • Genotypically Gifted: They are the original plant with the desired genotype.
  • Vegetatively Vital: Kept in a non-flowering, vegetative state for continued cloning.
  • Diverse Dynasties: Can be any plant—herbs, fruits, or flowers.

Next time you're admiring a particularly splendid plant and wishing you could fill your space with its twins, think of the mother plant technique—nature's first 3D printer!

Why Keep A Mother Plant?

So, what is the secret to a bountiful and consistent garden year-round? Well, I'm delighted to share that the answer might just be in nurturing a healthy mother plant. Not only does she become the backbone of your garden, but she also ensures a perpetual harvest, a dream for every grower.

Advantages Of A Mother Plant

  • Genetic Consistency: The offspring from a mother plant are clones, meaning they'll inherit her traits. In the context of cultivation, this translates to preserving the desired potency, flavour, and aroma.

  • Cost-Effectiveness: Instead of purchasing seeds or new plants repeatedly, I can snip cuttings from the mother plant, saving quite a bit of money. Over time, this significantly reduces costs for me and my fellow growers.

  • Healthy Cuttings: A robust mother plant gives rise to vigorous cuttings. This leads to an increase in the yield of the harvest as the plants grow strong and healthy.

  • Reduced Risk: By controlling the environment around one single mother plant, I dodge the bullet of pests and diseases, which are often a threat when introducing new plants from outside.

Community And Experimentation

It's heartening to swap cuttings with fellow gardening enthusiasts. It fosters a community spirit and lets us explore different plant varieties. Moreover, I get to experiment with various growing methods on these consistent cuttings, refining my green thumb.

Testimonials often underscore that mother plants tend to be the unsung heroes. For instance, a seasoned grower reported a substantial improvement in both the quality and quantity of their harvest after transitioning to a mother plant system.

So, whether you're a hobbyist or a professional, considering a mother plant could well be your ticket to a more fulfilling and fruitful gardening experience. Why not give it a shot and watch your garden thrive under your care?

Selecting Your Mother Plants

When I'm picking out mother plants, it's vital to look for ones with the best genetics and robust health to ensure the same quality is passed to their clones. Here's my approach to making that all-important decision.

Criteria For Selection

Strain: The strain is the starting point; I aim for those with a reputation for their desirable traits, be it flavour, aroma, or resin production.

Phenotypes: Opt for a healthy plant with stable and known phenotypes. This guarantees uniformity among the plant's clones.

Growth Rate and Yield: A mother plant needs to have a strong growth rate and a high yield. More vigorous plants tend to produce more cuttings, and that's what I'm after.

Resistance To Disease: I always choose a plant that's highly resistant to pests and diseases. Trust me, it's easier than dealing with sickly clones down the line!

Seeds vs Cuttings: I usually ponder if I should grow from seeds or use cuttings for predictable genetics. Both have their merits, and it often comes down to what's available and legal.

Legal Considerations: It's crucial to be aware of the legalities around plant cloning, especially with patented strains, so I make sure to do my homework.

Sensory Experience: Aroma and flavour matter. I look for mother plants that have the sensory profile I want my clones to exhibit.

Labelling: To stay organised, I label everything meticulously, from the initial seedlings to the final picks. Monitoring each plant's growth and comparing notes help me determine the best one.

Evaluation: The evaluation phase is all about comparisons. I assess my options on a set standard of criteria and keep what works for me and my garden.

Decision Time: Making the pick isn't always easy, but once I spot that resilient, high-quality plant with the characteristics I favour, I know I've found my mother plant. It's a rewarding moment!

When you select a mother plant it can set the foundation for a successful crop. It's a bit like selecting an Olympic athlete to parent the next generation of champions – pick the best, and you'll be set up for success!

How to Grow A Mother Plant: Step By Step Guide

In this guide, I'll walk you through the critical steps to successfully maintaining mother plants. We'll cover the right environment, important nutrition, the perfect light conditions, and training techniques to ensure your mother plant thrives.

Choosing The Right Environment

Creating the optimal environment is like setting the stage for a winning performance. My grow space must be controllable for factors like temperature and humidity. Ideal temperatures range between 22-26°C, with humidity sitting comfortably around 60% during the vegetative state. It's essential to choose a growing medium, be it soil, coco coir, or a hydroponic setup. Remember, soil should be rich and well-draining, while coco requires regular feeding since it lacks nutrients.

Nutrition And Feeding Schedule

Feeding a parent plant is not unlike crafting a gourmet dish—the right ingredients make all the difference. A balanced feed containing nitrogen, potassium, phosphorus, calcium, and magnesium supports vigorous growth. I keep an eye on the pH level, aiming for a slightly acidic environment around pH 6.0 for soil or 5.8 for hydroponics. My feeding schedule doesn't sleep on the job; I adhere to a consistent routine that supplies liquid fertilizers every other watering to avoid overfeeding.

Lighting And Photoperiod

Light is life, and for my mother plant, the veg light serves as the sun around which its world revolves. I ensure at least 18 hours of light daily to keep mother plants in a vegetative state, using full-spectrum LED lights or MH (Metal Halide) bulbs for efficiency and effectiveness. This photoperiod signals the plant to grow rather than flower, which is exactly the right amount of light for a mother plant.

Training Techniques

Training my mother plant is where I channel my inner gardener-sculptor. Techniques such as topping, pinching, and bending allow me to shape the plant to be bushier and promote more branching, which in turn provides more cuttings. It's not about brute force but gentle persuasion, encouraging the plant to grow in the direction and shape that I want without overstressing it.

By following these detailed steps and maintaining a delicate balance between discipline and care, growing a successful mother plant becomes an incredibly rewarding experience.

Caring For Your Mother Plants And Clones

When you embark on the journey of nurturing mother plants and their subsequent clones, you're committing to a craft that blends art with science. The vitality of your clones hinges on the well-being of the mother plant, so attention to detail in pruning, feeding, and pest control is paramount.

Pruning And Maintenance

Pruning is essential for promoting a bushy growth structure and ensuring vigorous clones. It will also keep the plant in good health. I always start with sterile equipment to prevent disease transmission. Topping the plant — cutting the main stem above a leaf node — encourages lateral growth and more sites for cuttings. Between stages of vigorous growth, pinching out the tips of new growth helps to establish a fuller shape. Regular defoliation is also important; removing older, lower leaves improves airflow and light penetration.

Maintenance involves more than pruning. I root my cuttings in a well-aerated medium like coco coir, which promotes healthy root development. For robust veg growth, I ensure my mother plant's environment stays between 20-25°C with relative humidity around 60-70%. I feed her a balanced diet rich in nitrogen, potassium, calcium, and magnesium, with consistent pH levels to keep nutrient absorption optimal.

Pest And Pathogen Prevention

My mother's plants are precious, so I'm always on guard against pests and pathogens. Inspecting the plant regularly is my first line of defence; the sooner I spot trouble, the better. I prefer to keep my grow area impeccably clean and implement good airflow to prevent stagnant, humid conditions where pests thrive. Introducing beneficial insects can sometimes help, as they prey on common pests like spider mites and aphids.

If I do encounter pests or fungal issues, I reach for organic solutions first, such as neem oil or a mild soap solution. Over the years, I've learned that the key to pest and pathogen control is to act swiftly but thoughtfully, avoiding harsh chemicals that could harm the plant or the efficacy of future clones. Decisive, informed action can save a mother plant from infestations which could otherwise spell disaster for both her and her clones.

Taking Cuttings From The Mother Plant

Have you ever wondered how to create clones of your favourite plants? Taking cuttings from a mother plant is a simple and efficient way to do just that. The process can yield identical offspring which preserve the mother plant's genetics. To increase your chances of successful rooting, follow these steps.

First off, when should you take cuttings? It’s best done early in the morning when the plant is full of moisture. Now, let’s get down to the nitty-gritty:

Step 1: Preparation Prepare your tools – you’ll need sterile scissors or a sharp blade. Sterility is vital to prevent any disease transmission.

Step 2: Cutting Identify a healthy branch and cut at a 45-degree angle. This particular angle increases the area available for rooting.

Step 3: Rooting Gel Dip your cutting into a rooting gel. This step is not mandatory, but a rooting hormone can significantly improve your success rates.

Step 4: Media Selection Choose your media. Your options range from rockwool cubes to peat pellets – it needs to be moist and well-aerated.

Step 5: Environmental Control Maintain a controlled environment using a propagator to uphold high humidity and stable temperatures.

Step Action Tip
1 Sterilise cutting tool. Isopropyl alcohol is a convenient steriliser.
2 Cut the branch at 45 degrees. Sharp tools make cleaner cuts for better rooting.
3 Apply rooting hormone. Rooting gels are cleaner and easier to use.
4 Insert into media. Ensure the media is pre-moistened.
5 Control the cuttings' environment. Propagators with vents can help manage humidity.

Remember, patience is key! It may take several weeks for your cuttings to root properly. You can improve your success rate with a heating mat beneath your cuttings to encourage growth. Avoid direct sunlight; instead, opt for gentle indirect light. Before you know it, you’ll have baby plants all ready for potting on!

The process is incredibly rewarding and simpler than you might think. So go on, give it a try! Who knows, you might just get hooked on expanding your plant family.

Conclusion

In mastering the art of cultivating mother plants, I've found it both rewarding and strategic, particularly for sustaining a consistent quality of harvest. By maintaining these plants in a vegetative state, I've ensured a steady supply of clones, mirroring the mother's robust genetics. The three key attributes of cultivating mother plants are:

  • Consistent Quality: Mother plants serve as a blueprint, allowing home and commercial growers to replicate their best genetics.
  • Economical: Growing from clones reduces the need for purchasing seeds, saving a considerable amount of money in the long run.
  • Efficiency: With clones, the guesswork from seed germination is eliminated, speeding up the growing process.

As a grower, I can attest to the growth advantages of using a mother plant. My clones transition to the flowering stage remarkably well because they're genetic copies of a proven, high-quality plant. This reliability translates to peace of mind and more predictable yields.

To sum up, a well-cared-for mother plant is at the heart of any fruitful cultivation cycle. Both home growers and commercial operators benefit greatly from the plant's ability to produce numerous, identical offspring. It's a tried and tested method that contributes to a garden's success, improving not just the growth but also the harvest quality. Embracing this technique will transform your growing experience, and I'm confident it will elevate your gardening endeavours.

Mother Plant Care Guide FAQs
How can one select the ideal candidate for a mother plant?
When I'm looking for the perfect mother plant, I ensure it's a healthy specimen with robust growth, free from diseases and pests. My preference is a plant with a strong root system and vigorous vegetative growth, as it often yields the best cuttings.
Could you explain how a mother plant contributes to propagation?
Certainly! A mother plant serves as a donor for cuttings or clones. These cuttings, when rooted properly, develop into new plants that are genetically identical to the mother, helping me preserve the desired traits of the original plant.
What are the key care tips for sustaining a healthy mother plant?
To keep my mother plant thriving, I focus on providing optimal lighting, proper watering, and regular feeding with balanced nutrients. Additionally, maintaining the right temperature and humidity is crucial for its overall health.
In what ways do mother plants impact the quality of their cuttings?
The health of a mother plant is directly proportional to the quality of its cuttings. I've observed that a well-cared-for mother plant produces more vigorous and robust cuttings, which in turn have a higher success rate during propagation.
How often should a mother plant be replaced to ensure the best propagation results?
I usually replace my mother plant with a new mother, every few years. If I notice a decline in vigour or if it becomes too woody, the plant is ready to retire. This ensures that the cuttings remain high-quality and the propagation success rate stays high.
Can you detail the procedure for taking cuttings from a mother plant?
When taking cuttings from a mother plant, I use a clean, sharp pair of scissors or a knife to make a cut below a node. I then remove the lower leaves and dip the cutting in rooting hormone before placing it into a suitable growing medium, ensuring a better chance for the rooting to occur.

1 2